My Family Scrapbook

Wednesday, November 23, 2011

This Was A "Must" For Me

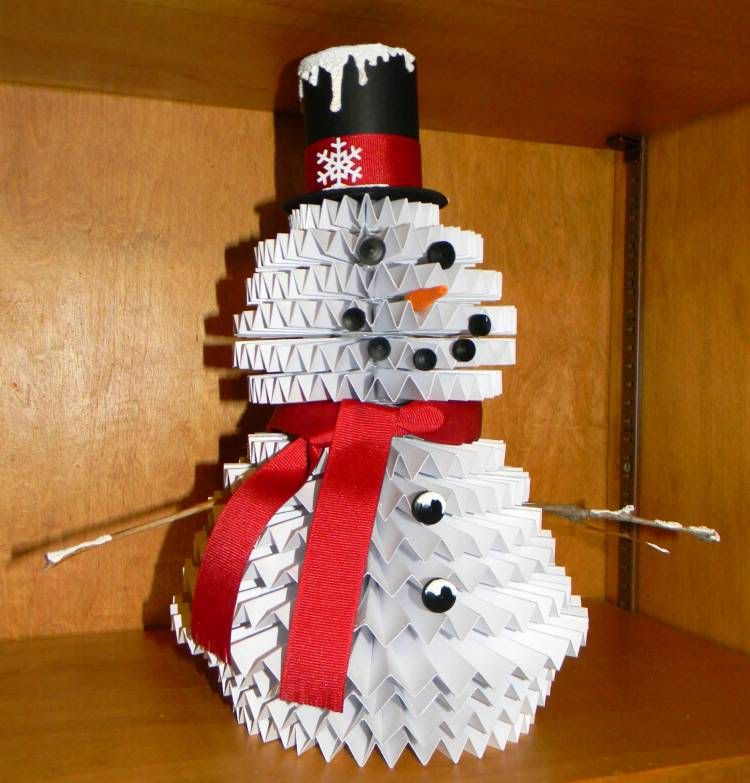
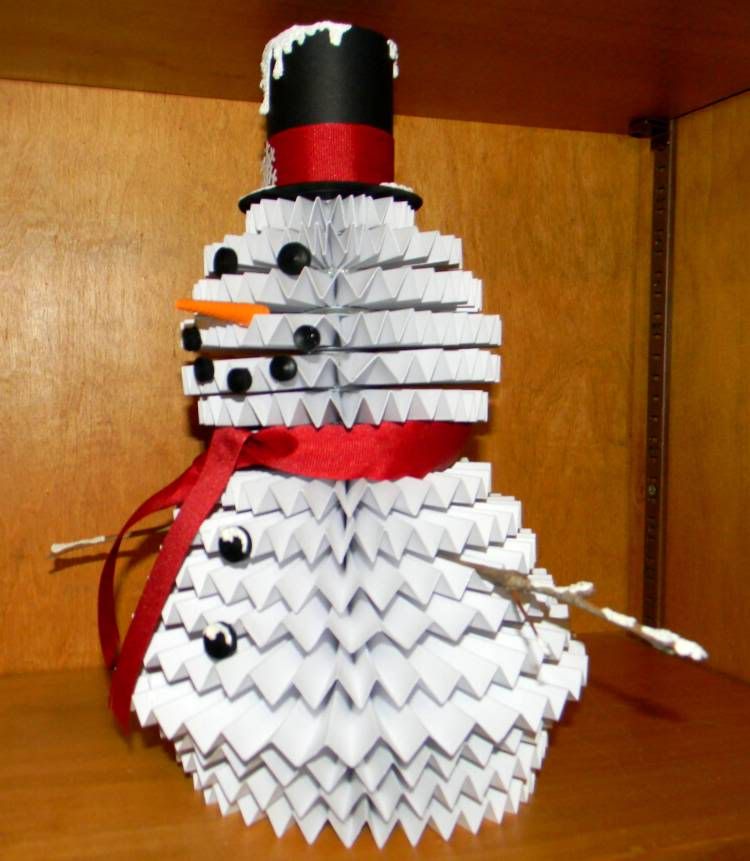
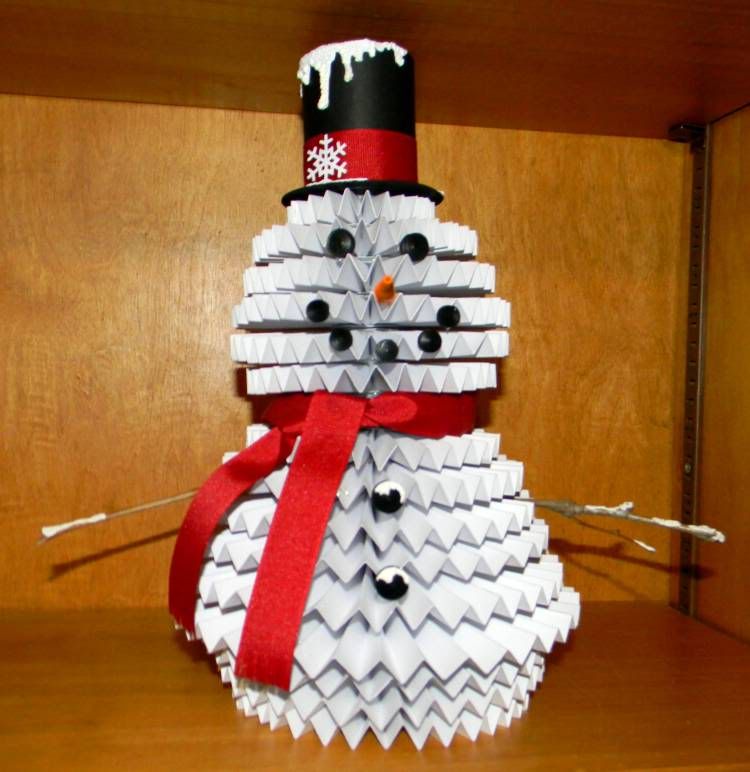
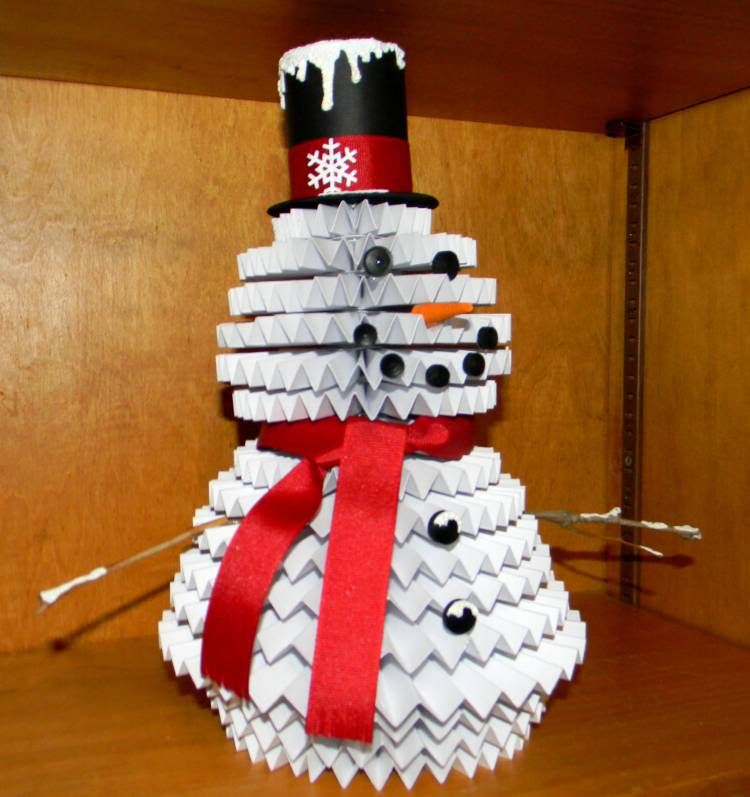
When I got an recent Archiver's email I went a little "ga-ga" over this little snowman. I could not wait to try to make him. It reminded me of technique I did as a child and used an old Reader's Digest and folded the pages to create an accordion type Christmas Tree, Snowman, or Santa head. This is a little different because this is "rosettes" that are stacked to form the shape and then other parts that are formed, quilled, or punched for accents.

I did take mine a step farther and added a "music button" to mine that plays "Frosty The Snowman." (Something I happened to have on-hand.)

This was not hard to make, it only took cardstock, patience, and time to complete.

Here is my finished snowman:


Archiver's had a pattern for a pumpkin, Christmas Tree, and Snowman. All of them using the same technique to make.... all of them simple.... and all of them a great decoration or gift.

I can not re-post the pattern because it is not mine to give BUT I will link you to the Archiver's site. Click Here for the Link!

And you are ready to go! I had all of the supplies on hand but if you don't there is an Archiver's near you or use the Archiver's Annex to purchase what you need.

I will give you a hint..... it is much easier to score entire sheets of cardstock first and then cut them into strips and then accordion fold them. Either way you do it you will get the same results BUT it saved me time.

Happy Scrappin' ! ! !

Brenda

Monday, November 21, 2011

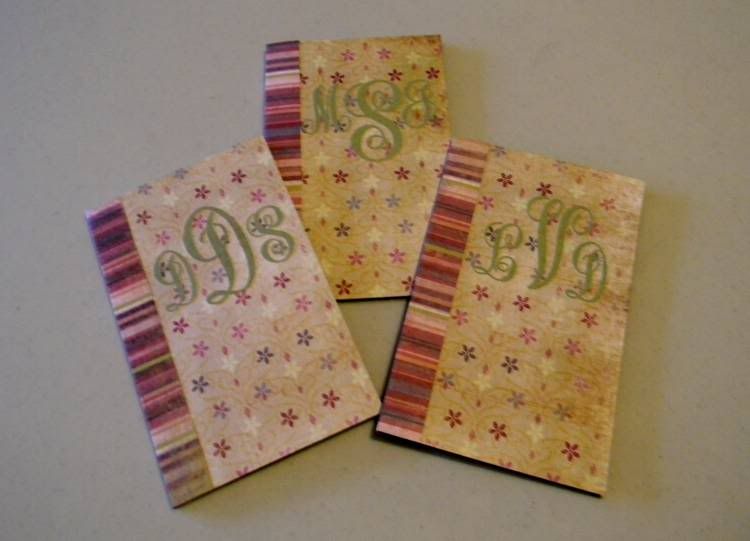
Monogramed Gifts For Co-Workers

I love personalized gifts. There are different kinds of personalized gifts as well. The ones that are personalized to a specific person, such as, a note pad for a secretary or office employee who is always taking notes. My feeling is why not take it a step farther and monogram it for a very special person.

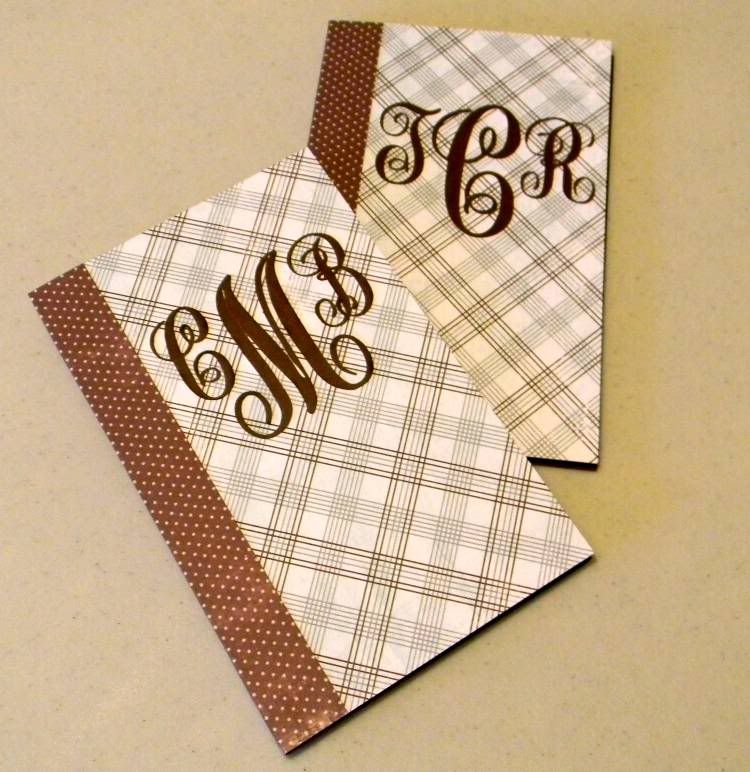
That is what I did with today's gift. I used a Jr. Legal Pad for this project.

These are the easiest things to make and can be customized for any sized tablet. Simply measure the pad, add 1/8 inch to the top, bottom and one side. Then measure the width of the "binding" and add the first measurement to that so that the "folder" goes around the tablet. You can add a contrasting color to the binder and add a pocket to the inside for things like a business card or receipt and add your favorite monogram to the front and you have an easy gift done in less than a half hour.


I don't want to leave anyone out so I do a head count of how many I need for a particular department, make the "folders" ahead of time and then the people I know I monogram their. The people that I do not know I try to find out their initials but if I can not get that then I do a generic embellishment. The important thing is that people know you recognize them and not one be overlooked.

Easy gifts to make ahead.

Happy Scrappin' ! ! !

Brenda

Friday, November 18, 2011

Called For Duty

If you call a phone call from a friend to ask for something special for a special occasion a "call for duty," then I have been called.

Friends were planning a shower and they wanted things a little more elegant that throwing a printed sign in front of the pitchers of drinks. I don't blamed them. The little special touches make the difference between an okay shower and a memorable shower.

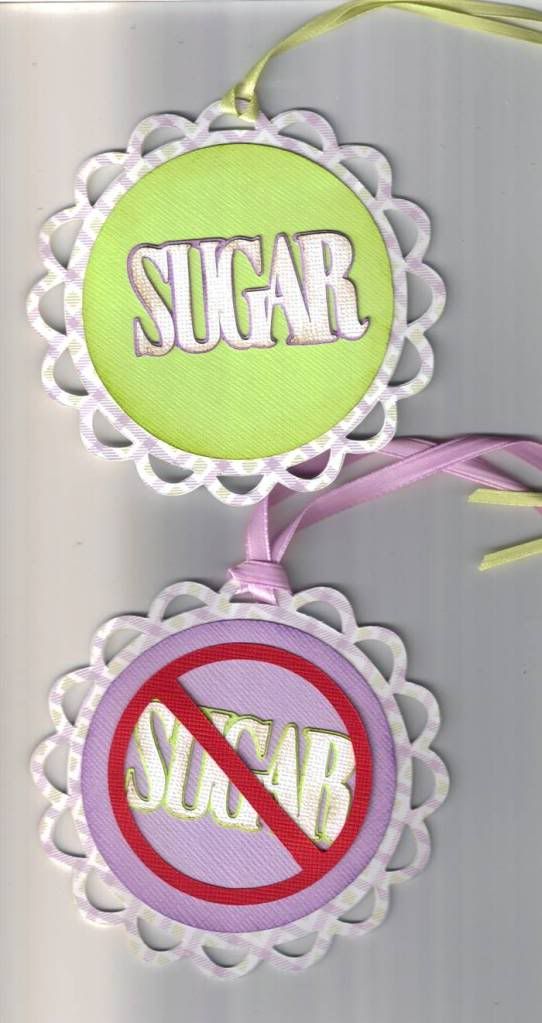
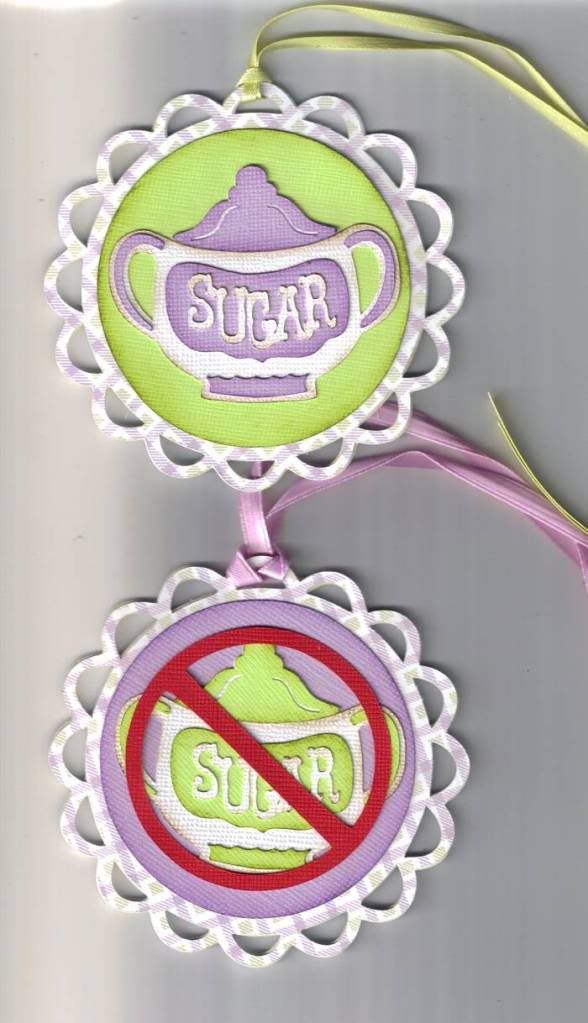
This was such a simple concept. Tags to hang from the pitchers of tea to let guests know if it the container had sugar or no sugar. I got basic information like the size of the container and colors for the shower and went to work.

I got out my scrap papers/cardstocks, my Cricut, George & Basic Shapes, Savory, and Lacy Labels Cartridges and made these little medallion type tags.d\

This is one side of the labels:


This is the reverse side of the above labels:


Just remember to take a few extra minutes and a little extra thought for those special touches.

Happy Scrappin' ! ! !

Brenda

Wednesday, November 16, 2011

A Funny, Special Christmas Gift

This one goes out to my God-Children, Karley and Sean. Their mom, one of my dearest friends loves getting hand-made cards. She always tells me that she looks forward to the hand-made things I send her and the children. With that in mind I am always looking for a special card or gift to make them. This year was no different.

Another friend of mine, Glenda, had this coffee filter book and I looked at it and fell in love with this little book. It was so special with all of its pockets and hiding places. A book made out of coffee filters? Yes, but when I heard coffee filters I thought of the ones that my coffee machine took with the rippled edges, and these were the cone type which made so much more sense to me. Evidently these books have been around for while and were all the rage at Stampin' Up parties and camps. Since I don't stamp very often I was out of the loop on this one.

Glenda and I planned a scrapping date so that we could each make one of these odd little books. At the time I did not know what I would do with the book. I honestly didn't even know how I would embellish my pages since I do know have very many stamps. I didn't even know the theme that I wanted to do because let's face it the possibilities with a mini photo album like this are endless!

Glenda and I got together and had an afternoon of chatting and scrapping. I pulled out Christmas papers, coordinating colored cardstock, dies, ribbons, eyelets and other miscellaneous supplies. And together we figured out what we needed to do to make this nifty little scrapbook. She made one of her own but used stamps that she had brought with her. It was not until after she left that afternoon it hit me that this would be a perfect "hide & seek" gift for my God-Children. I never know what to get them and money is always the universal gift but I get tired of just handing them money. I continued working on the project for the next couple of afternoons.

I wrote a little poem for them, instructing them before they ever open the box that they had to get mom to take a list of pictures as they go, and that they must take turns looking for the next hidden bil or gift cardl. The poem ends with a verse about each having the same amount and that the pictures should be cropped or shrank and placed in the places on the pages and then given to their mom as their gift to her.

Anyway... enough babbling about the story of where the book is going. Below you find the pictures of the book.

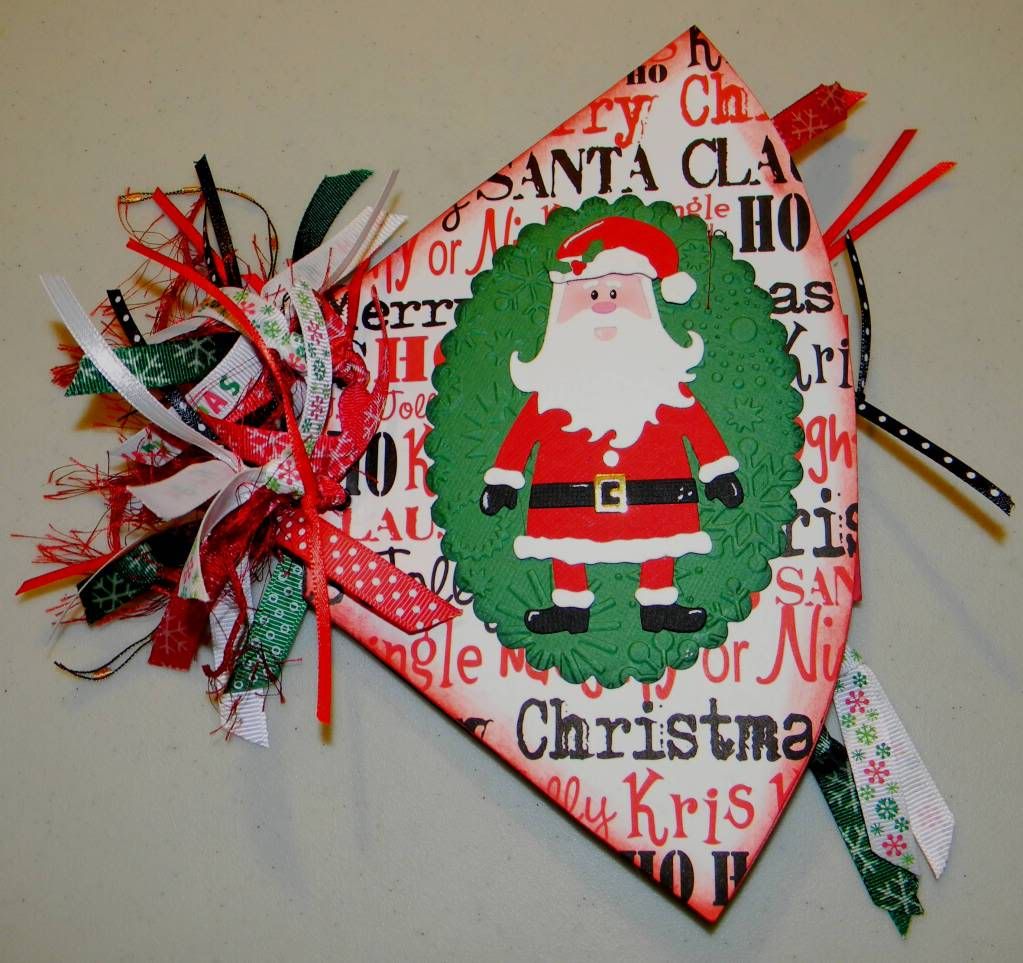
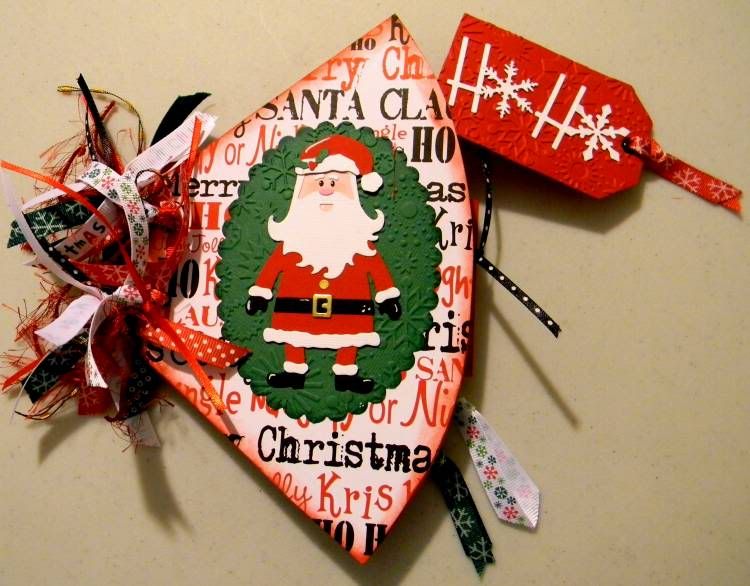
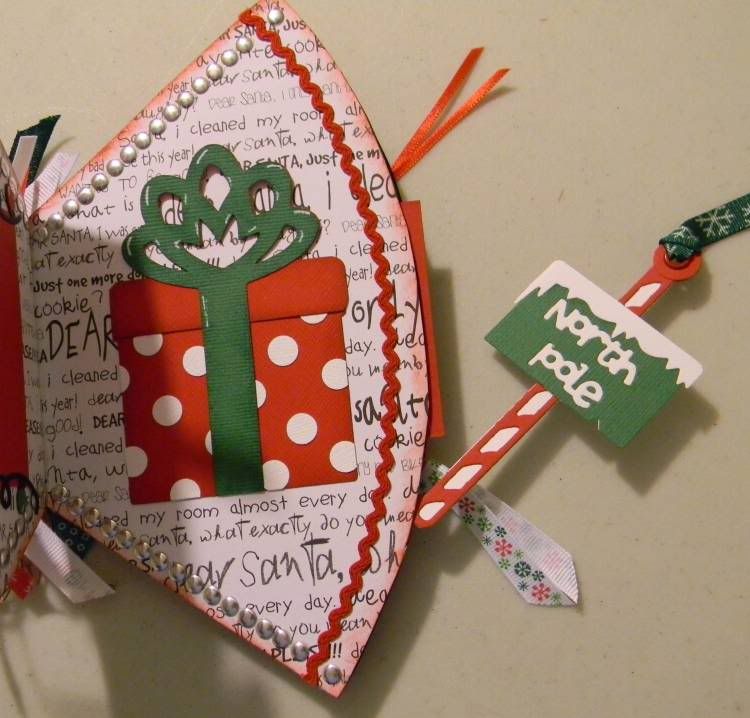
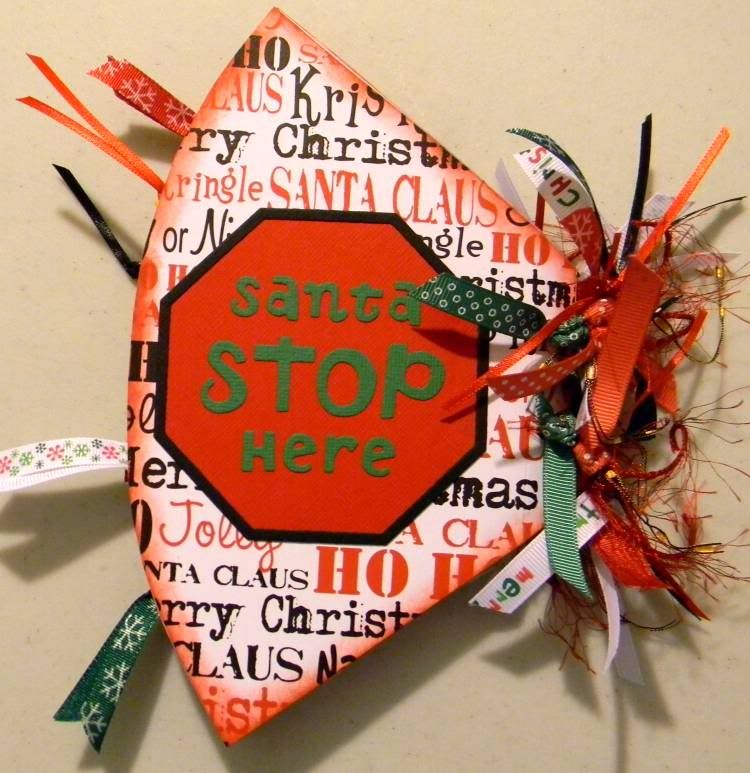
This is the front of the book, and then a picture of the tag that is nestled in the pocket that was formed by the coffee filter:


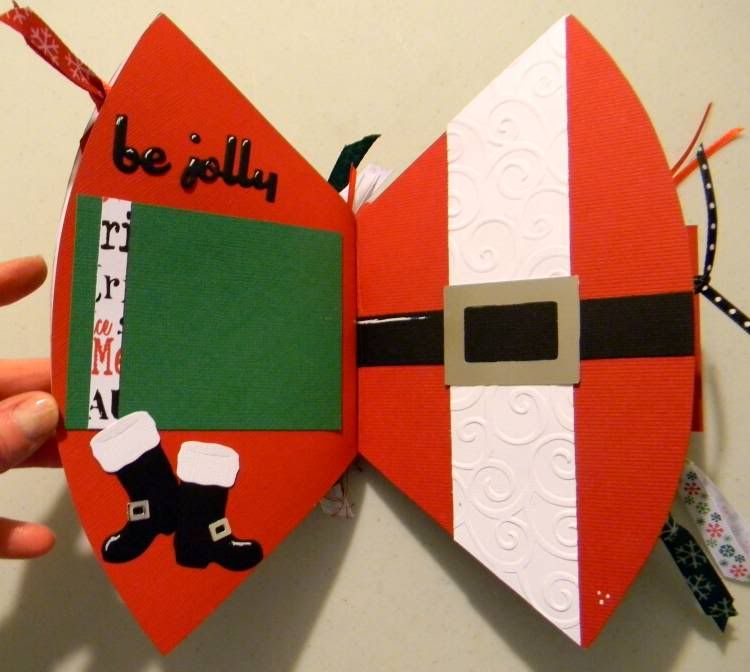
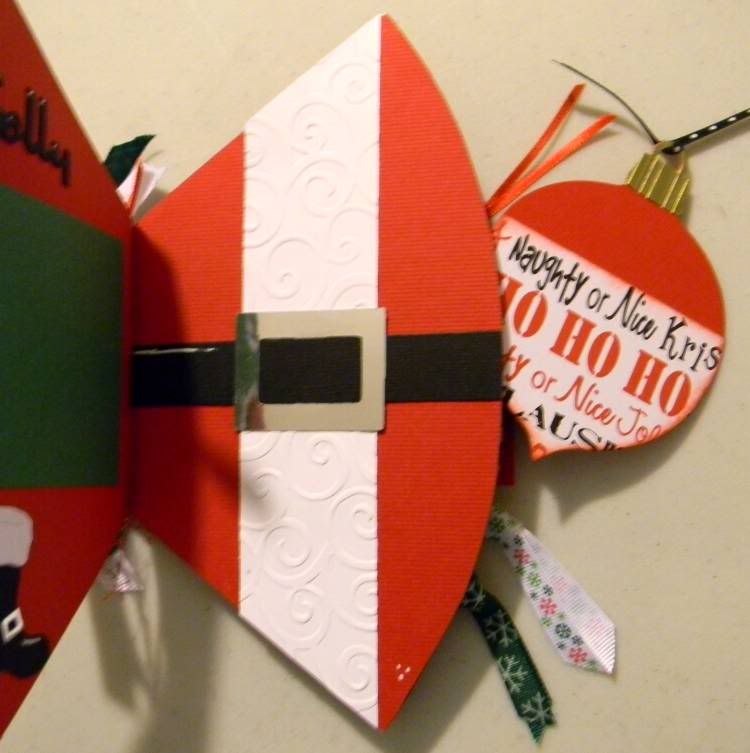
Then you have pages 1 & 2, and then a picture of the tag (that is also a pocket) hidden in the coffee filter :


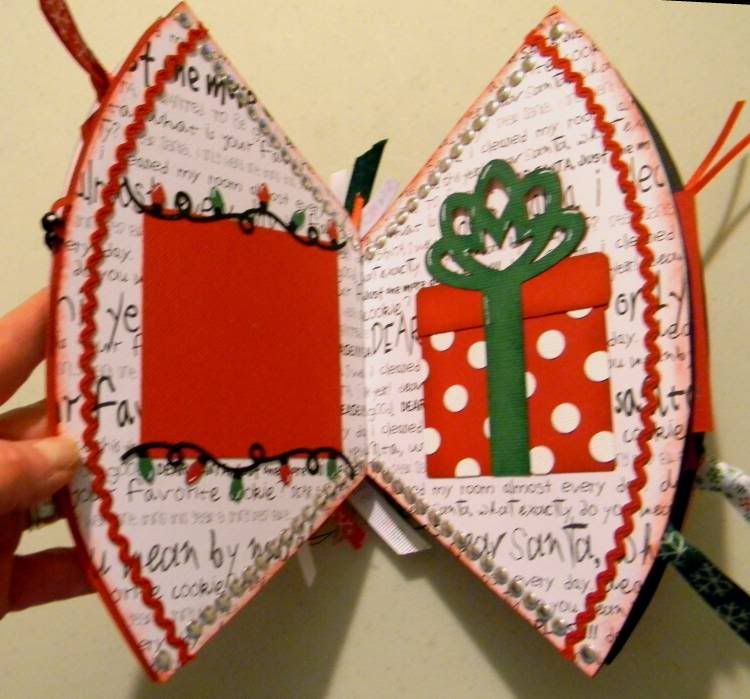
Pages 3 & 4, along with the items that are hidden there. (The present on the page is only glue on the two sides and bottom so that something can be slid in the gift):


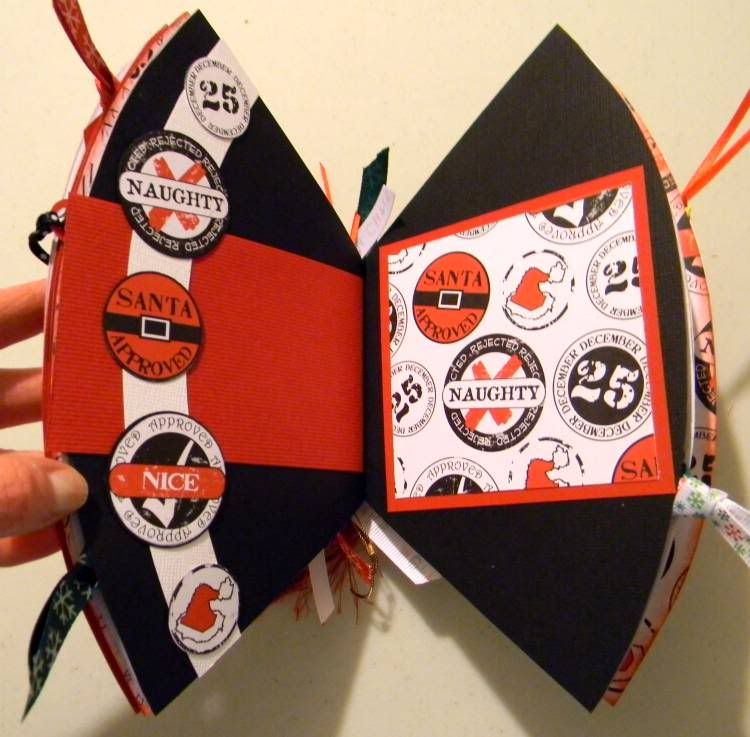
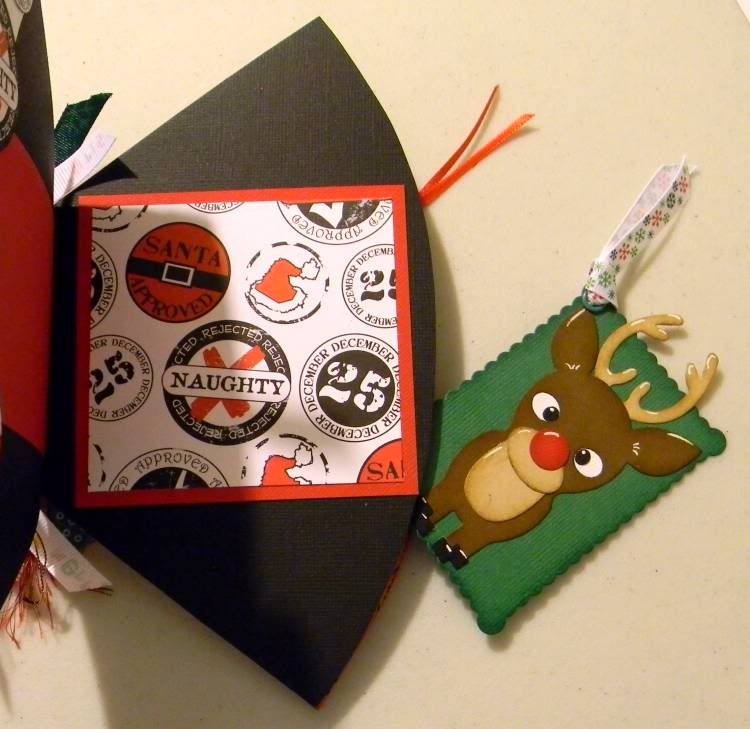
Pages 5 & 6, and with this side pocket is a tag. Even though I tried to stay with the black, red, white that is in the 3 printed cardstocks that I used, I also wanted to use the traditional Christmas green for accents. I ended up using a little brown, silver, and gold which I had not planned on but like all the same.


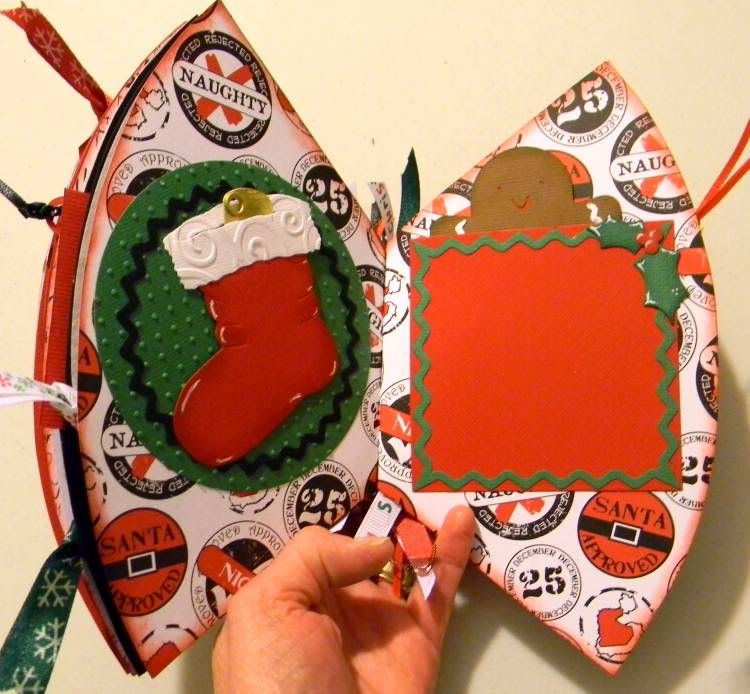
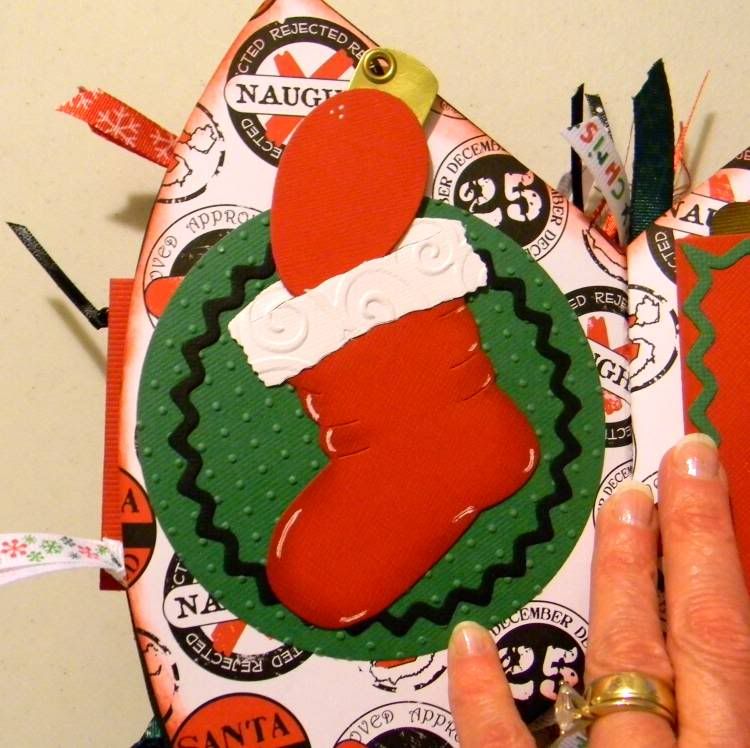
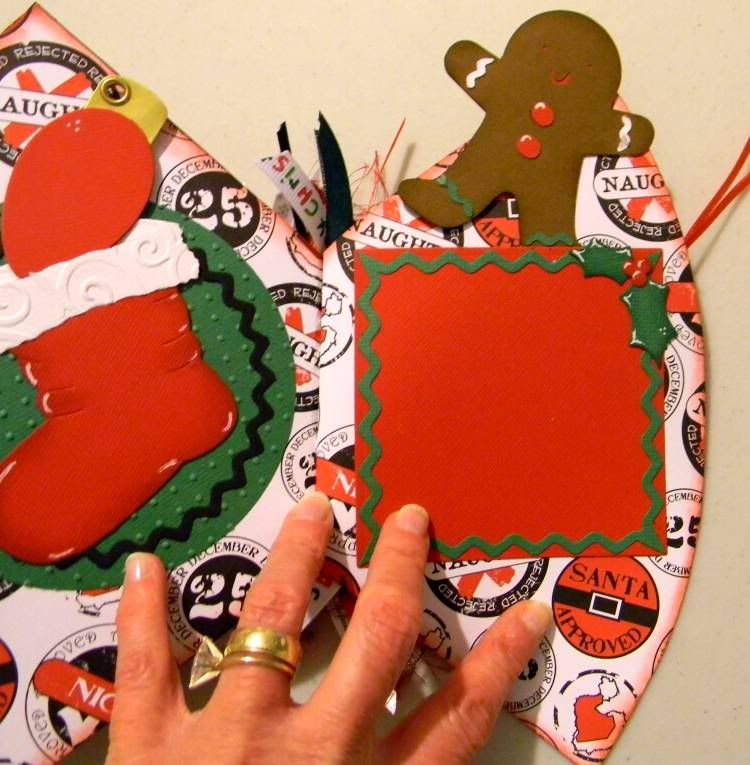
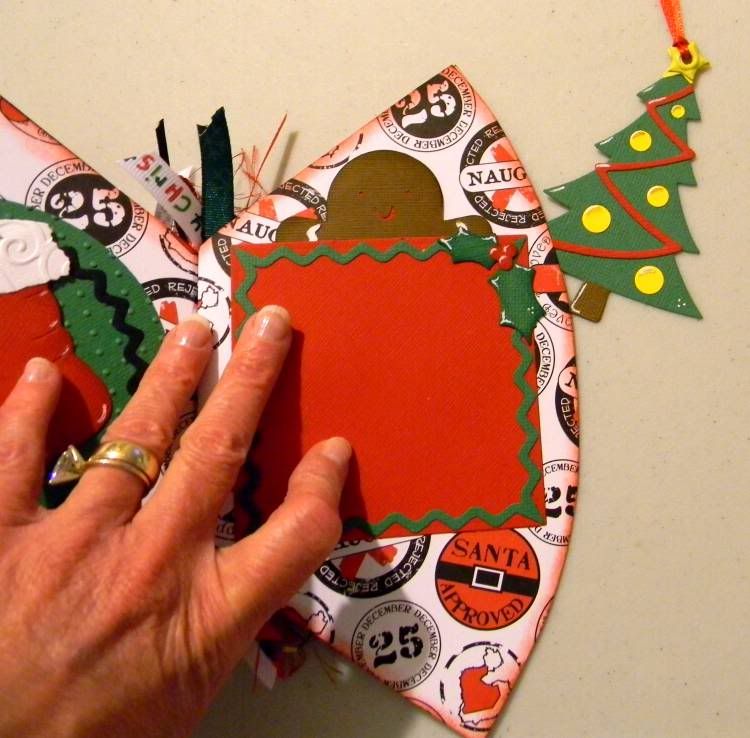
Pages 7 & 8. In addition to the coffee filter pockets there are two more pockets with removable tags. The top of the stocking is open and has a Christmas light tucked in it and the square on the right houses the Gingerbread man. When I took the pictures of the book I did not notice that I missed putting a ribbon on the light bulb tag. That has since been corrected:


And finally the back of the book:


This was a lot of work but worth every minute that I spent doing it after I had a focus of where it was going to go and be used for.

I think this will be fun for my God-Children to thumb through and explore and find the hidden money and gift cards and if they follow the enclosed directions their mom will also have a keepsake of the Christmas Gift as well.

I hope all of you are able to find some inspiration in this project.

Happy Scrappin' ! ! !

Brenda

Monday, November 14, 2011

A Little Something For My Holiday Decorating

This time I am making something for me.... perhaps not so much for me but for my Christmas tree! I stumbled across a couple of pictures of old crafts and decorating made new by not only a scrapbooking company but also a crafting diva.

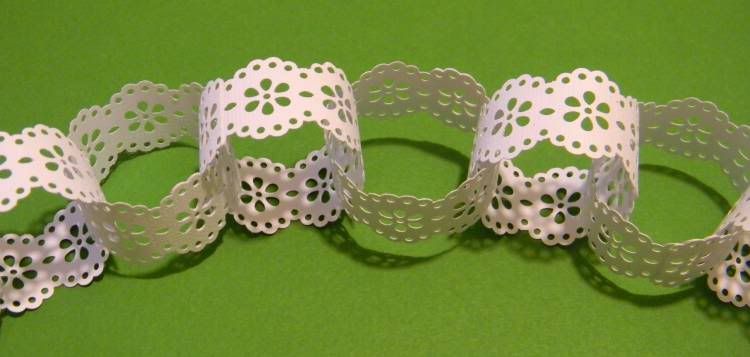
As a child I would make paper chains of brightly colored papers and because I had made them my mom would allow me to put them on the tree. A little old fashioned type of decoration that had been around since my own mom was a little girl. Now with new Martha Stewart scrapbooking/craft punches you can relive those childhood moments and make some elegant paper chains for the tree, mantal, or for around a door or staircase.

Here is the picture of the ones I have started:


These are so easy to make. I took a 12 x 12 sheet of paper and cut it in half. So that it is 12 x 6. I started punching the strips with the punch along the 6" side of the 12 x 6 sheet. I just had to line up the previous cut to make a continuous design. It was that easy. I ended up with a 6" strip that I formed into a ring and added more rings from there.

This lace paper chains will be used on my tree, added to garlands that go up the banister of my staircase and the garland around my front door.

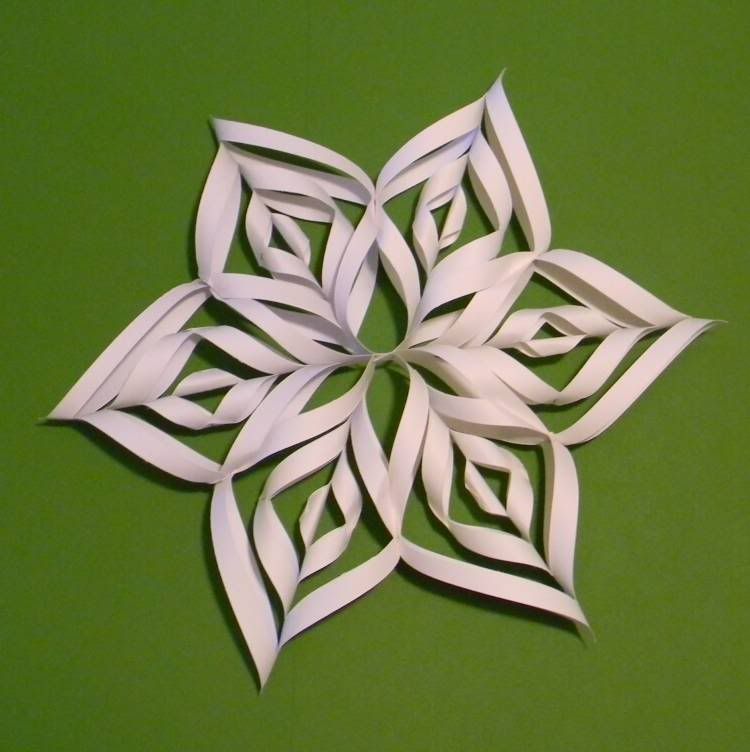
Then comes the tree topper for the season. Once again the crafting diva, Martha Steward comes to the rescue with a new template to make these spirals, that when 6 are combined a beautiful star is the end result.

Here is a picture of my finished star:


I used the 6 inch template, but I will tell you, I made these as a child and you can still download the instructions on-line if you do not want to spend the $12.99 on the template. (I used a 40% off coupon at Michael's to purchase mine.)

Sometimes a touch of old-fashioned is an elegant touch. I hope that you make at least one hand-made item for holiday decorating.

Happy Scrappin' ! ! !

Brenda

Friday, November 11, 2011

For The "Grinch's" In Your Life

With Christmas comes my warped sense of humor. There are generally those who do not like Christmas and try to put a damper on the holiday season. To them I refer to the Grinch Who Stole Christmas. What a great holiday tradition that movie has become.

I think the Grinch has been incorporated into many people's holiday traditions. I know here at my house it has.

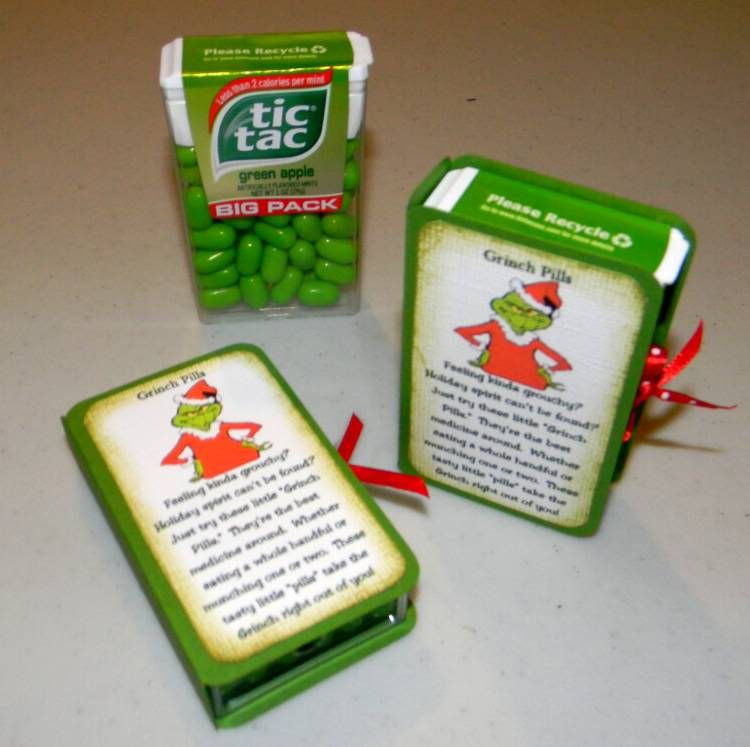
Once again while surfing Pinterest for some new ideas I found this little craft. I found 2 different version of it, one using green M&Ms and the other using Spearmint Tic Tacs. I set out to do the Tic Tac version of it.

Nothing can ever be easy, and so with that said perhaps my journey to make these will help you do it with more ease.

I could not find the Spearmint Tic Tacs. Come to find out they do not make that flavor any longer. So to find another flavor in the correct color of green turned out to be my biggest challenge. Low and behold I found "Green Apple" Tic Tacs that were the same color as the Grinch. Perfect!

I then downloaded the "cut" file for folder.... it did not fit. It was fabricated for the smaller package of Tic Tacs - also no longer produced. So out came the Cricut Design Studio, George Cartridge, and scrap paper. It only took two tries to get the design the right size and everything welded. I was able to get six of these folders out of a 12 x 12 sheet of cardstock.

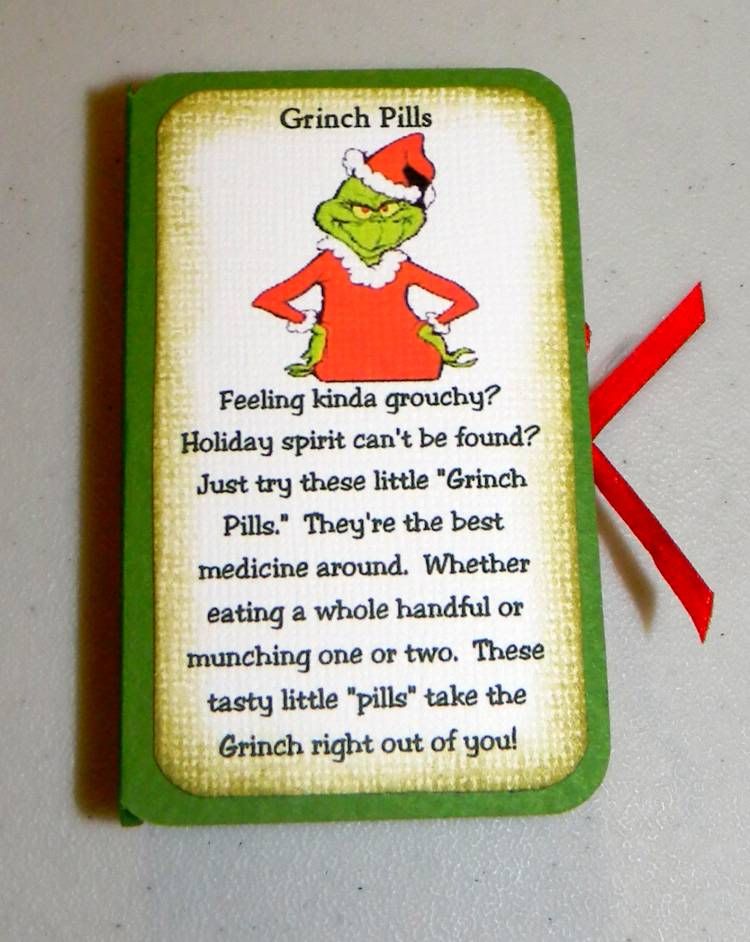
I then had to re-size the front of it. For that I used my computer and Print Shop. One sheet of white cardstock will make 12 of the fronts for the folders.

Score the folders, add a thin holiday colored ribbon, put a little green ink around the white front for the folder, glue into place, insert the tic tacs and tie a bow and these are set to go.


These are going to be a holiday hit... great for me to give clients and a few "Grinch's" along the way.

Happy Scrappin' ! ! !

Brenda

Wednesday, November 9, 2011

Little Christmas Gifts

Between now and Christmas I will be posting more of the "little" gifts that I have made.

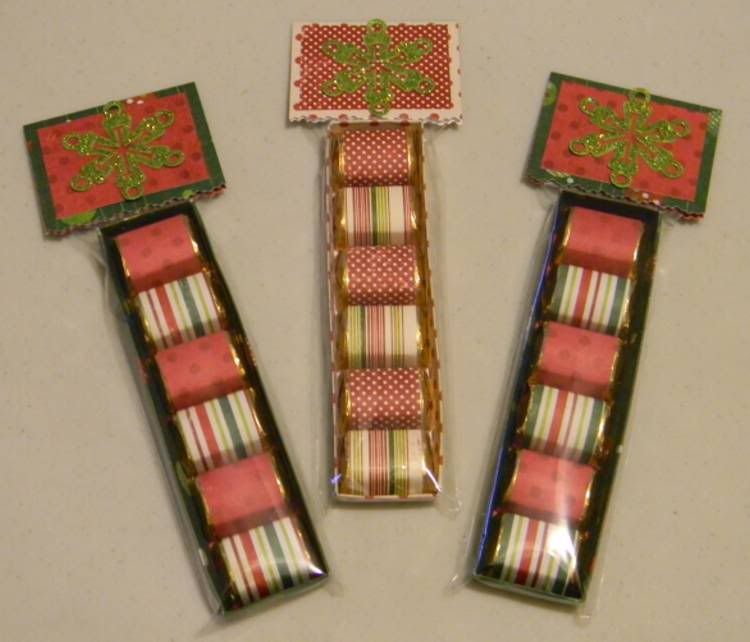
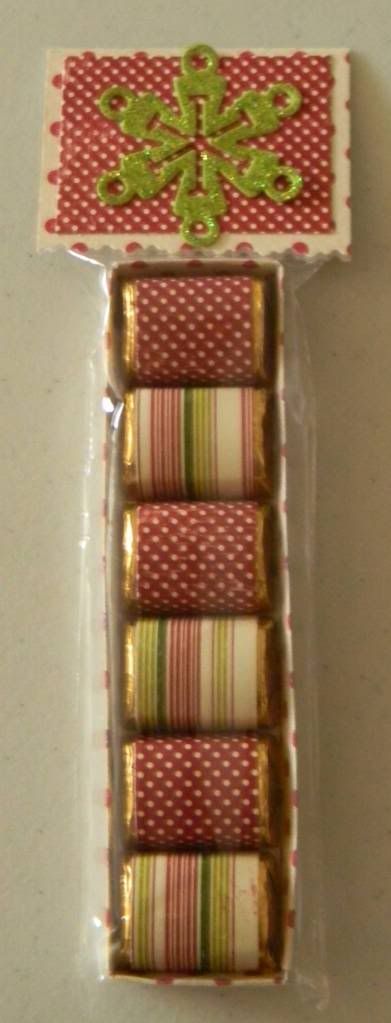
Today's "little" gifts are for co-workers. These are Hershey Nuggets that I used 2 or 3 different double-sided holiday scrapbooking papers to cover the original gold wrappers. Using the same paper/cardstock I fabricated a tray for the candies to nest in and put them in a Wilton Pretzel Bag. I then made a "topper" for the bag and used a die cut with Stickles for a final touch.

This idea is not my own, I found it on Pinterest.


These are inexpensive little gifts and allow me to let co-workers know that I thought of them during the Christmas season.

Happy Scrappin' ! ! !

Brenda

Monday, November 7, 2011

Christmas Is In The Air - Really ? - It Is That Time Of Year !

I am feeling a bit overwhelmed. It is the beginning of November already, in fact, the first week of November is gone already. The children (grown and still at home) have handed me their Christmas lists. All the while, I am still in Spring mode.

I do not know where the time goes. School is almost done, work is all consuming, and family still comes first, which also means that my crafting and scrapbooking has become a thought of "when I have time." That I assure almost never happens these days.

I promised myself recently that I am going to take at least 2 or 3 hours each week to do some form of crafting. It keeps me sane, which also explains my recent meltdown about papers being turned in, deadlines being met, oversleeping, and work being all consuming and the balancing act with family and the needs of my household.

Recently I took 2 weeks off from everything, I got back to my craft table. I loved it. My list of handmade Christmas gifts is a mile long and I only have a few short weeks to get them all done. Some of my list is for co-workers, family, my favorite clients, friends, and church buddies.

Today I am sharing something that I made for four of my co-workers. I found this idea on Pinterest and knew I had to at least try it. It was not without its' trials. I learned as I went.

So here are the pictures:


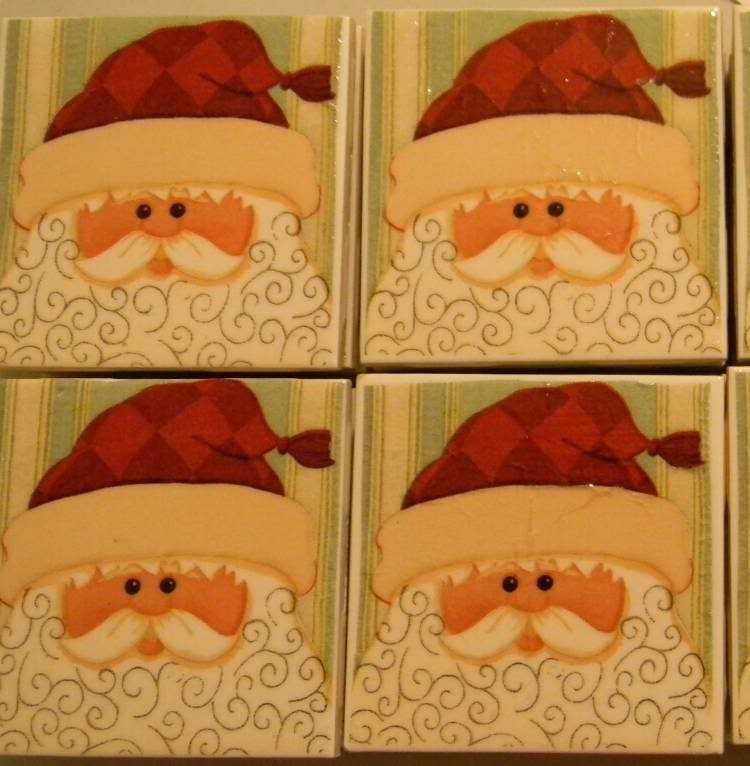
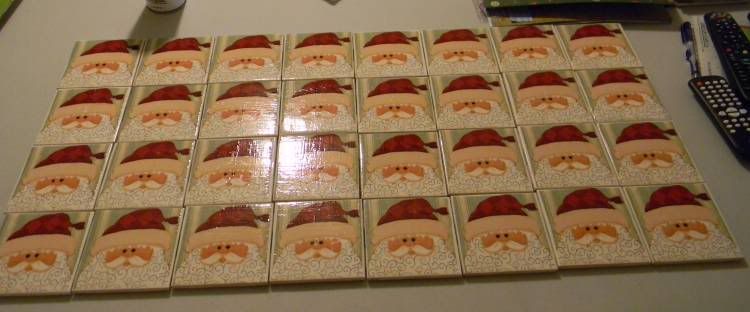
These are holiday drink coasters. They are made from 4x4 white ceramic tiles, holiday snack napkins, Modge Podge, Clear drying Polyurethane spray, E-6000 glue, and thin cork.

They sounded simple enough to make until you start laying those napkins on the first layer of Modge Podge and I got wrinkles and air bubbles in the napkin. I finally realized that they have to be "rolled" onto the layer of Modge Podge and came to the conclusion that the wrinkles gave them character. I also discovered that it is best to let the first layer of Modge Podge and napkin to dry completely before putting the layer of Modge Podge over the napkin. This step prevents the napkin from tearing. Then my second realization while making these was that you should not use an acrylic sealer, because when you stack them the cork that you have glued to the bottom will stick to the top of the next. That was a mess! So I salvaged what I could and used a real polyurethane sealer on them. I managed to salvage about half of my original coasters.

This is a craft that can be made for any holiday and after you get into the rhythm of making them and a little trial and error make a lovely "folk art" type gift.

It isn't to late to start and complete a project like this for Thanksgiving or Christmas.

Happy Scrappin' ! ! !

Brenda

Friday, April 29, 2011

Special Occasions

It seems there is always a special occasion on the horizon. In my circle of family and friends it is generally a birthday, wedding, bridal or baby shower. I love these events and I also love it when the guest of honor makes over a hand-made card or gift.

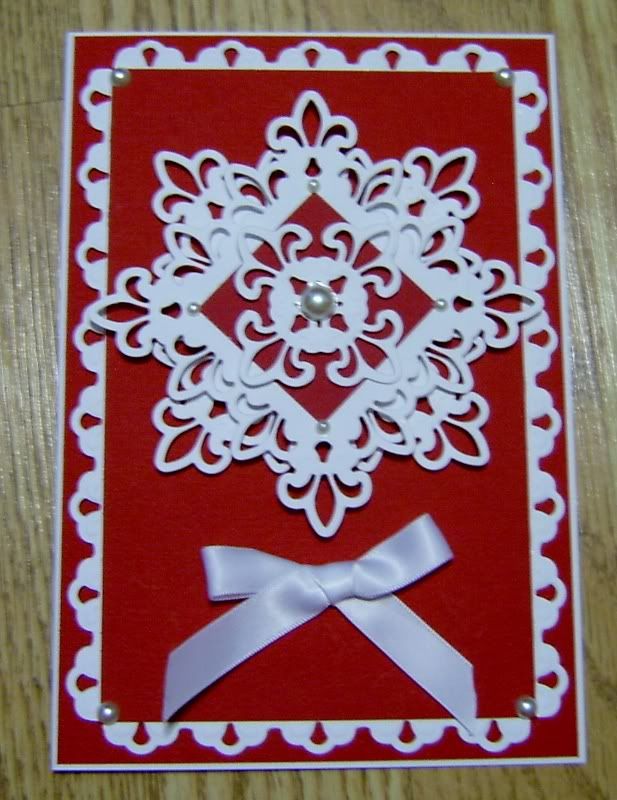
A very dear friend wed on New Year's Eve and made the comment to me that she could not wait to open my envelope, not because of the gift inside, but to see the card. I try to make (or in this case scrap-lift) the perfect card for the occasion and it is rare that I buy a card.

I saw this card on line and fell in love with it. It just so happened that I had the set of Spellbinder dies to recreate it. The only thing I changed was the colors in order that the colors of the card match the bride's wedding colors.

This card is heavy with the layers therefore I kept the pop dots to the thinnest ones I could find. Also adding texture to this card was the bow and half pearls that the bride also had on her dress. As you may have guess the wedding colors were red and white.


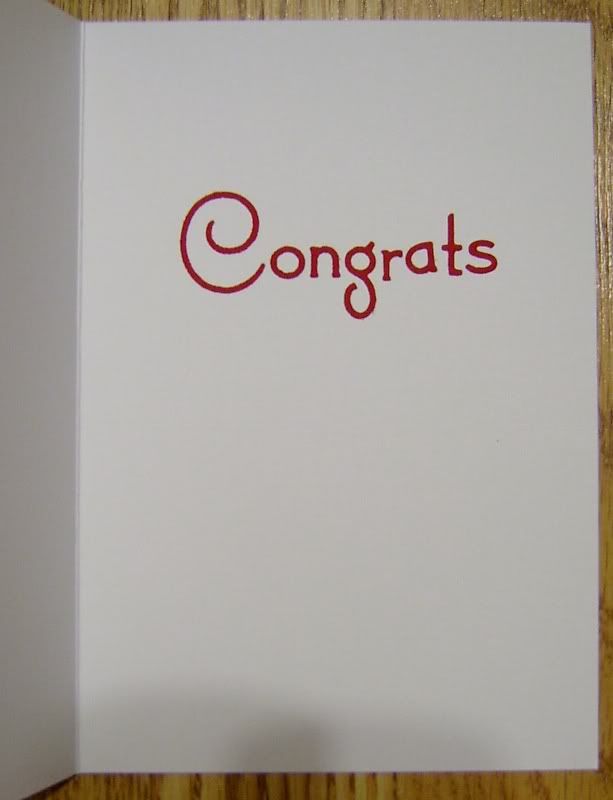
The inside of the card was simple.


This pictures is just of the closed card so that you can see all of the layers.


When it comes time for a special occasion don't buy a card, with a little planning ahead, and the correct supplies you can create or scrap-lift an idea that is perfect.

Happy Scrappin' ! ! !

Brenda

Thursday, April 14, 2011

Trouble With My Blog Posts

My apologies for the messy blog post yesterday. When I saved that post there were nice neat paragraphs and it looked like all of the ones in the past. For some reason all of the paragraphs just ran together and "Blogger" will not allow me to fix it. It just keeps going back to the way it is right now. I am not a happy camper about the situation but I can only do so much with that post.

My spell checker is also not working correctly.

Today I am in my scrap room and working on a few LO. I am hoping to have some new things to post very soon.

Happy Scrappin' ! ! !

Brenda

Wednesday, April 13, 2011

Easter Gifts

There is inspiration everywhere I look and sometimes there is too much inspiration. I am torn as to what I want to make, what I have time to make, and what I have on hand to make the projects. I am also one of those people who save pictures of projects that I love and just want to scrap-lift, although I am a bigger fan of drawing from someone else's project and making something totally different That is the case today.

Easter is quickly approaching and I needed gifts for my CCD/PSR students. These gifts need to be special as this week is my last week teaching these wonderful children. In truth I've learned more from them than they have from me.

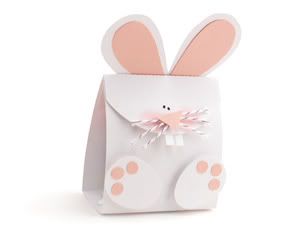
I have about 50 things Easter related in my project folder so I had to narrow it down. Our last class is Wednesday April 13 (today,) so I didn't have much time to devote to the project but still wanted it to be very special and make those kids smile. I also didn't have time to go shopping for scrap supplies so the project had to include items that I already had on hand. Here was my inspiration after I narrowed it down:


Both of those items are from "Pebbles In
My Pocket" and are available in kit form. They are adorable. But here is another fact, I didn't have time to order and wait on the mail to deliver the kits and then have the time to make them.

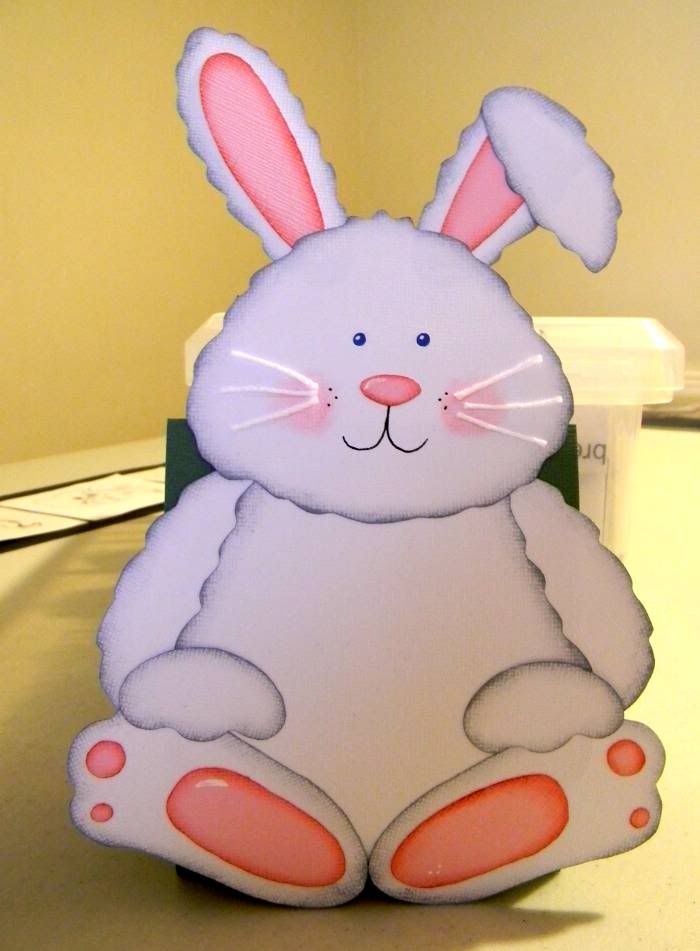
I love the idea of the bunny for Easter because children love "THE BUNNY." I also love the match book because it is a great way to "wrap" or hide the real gift (the candy inside.)

Then start the thought process of how to make these and make them somewhat my own.
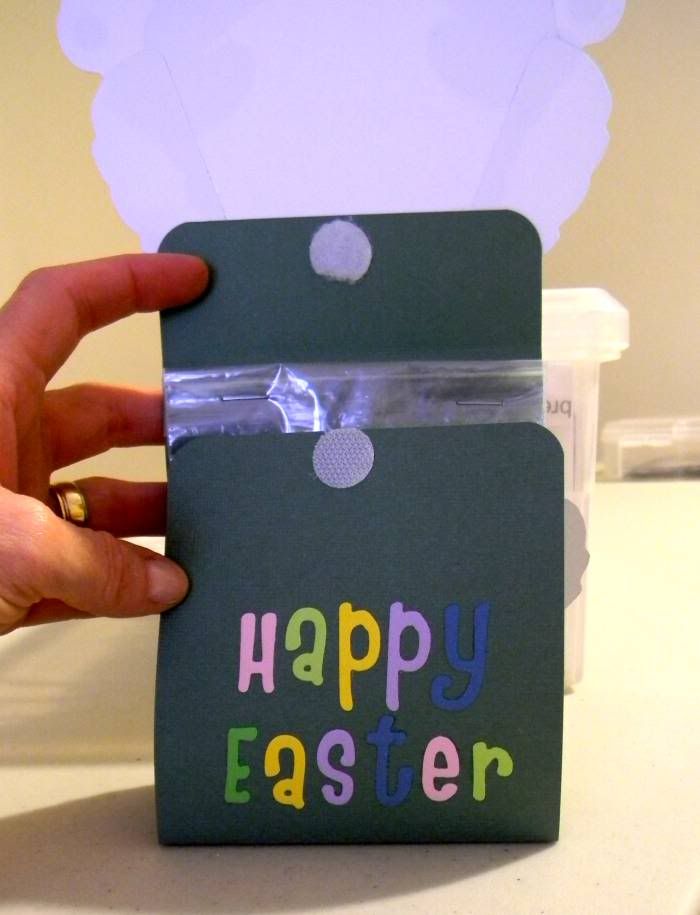
I also did not want to have to make a separate tag or card.... lazy... no... rather a little pressed for time. So I decided to make a match book greeting card.

I went into my supplies and found an
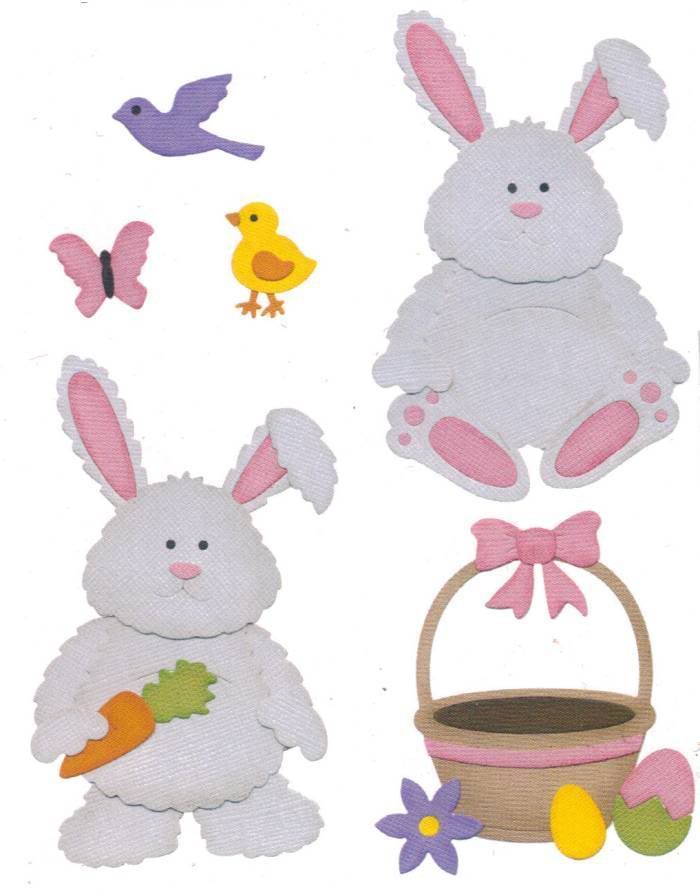
exclusive die from ScrapyLand.com. When I put together that die it is about 2 to 2 1/2 inches tall. Here is a picture of that die:


I needed this to be a lot bigger. So this is what I did: Using black cardstock, I cut one set of the rabbit parts. I then scanned those pieces and saved them as a photo on my computer. I then opened that photo image with a program called Makes-The-Cut. With that program I was able to resize the die pieces and cut them using my Cricut.

I can't share the cut file but you can use the above link and buy the die at ScrapyLand.com and do the same thing.

I folded my match books, adhered my finished rabbits to the closing flap of the book.


When you open that flap there is the "Happy Easter" greeting and finally open that flap and there is the candy gift.


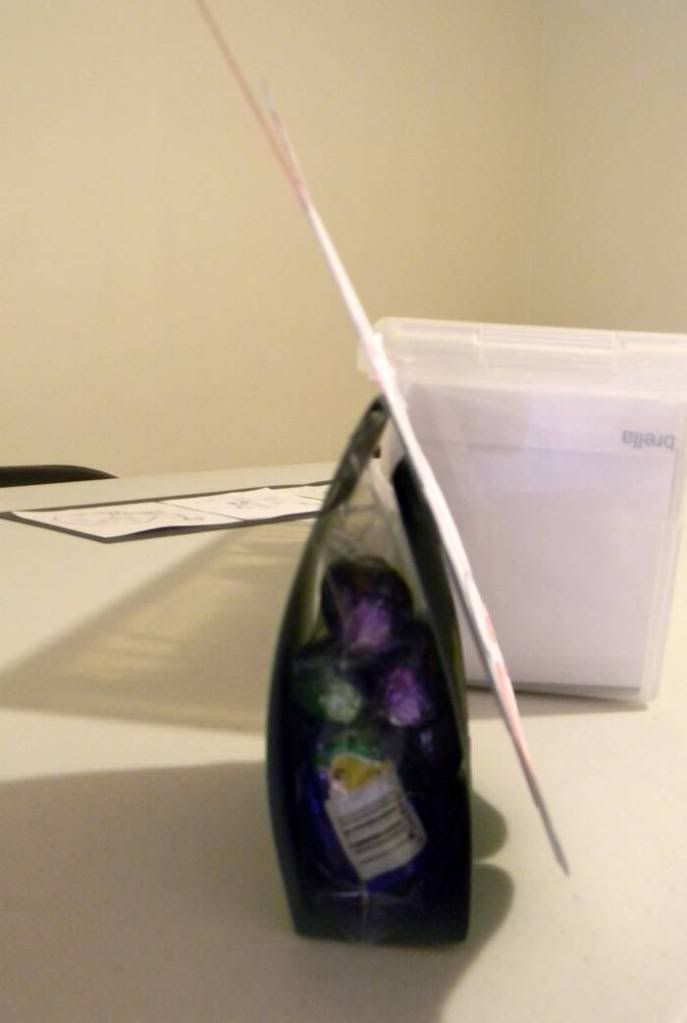
This match book was large enough that I was able to use a 4x6 baggie filled with chocolate Easter eggs.


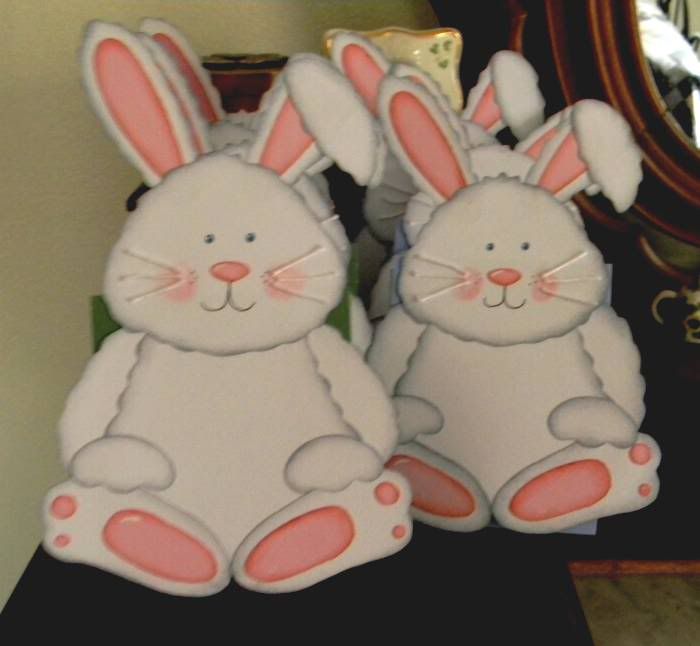
Now while I wait for time to pass today and my class time to come, I have 7 little bunnies hanging out on my table.


Instead of going out and buying a kit try using what you have on hand and a little imagination and innovation to make an old project work for you.... because there is inspiration everywhere you look!

Happy Scrappin' ! ! !


Brenda

Thursday, March 17, 2011

Top Of The Morning To You ! ! !

Happy St. Patrick's Day.

Yesterday I posted small gifts that I gave to my CCD/PSR students.... and today it is a card for a dear friend.

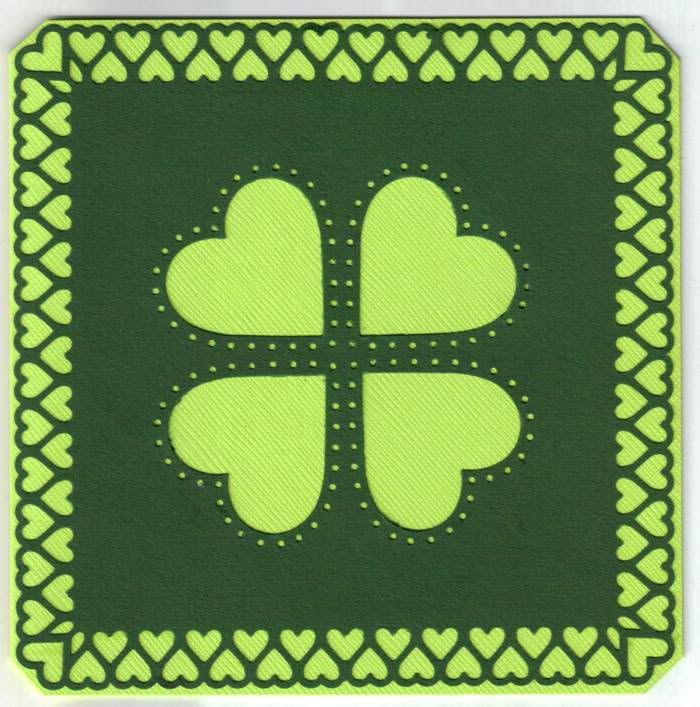
I received a couple of Martha Stewart punches which I had to use immediately. I LOVE punches and I LOVE anything with hearts so these were two-fold for me. I had received an email back in October from another blog that I subscribe to.... Capadia Designs. Ever since her post I've watched for these punches.

When I got them just 3 days ago I quickly made duplicates of the cards she created and then thought that I had to find another use for those punches. That "Punch All Over The Page Punch" had me intrigued. The design I had in my mind was for a shamrock and I tried several times to line up the small holes and punch them so that a single set of holes was between the hearts but because the large heart has a slight curve it wasn't happening so I re-thought the way I was trying to do this. Then with a graph drawn on the back side of the cardstock and careful alignment I was able to punch 4 hearts to represent my shamrock.

Here is the front of my card:


I was very pleased with my St. Patrick's Day card for my Irish friends. Inside the card I used a Celtic Font and wrote, " Lucky To Have You As My Friend." They should receive their cards today in the mail.

I am sure that I will find many uses for these punches (both sets) and that many of my fellow scrapbookers will help me out and I hope that I inspired just one of you.

Happy Scrappin' ! ! !

Brenda

Wednesday, March 16, 2011

St. Patty's Day Gifts

I try to give my CCD/PSR Students a little gift for each holiday that involves one of our Catholic Saints in addition to those religious holidays such as Christmas and Easter.

This holiday is a little bit more special to me since I have that Irish Heritage as well.

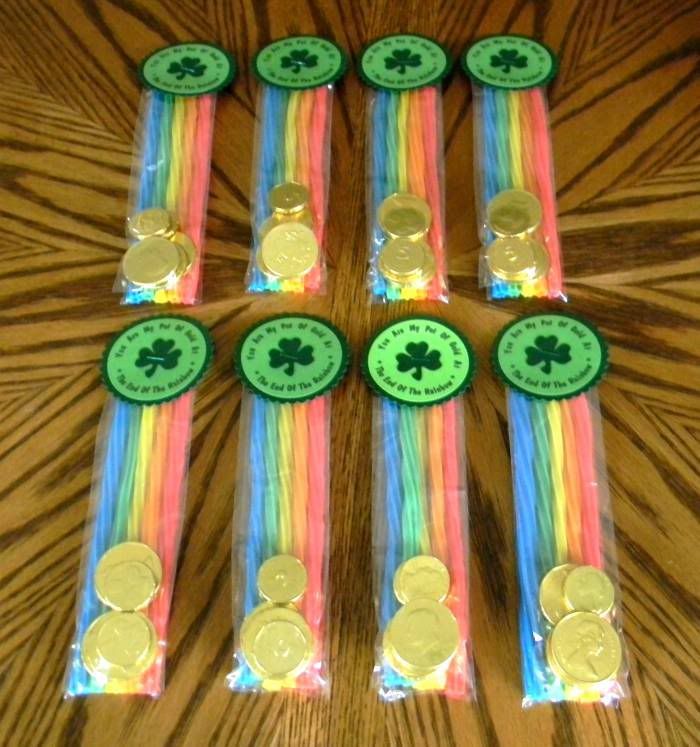
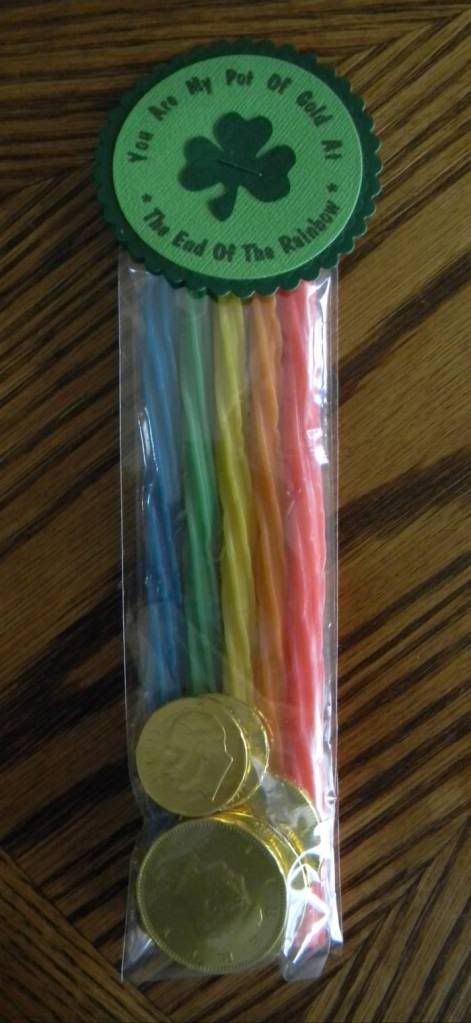
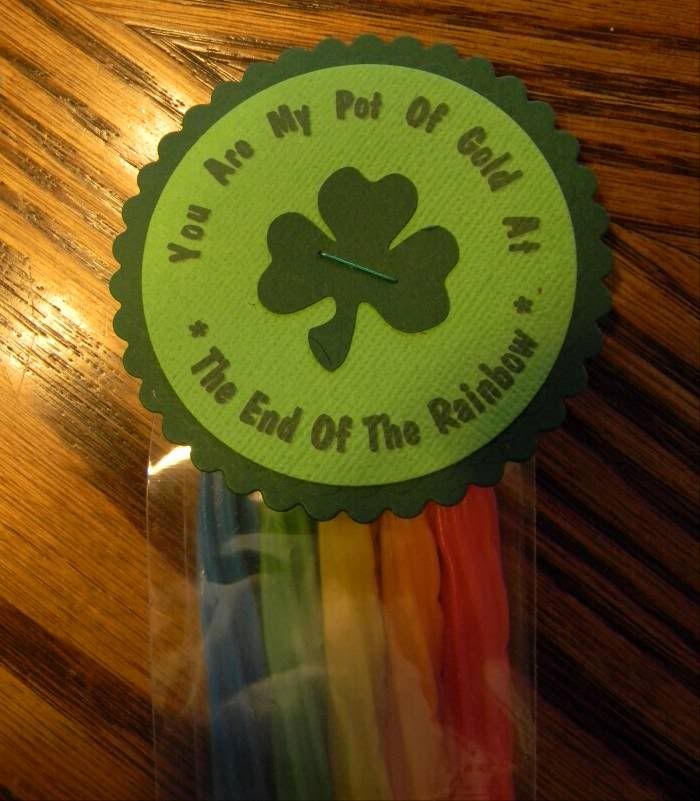
I can't take credit for the original idea on this little gift but I did make my own topper. Here is a link to the original St. Patty's Day Gift. She offers a printable topper if you are in a rush and don't want to think of one of your own.

I used Wilton Pretzel bags as she suggested but I used two bags putting the licorice in one bag and the chocolate coins in the second and then layered the bags. I used a Spellbinder Scalloped Circle and a Spellbinder Circle to make my topper. I printed her saying on the circle but instead of making the saying the focal point I put it around the edges in an arc and then my focal point is a Shamrock made with my Cricut and the Paper Doll Dress Up Cartridge.

I found the Rainbow Twizzlers at Wal-Mart and the Chocolate Gold Coins at Wal-Greens.

This project was quick and easy to make and I enjoyed making it.


There is still a little time to make these treats/gifts for the little ones in your life and make St. Patrick's Day Special.

Happy Scrappin' ! ! !

Brenda

Monday, February 7, 2011

What's All The Rage ? ? ?

What do you give as a gift to someone who is so hard to buy for?

That is exactly what my question was when it came time for a gift for my mom. I always go out of my way to find exactly what she asks for. There are the times when she doesn't give hints as to what she wants or will tell us, "I have everything I need or want right now."

I've never made my mom a scrapbook or a photo frame because she never seemed interested in my scrapbook pages or projects. I think at one point she had made the comment that scrapbooking was "expensive and a waste of time." I guess I wanted her to have something that I had made and to show her that the time I spend crafting is not a waste of time. Plus this gift is something that I would proudly display on my own wall.

I've noticed that my mom, now that my dad has passed away, has older pictures of my dad displayed around the house. They aren't in frames, but rather just laying here and there. She has the funeral program hanging from her computer table. She loves the having those pictures around.

Since the photo frames that look like old time shadow boxes are all the rage, I thought it would be a good idea to organize a few of her favorite pictures of my dad into one of those frames.

I contacted my younger sister who "borrowed" the boxes of old photographs from my mom's home and made sure that I got them to make copies. I copied more than what I needed so that I could pick and choose which photos/snapshots would work best in the frame. I wanted a mix of older photos and some of the more recent ones as well. I had the photos reprinted in black & white tones so that the photos were uniform and looked more heritage.

I carefully chose metal embellishments that reflected interests of my dad or were symbols of what was going on in the photos. Other metal embellishments like brads with the back cut off were used to accent and balance the frame. Many of the metals that I used I had on hand, metals that I fell in love with, purchased, and knew someday that I would find the perfect project for. Many of them are retired pieces by Making Memories but others are brand new on store shelves, marketed by one of my favorite people in the scrapbooking industry, Tim Holtz. I also used sepia toned papers and the papers also reflect interest of my dad.

Here is the finished frame:
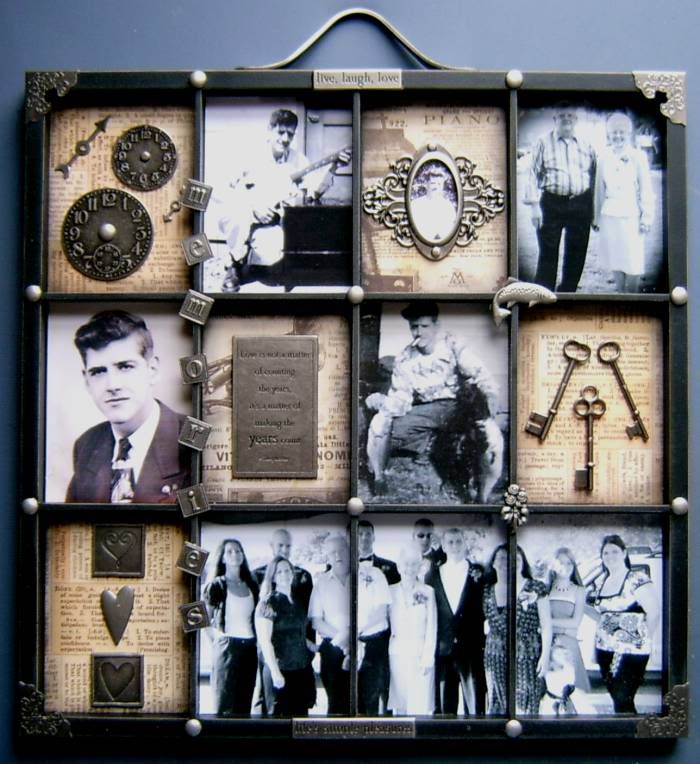


I will start in the upper left hand corner and show you two frames at a time a little closer.

My dad loved clocks. He used to make them. He was actually very crafty and made many things including the guitar and amplifier in the second frame. Music was another interest.
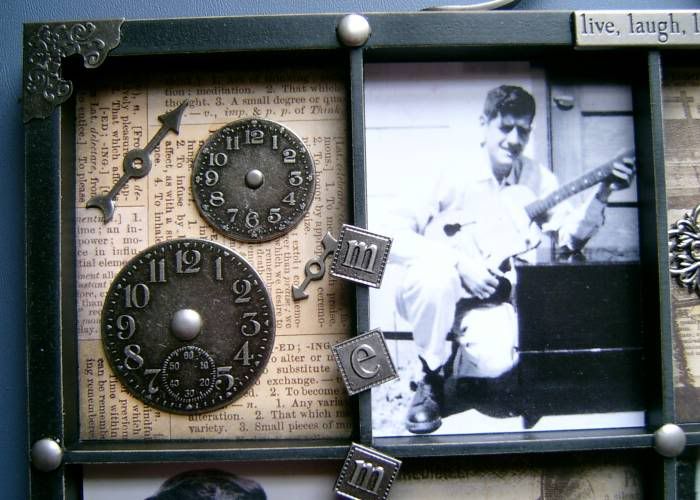


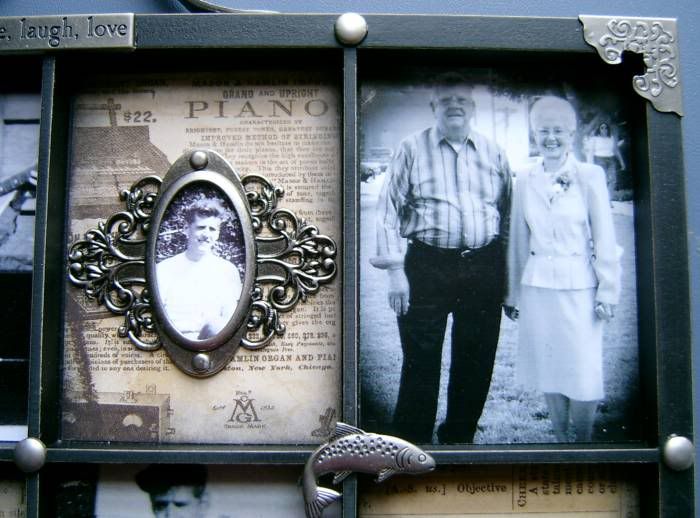
The third was one of my dad when he was a teen. I can't tell the year of the photo, I only know what I was told. The paper behind it caught my eye because of the word and picture of a piano. My dad could also play the piano "by ear." He could not read music but if he could hear a song he could play it on the piano. I loved to listen to him play. The frame that the picture is in reminded of me of something that would have been around when that picture was taken.

The forth frame is a picture of my dad with my mom at their grandson's (my nephew's) wedding. He carried a copy of this photo in his wallet. I remember taking dad to the doctor and while looking for his insurance card whipped out this picture and showed the receptionist and told her "This is the most beautiful woman in the world and she's mine."

My dad loved my mom unconditionally.


The second row of frames are some of my personal favorites. A formal picture of my dad, as young man. How handsome he was! I love the saying on the metal plaque in the next frame. I think my dad made every moment in his life count... not just the years. Although he was not perfect he was a family man and worked hard so that his family had what they needed.
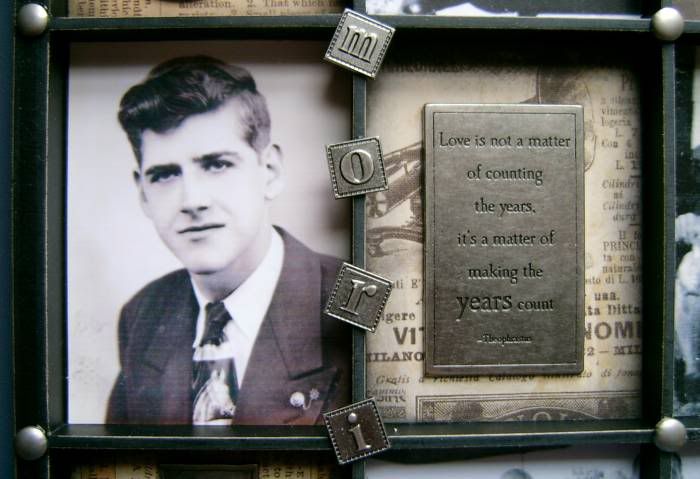


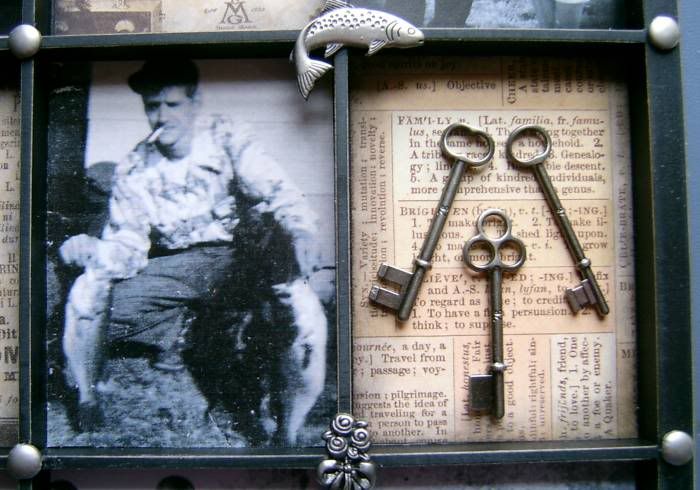
My dad love the outdoors and respected nature. He loved the sport of fishing but if he kept a catch it was on our dinner table. (The metal fish is a Karen Foster charm but we cut the charm ring off of it and smoothed out the burrs on it. Those are still available. ) There he is, my dad, tall, dark and handsome.

I love the box with the keys in it. My dad didn't throw away anything. This was both a blessing and a curse. These were not his keys but I can't tell you how many keys we found. I laugh and compare my dad to Hagrid from the Harry Potter Series because he was definitely "the keeper of keys."


On the bottom rows of frames I used the first box and filled it with hearts because I loved my dad and he loved all of his family. In the definitions behind the hearts is the definition for the word "hope." My dad never lost hope when he was fighting his cancer. He looked to the next day and for the next miracle. Each new day was a mircle for my dad.

The last 3 frames on the bottom row is a family photo, taken at another grandson's (my nephew's) wedding. Like so many families it is hard for everyone to be at one place at the same time, so not all of the family is in the picture, but it was as close as I could get. I sectioned the photo so that it is one continuous photo across the three frames.
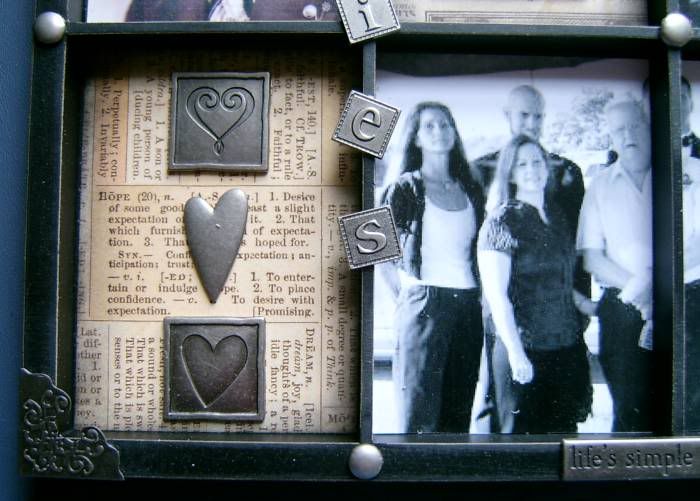


As you can see I used other plaques, on the top and bottom of the frame, used metal photo corners on the corners of the frame, used brads as accents, and other metals that pertained to the frames. I used metal letters to spell out the word "Memories" down one of the spines of the frames.

It is my hope that I made a gift that my mom will cherish because it was made with a lot of love and caring attention. I sat and cried everytime I worked on this frame because I miss my dad so much. It is as much a tribute to him as it is a gift for mom. I know how much she misses him because as much as I miss him she must feel it a hundred times more. Even death hasn't detoured their love.

I am hoping that the next time I need a gift for mom that I will be able to do one of these frames with her pictures so that her favorite photos can hang on the wall next to my father's.

It is also my hope that I have inspired you to try something new, trendy or all the rage the next time you need a gift for someone special. These can be made with or without photos and in almost any theme.

Happy Scrappin' ! ! !

Brenda
Friday, February 4, 2011

St, Valentine's Day Gifts

Each year I make Valentine's cards for my CCD/PSR students and for my children, but sometimes a card just doesn't seem like it is enough but I can't spend a lot of money.
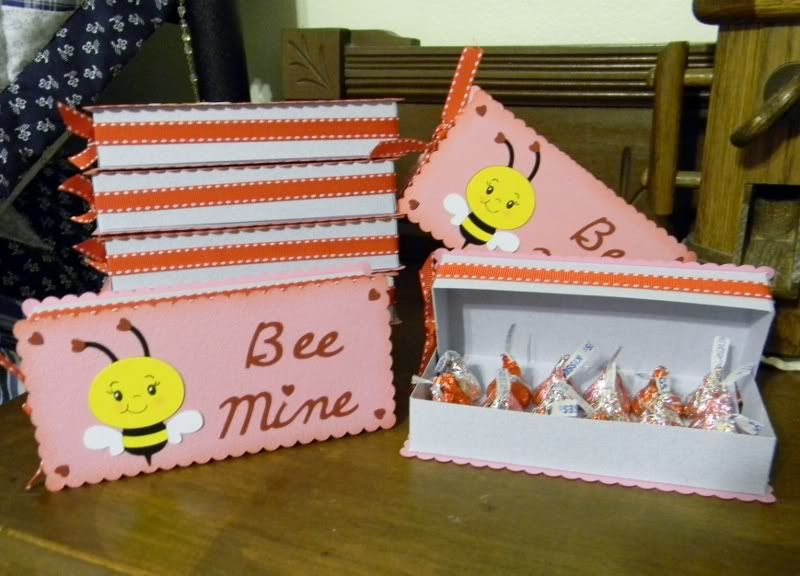
This year I took an old project and revamped it slightly and was able to make a special Valentine Candy Box for about $1 per child.

Do you remember this project?


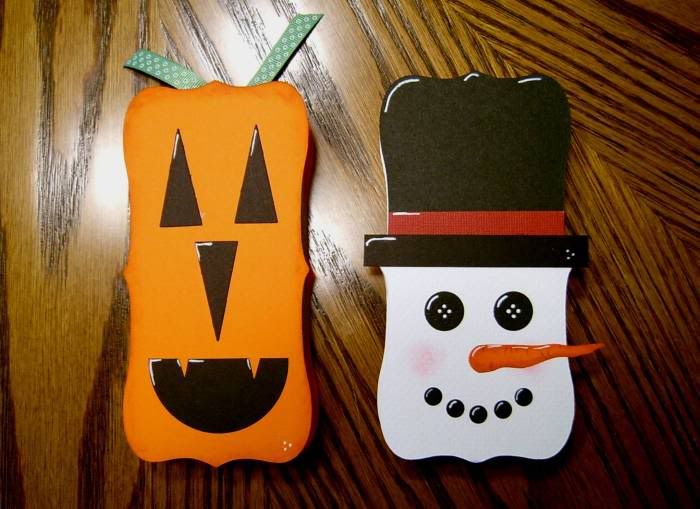
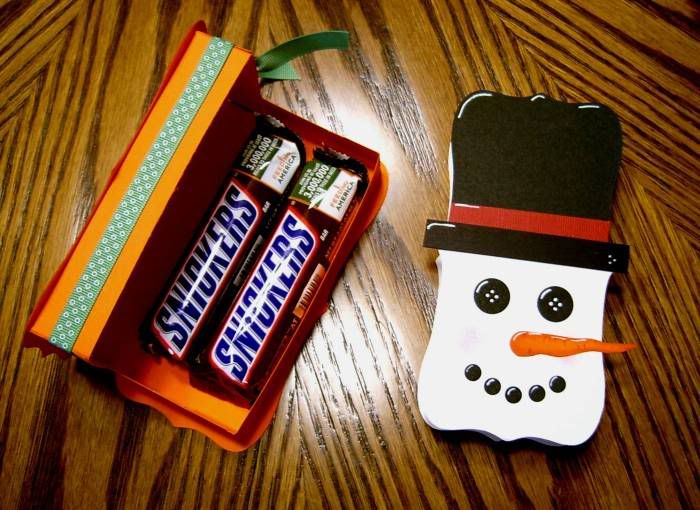
I will give where credit is due for this project and also share where you will find the directions for the box. Scrapy Land Susan posted the original "Pumpkin Box" on the ScrapyLand Blog. Here is the link to her VIDEO. I had taken her idea and turned it into a snowman because she challenged us.

I love the idea of the little box being a blank canvas so I changed it up yet again for my Valentine's Candy Box.

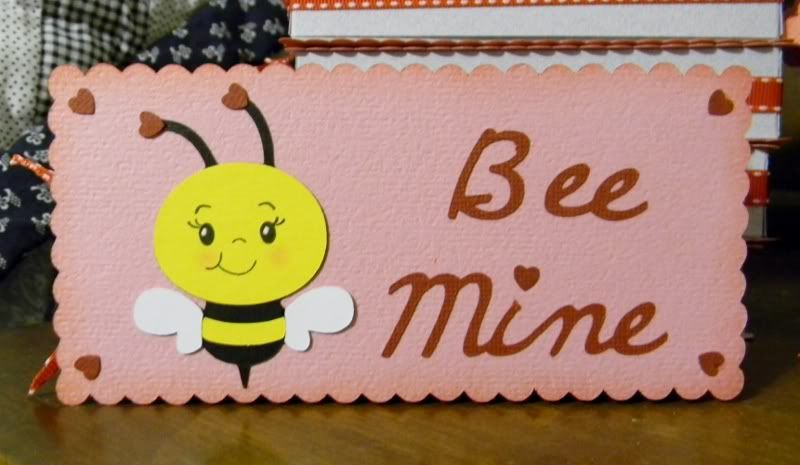
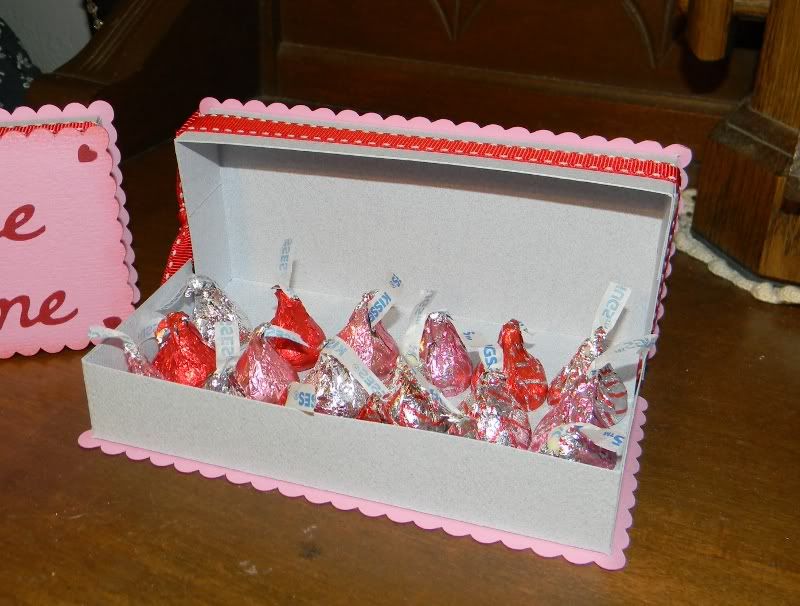
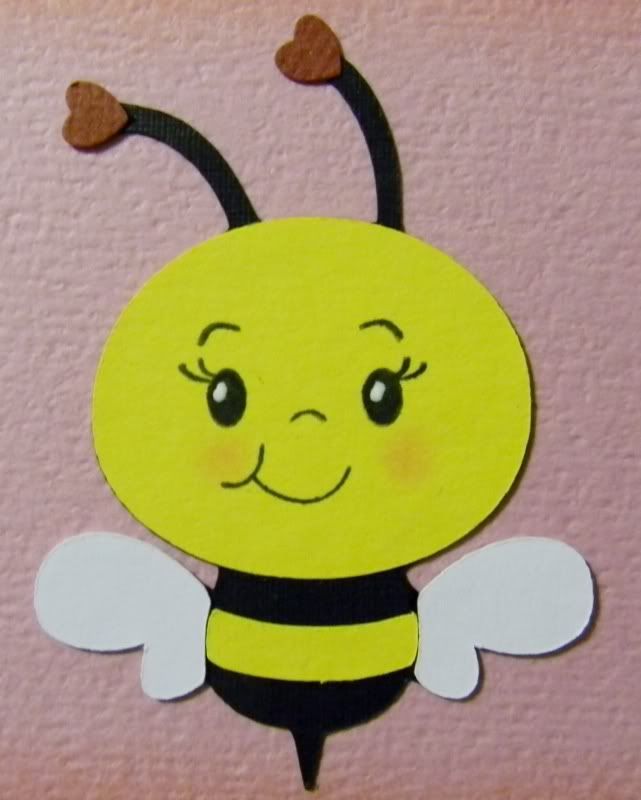
I used my Cricut Design Studio (DS) and designed a new scalloped box top and bottom which gave me a new area to create on. That scalloped rectangle for the top and bottom of the box was created by using the George Cartridge. I also broke out the Create-A-Critter Cricut Cartridge and used the bee from that cartridge. By using my DS I was able to cut 10 bees (with all of the layers) on one mat. Although I love the bee made just as it was on the Cricut Cartridge I used the hide contour option in DS and hid the facial cuts on the Bee and then I used some awesome Peachy Keen Stamps and stamped those adorable faces and then used a white gel pen to put the highlight in the eyes and a little chalk to makes his cheeks blushed. The words were created using Cursive 101 Cartridge and my DS to weld the letters. I used a little red ink to accent the edges of the scalloped rectangles. The hearts for the corners of the box, on the bee's antenna, and to replace the dot on the "i" were made with a hand punch.


I filled the boxes with 18 (9 each) Hershey Hugs and Kisses. They fit perfectly! Nothing says I love you like a hug and kiss.


Here is a close up of just the Bee:


From start to finish it took about 3 hours to make these and I figured while I was doing it I would make enough for all of my CCD/PSR students, my children, and a few extras because I know there will be someone else that I want to give one to.... maybe the girls at work.


There are still time to makes these or something similar for your little Valentines. So my challenge today is to use what you have on hand and create a little "I Love You" gift.

Happy Scrappin' ! ! !

Brenda