My Family Scrapbook

Monday, December 24, 2012

Heart Candle Base With Charms

This will probably be my last post until after the New Year. This also concludes the items that I have made for Christmas gifts. I made two of these heart candle bases with matching charms. One of them is going to my husband's brother and his wife, and the other to his sister and her husband. I just could not come up with a gift idea for them so I made them something and purchased the candle to go with it.

I am not going to get long winded on this post but rather get right to the wood working.

Here is a picture of the just the base:


And here is a picture of the candle on the base with the charms tied to it with jute:


I hope that they like them as I put a lot of time and effort into these.

Happy Crafting ! ! !

Brenda

Friday, December 21, 2012

Quick Gifts - Change Of Pace - Sewing

I needed a quick and easy little something to give as a gift. This was more or less to fill in and make my gift look a little bigger. I had previously posted that I made each of the girls in my office a wooden trivet.

I did a little research after seeing these towels at a local craft bizarre. I found a great step-by-step tutorial on you-tube.com and having some sewing experience these looked so easy.

Materials were inexpensive, readily available, and I had some of the supplies on hand such as thread and buttons. My materials list was potholders with a loop on the side and they could be round, square, or rectangle. Matching or coordinating kitchen hand towels, color coordinating buttons, thread and of course my sewing machine.

Here is a the LINK to the you-tube tutorial. You will find that the directions that the girl gives are very easy to understand.

Here is a picture of my finished hanging towels that will be given with the hand made trivets.


Just a quick share of another craft that I enjoyed making and would like to get as a gift myself.

My motto is always give something that you would like to receive.

Happy Crafting ! ! !

Brenda


Tuesday, December 18, 2012

More Bottle Cap Ornaments

I spray painted way too many bottle caps white when I was making the snowflake face snowmen, so with that in mind I decided to surf the web to see what I could find to make with white bottle caps. I didn't have to look to far. I went as far as Pinterest. That site is a wealth of pinned items that people have found on the Internet.

I found an ornament using 3 bottle caps that were glued to a a ribbon but the bottle caps were inverted and harder to work with, so with a flip of the cap I had a smooth surface to work with. Here is a link to that original snowman ornament.

As in my previous post with the snowflake ornaments, I had some crafting supplies that allowed me to stamp the faces for the snowmen. I love that little face!

Instead of using a ribbon, I drilled holes in the bottle caps and used jump rings to attach one to the next. I also made some plain as in the original that I found on Pinterest, and I made a few dressed up by adding ribbon and snowflake buttons and a few with each style of face.

Here are my finished ornaments:


It amazed me how a little piece of ribbon and a button dressed these up.

So next time you prepare more of an item that what you can use for one craft, do a little searching to see what else you can make using that item and double up your productivity.

Happy Crafting ! ! !

Brenda

Friday, December 7, 2012

Gift: Clover Candle Base With Charms

Today I am sharing a gift that is partially hand-made and partially store bought.

The wood base with charms is a pattern that I purchased when I ordered my wood. I purchased 2 patterns (one with clovers and one with hearts)  for these candle bases.

This first one is a Christmas gift  for a very special couple (my son and his wife.) My son is very proud of our Irish Heritage and I wanted to make something that they both would like. Kim, my beautiful daughter-in-law, loves candles.

This has many hours involved and the cuts became tedious because progress was very slow to see, BUT, the I really love the end result.

Also a side note for this project, I did not follow all of the directions that came with the pattern because I did not understand them. I do now because of the wonderful men and ladies at the wood working message board. I am exploring and going to try the self-framing method, but for now what I did worked and gave me more practice with my router.

Here is a picture of the candle base:


Another photo of the edge so you can see the router work on the edge:


And one last photo of the finished piece with the candle in place. I used jute string to tie a decorative bow and hang the charms from the stings.


One of these days I will make myself one of these. I have yet to make myself anything.

Happy Crafting ! ! !

Brenda

Thursday, December 6, 2012

Snowman Face Ornaments

Today I am switching gears and posting  a craft item that is not made of wood.

I have an abundance of crafting items laying around and decided to play with some of my scrapbooking and paper crafting items BUT not on paper! I forget the mulitude of items that I buy for one purpose and then find other uses for them.

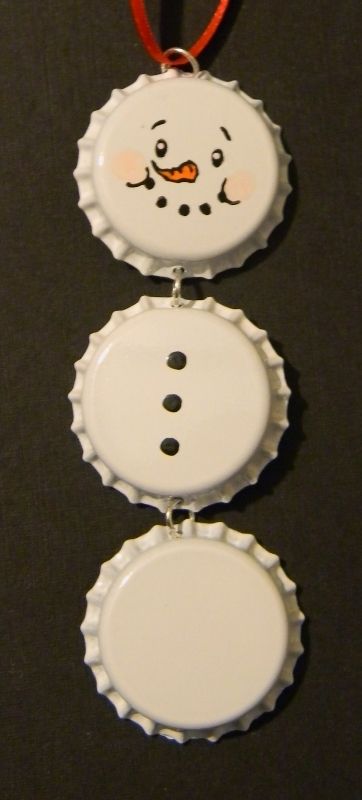
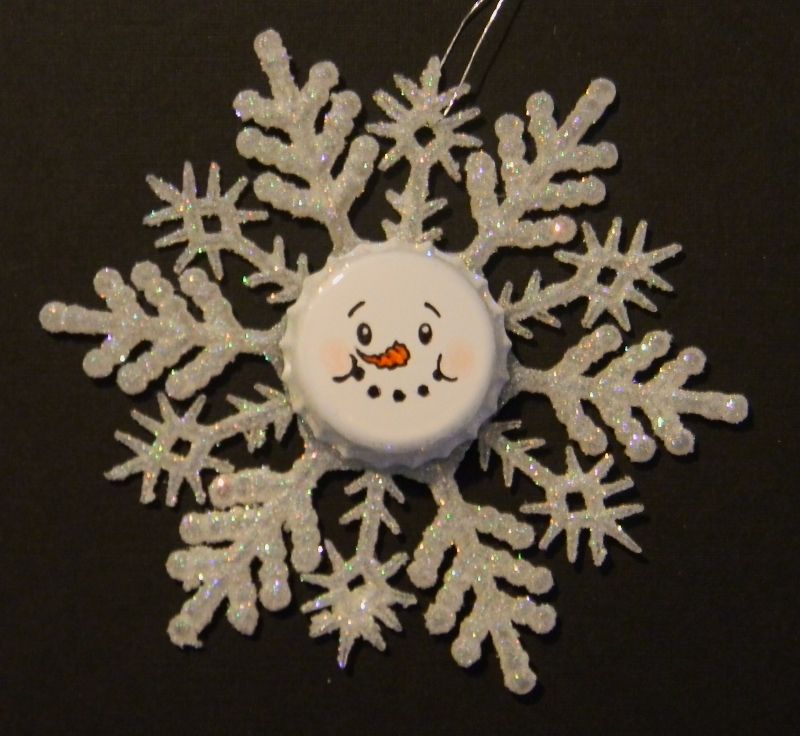
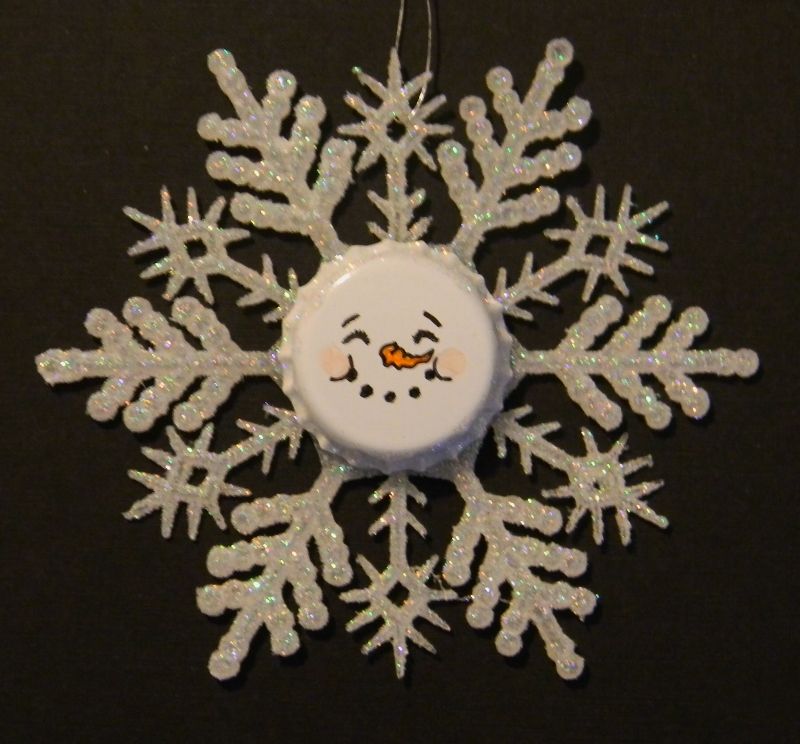
I have a box of the cheap, glitter, plastic snowflakes that you can buy in any dollar store, craft store, or Wal-Mart. These come 20 to a box and I actually found mine at a resale shop. They were new in the original packaging and sealed.

I also used some old bottlecaps that I have had in my stash for years and never had any idea what I would use them for but loved them. These were sent to me in a swap.

The stamps that I dug out of my scrapbooking supplies were part of a die cut set that I purchased from The Scrapping Cottage. I love their products! Here is the LINK for the die set that I used. The snowman's pipe on the face is not on the stamp (which I love even more!)

Other materials I used were spray paint to make the bottle caps white, Copic Markers to color in the nose and to pink the cheeks of the snowman face. Stickles to glitter the edges of the bottlecap so that it pulled the piece together. I also use the clear Aleene's Gel glue to adhere the bottlecap to the snowflake.

It took more time waiting for the paint to dry on the bottlecaps then it did to stamp, color and put together 12 of these.

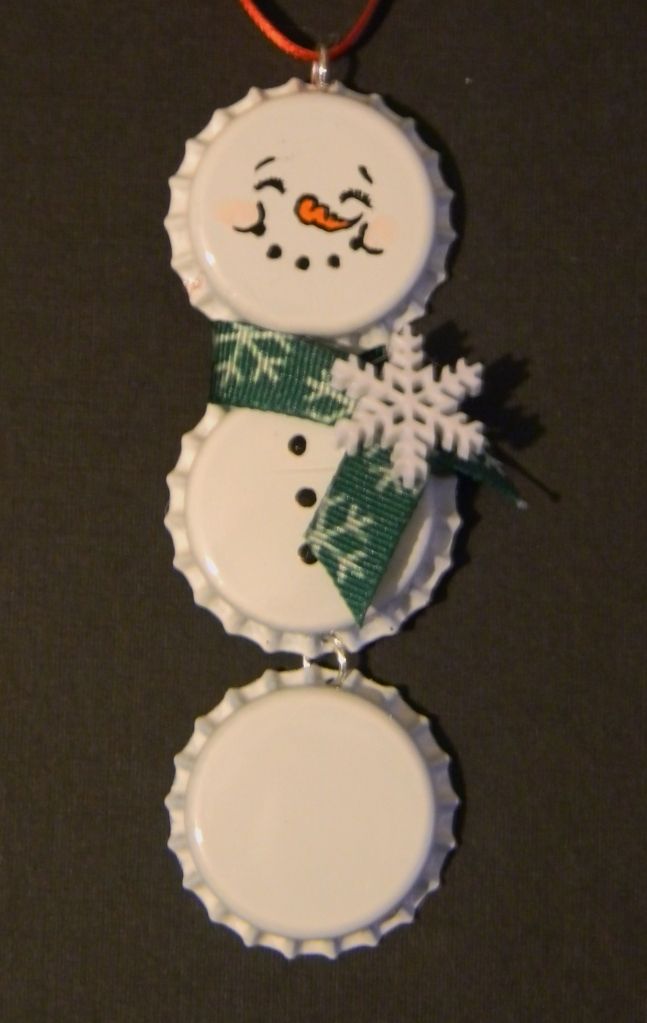
Here are the two differnt ornaments that I made:


These only cost pennies to make and the little ones on my gift giving list will love these! I plan on using them on packages along with the bow or ribbon.

Just something new to do with all of those tucked away scrapbooking or paper crafting items.

Happy Scrappin' and Crafting ! ! !

Brenda

Monday, December 3, 2012

Now For A Few Home-Made Gifts

I have already showed you the "trivets" and ornaments that I have made for gift giving. Now it is time for just a couple of other gifts that I have made and I am planing on giving.

I am showing you just one today. This gift has already been given back in September.

It was the first thing that I gave away. It seemed like it took me forever to make but that is because I would get tired of working on it and would go between making ornaments and working on the basket. I think that was because of the amount of sanding that was involved in this small project. I did not like the squareness to the cut and I took time to round each band of the basket so it looked more like a natural basket.

I was amazed at how these baskets are made. It took me a little while to put my mind around the process. A bottom solid piece, 5 rings, a finishing ring, and a handle. The handle turned out to be the trickiest part of the entire process!

I liked the end result! I filled the little basket with candy, put some netting around it and gave it as a wedding gift.

Here is the picture of the finished basket. It is small, only about 7 inches from the table to the top of the handle. It was very light in weight. I cut it from 3/8" pine and stained it in natural stain.


I would also like to share a couple of pictures of the couple that I made this for:


I hope that the happy couple have many happy years!

Brenda ! ! !