I have tried several times to complete a how-to video for the magnetic slider book marks. I am not sure why but when I tape the video and play it back on my computer it is fine BUT when I upload it to You-Tube in order to share it with all of you it is very jerky.
I have no idea why it is doing this or how to fix it.
I have made other videos and shared them with no problem, just a week ago I made one on making faux chipboard and pop dots and didn't have these issues.
I am putting the video on the back burner and moving on to something else. I have another book mark to share with you and it will be posted in a few days.
I apologize for promising something that I can't deliver at this time. When we get the kinks worked out I will try again.
Brenda
Monday, July 30, 2012
Wednesday, July 25, 2012
Magnetic Slider Book Mark
I recently joined a swap for book marks and I wanted the one that I was sending to be very special. I love to read and one of my biggest pet peeves is losing my place and a book mark that comes out of the book easily. Another thing that really bothers me is not being able to remember which paragraph I left off at. I am one of those people who reads a little here and there and sometimes I have to stop before I get to the end of a chapter. So I guess, I wanted a book mark that was also a place marker.
I was on a mission!
I wasn't sure how to put all of my ideas into one element. I literally went to bed one night thinking about this project and dreamed about who and what to make. I woke thinking I already have the concept down in a spinner card that I had made previously.
If you missed that post here is the LINK to the Spinner Card.
I took the concept of the spinner and altered it slightly. The book marks made from that concept are less bulking and lighter. There is no pennies in these and they do not "spin" but rather slide.
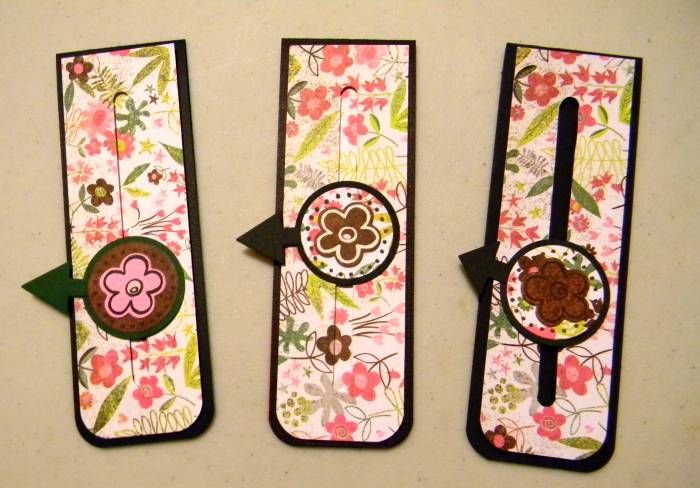
Here is the first picture. The one on the far left is my prototype. I wanted to make sure that this idea would work before I put too much effort into it. The basic idea worked but I did not like the look of the channel showing so I created a back by lining up the repeating pattern of the paper and putting a backer down before I mounted the slider. That is shown in the two book marks to the right.
Here is a close up of a finished book mark:

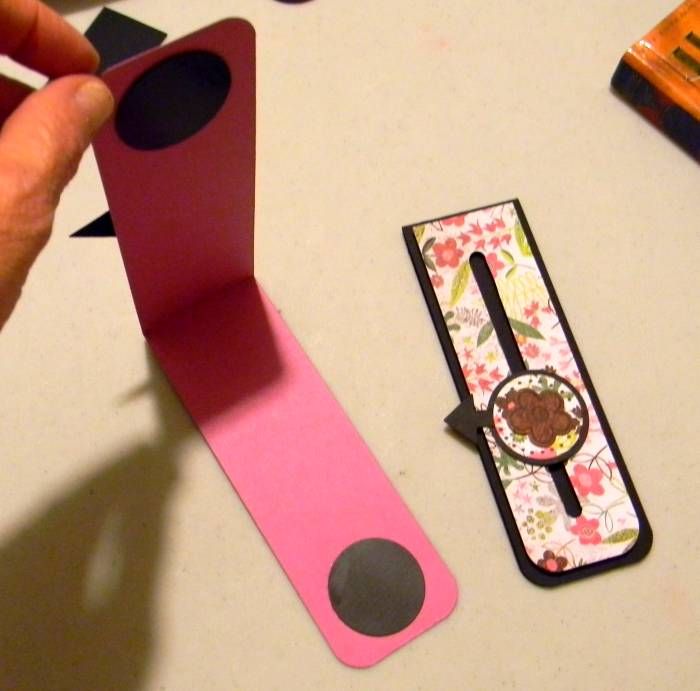
This is made of a 12" x 2" strip of cardstock, scored and folded in half so that the book mark goes over the top of a page or two. To keep the book mark from flying off the page I used magnets so that it grabs the page and stays put. These magnets are made from recycled magnetic business cards that I receive in the mail. I simply peel off the business card and reuse the sheet of magnet.
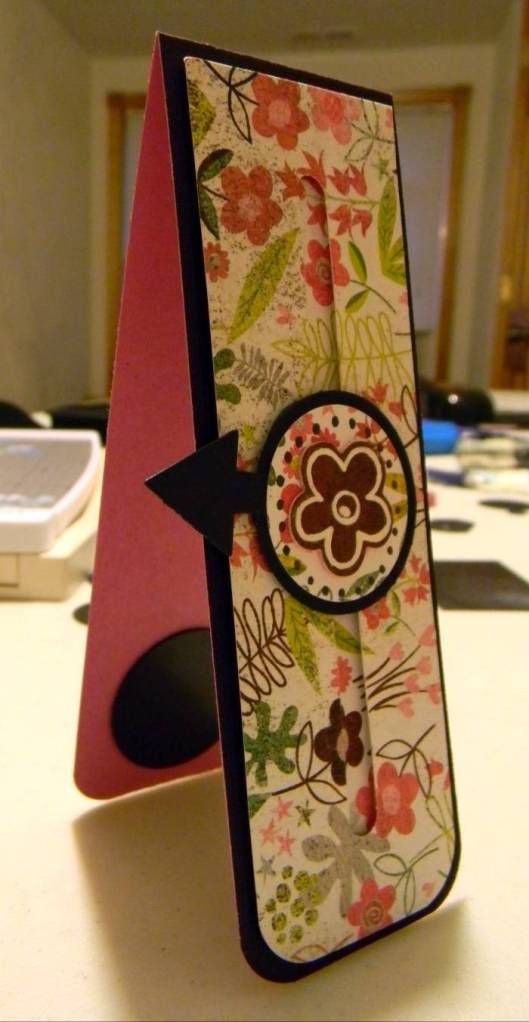
Here is the finished book mark on my book. The medallion slides up and down and it also spins in order that you can point the arrow to the paragraph where you are ready to start reading when you open your book.
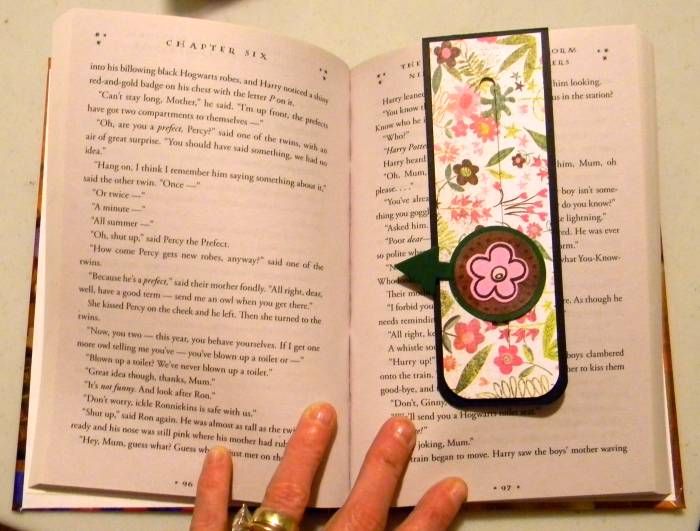
I think I can say mission accomplished!
Now if you would like to know how I made this book mark, stay tuned as I am working on a video for it.
Happy Scrappin' ! ! !
Brenda
Monday, July 23, 2012
A New Video And A Project On The Horizon
I am trying to get back into the swing of things. Trying to scrapbook, crochet, and do various crafts. I used to make videos when I was on the design teams but I've long since given up that crazy paced life where I must craft.
To be honest with you when I had to make things using specific products and had deadlines the whole process became tedious and mechanical. I just wasn't enjoying myself anymore. I think that was why I took a step back from all of it.
Now on my days off I craft or scrapbook because I want to and it is back to being fun!
In the mist of everything I still belong to one message board that was formed because of scrapbooking but now it is just five very close friends with the scrapbooking thread in common. One of the girls, Rainy, began to post challenges in order to get us back to our scrap tables. It worked!
Rainy has also asked us to join in a small swap. I used to love swaps but didn't have time for those either. Life is just too busy, or at least we make it that way.
I sat down to try to work on an idea for a swap and it turned into making how-to videos again. So here is a how to video on making Faux Chipboard and Pop-Dots. This is a technique that I used to make my swap items.
It is fun to make a how-to video when you do not have to sell something or told what has to be used, said, or included and excluded.
I am planning on another video soon showing how to make what we swapped. I hope this video helps others save a little money and realize that you don't have to travel to scrap stores to get those pricey things. You can raise something off the page without those spongy little dots or make paper stiff like cardboard just by layering it.
Stay tuned because I will be back with another video, it might be another how-to leading up to the swap item or I may just jump to the swap. Ignore the little flubs and glitches, it has been awhile. This time you even get to see me.
You never know about me, what I am going to say or do!
Happy Scrappin' ! ! !
Brenda
Monday, July 2, 2012
Not Turning Into A Recipe Blog
There are a million blogs out there that share recipes and I love them. I am not turning into a food blogger but thought once in a while it would be fun to share one of my food items. I spend a lot of time in the kitchen and have a few original recipes that I would put up against some of the best Food Network stars. I do not claim to be a master chef by any means but I enjoy cooking and baking and know my way around the kitchen and have the hips to prove it!
This is a dessert that I love to make that has 4 layers. A little bit of everything that any one might like or love in a dessert.
The first (bottom) layer is a fudge chocolate cake. No secrets here, this is a box cake mix that has been mixed and baked according to the package directions but is baked in a very old pan. To get those pans you had to buy a Duncan Hines Tiarra Cake Kit. I loved those kits. I found an extra set of those in a resale shop recently and bought them. They join my other four sets. They are great pans.
The next layer is a chocolate ganache. Simple terms, melted chocolate and cream. Pour a thin layer in the well of the cake.
Third layer is a mousse. This is the simplest thing to make. One small box of instant pudding, 1 cup of cold milk, mixed well, with one cup of Cool-Whip folded in.
Fourth layer is Cool-Whip.
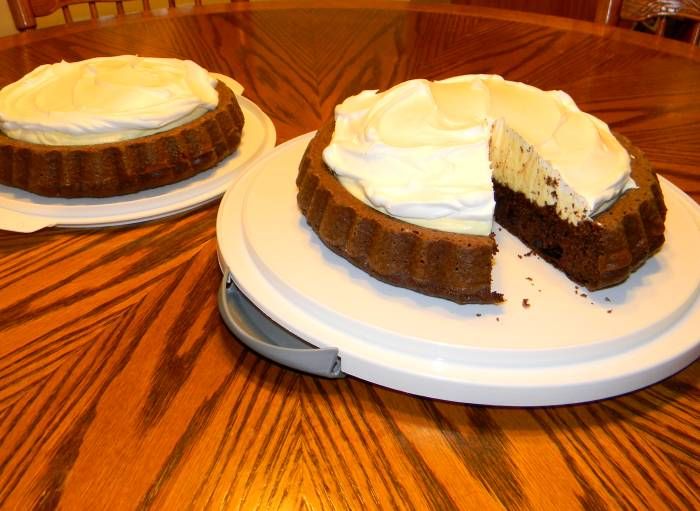
It is hard to see that ganache layer, but it gives it a rich chocolate boost.
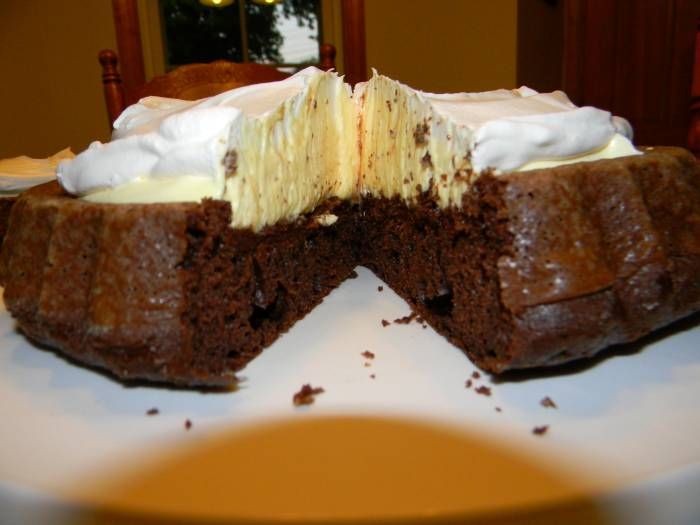
A little slice of heaven if you ask me! If you want to mix this up you can add a teaspoon or two of extract to the vanilla pudding to change the flavor. My favorite there is almond, or you can just get a different flavor pudding. Another thing that can be done, instead of the mousse layer, omit the mousse complete and add a can of your favorite pie filling and top each slice with a dollop of whipped topping.
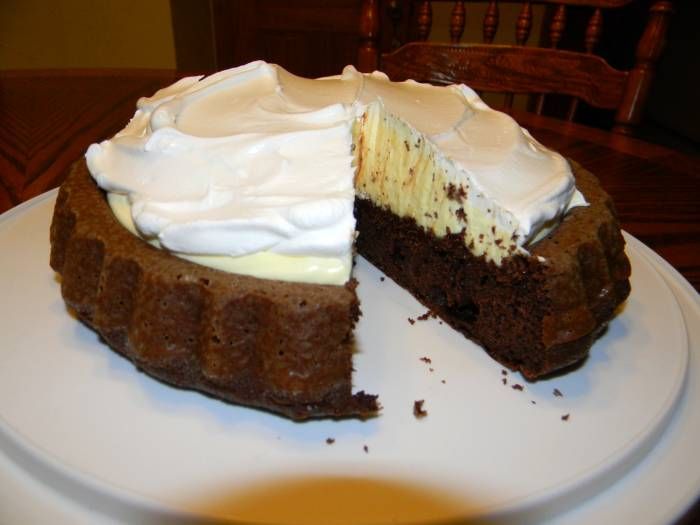
The possibilities with this simple dessert are endless.
I will be back to the crafting and scrapping ... but today I say Happy Cooking ! ! !
Brenda
Subscribe to:
Posts (Atom)
