That is exactly what my question was when it came time for a gift for my mom. I always go out of my way to find exactly what she asks for. There are the times when she doesn't give hints as to what she wants or will tell us, "I have everything I need or want right now."
I've never made my mom a scrapbook or a photo frame because she never seemed interested in my scrapbook pages or projects. I think at one point she had made the comment that scrapbooking was "expensive and a waste of time." I guess I wanted her to have something that I had made and to show her that the time I spend crafting is not a waste of time. Plus this gift is something that I would proudly display on my own wall.
I've noticed that my mom, now that my dad has passed away, has older pictures of my dad displayed around the house. They aren't in frames, but rather just laying here and there. She has the funeral program hanging from her computer table. She loves the having those pictures around.
Since the photo frames that look like old time shadow boxes are all the rage, I thought it would be a good idea to organize a few of her favorite pictures of my dad into one of those frames.
I contacted my younger sister who "borrowed" the boxes of old photographs from my mom's home and made sure that I got them to make copies. I copied more than what I needed so that I could pick and choose which photos/snapshots would work best in the frame. I wanted a mix of older photos and some of the more recent ones as well. I had the photos reprinted in black & white tones so that the photos were uniform and looked more heritage.
I carefully chose metal embellishments that reflected interests of my dad or were symbols of what was going on in the photos. Other metal embellishments like brads with the back cut off were used to accent and balance the frame. Many of the metals that I used I had on hand, metals that I fell in love with, purchased, and knew someday that I would find the perfect project for. Many of them are retired pieces by Making Memories but others are brand new on store shelves, marketed by one of my favorite people in the scrapbooking industry, Tim Holtz. I also used sepia toned papers and the papers also reflect interest of my dad.
Here is the finished frame:
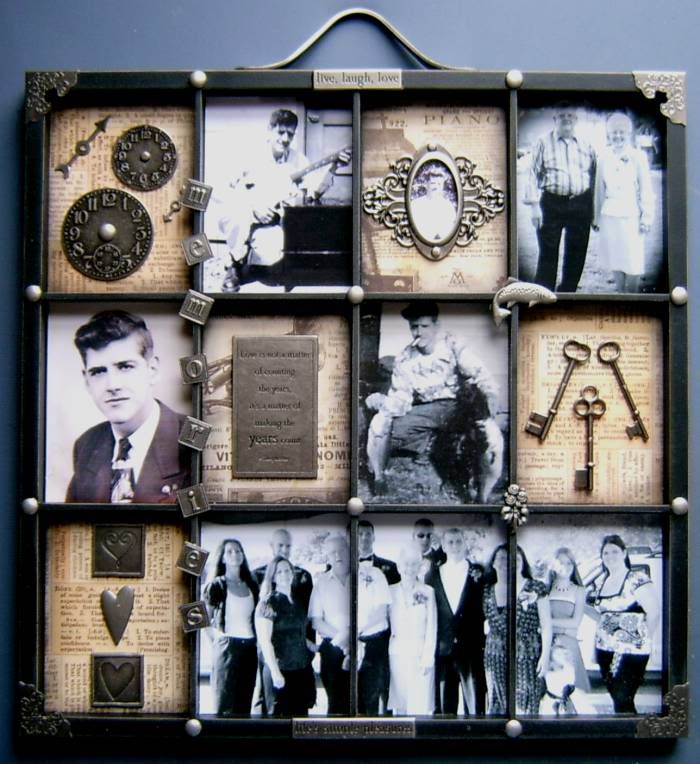
I will start in the upper left hand corner and show you two frames at a time a little closer.
My dad loved clocks. He used to make them. He was actually very crafty and made many things including the guitar and amplifier in the second frame. Music was another interest.
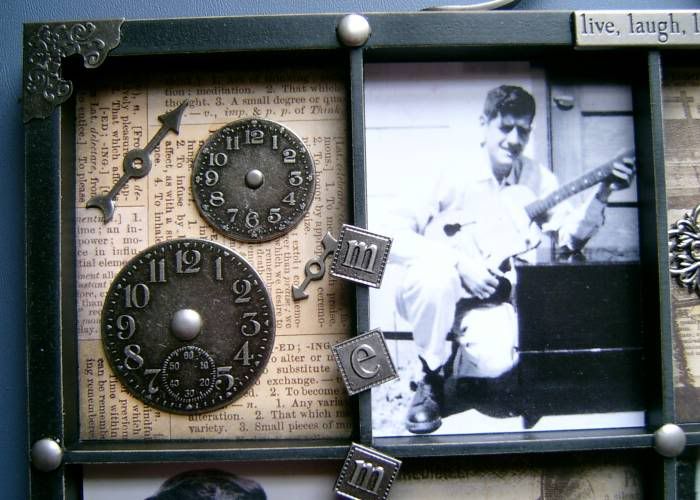
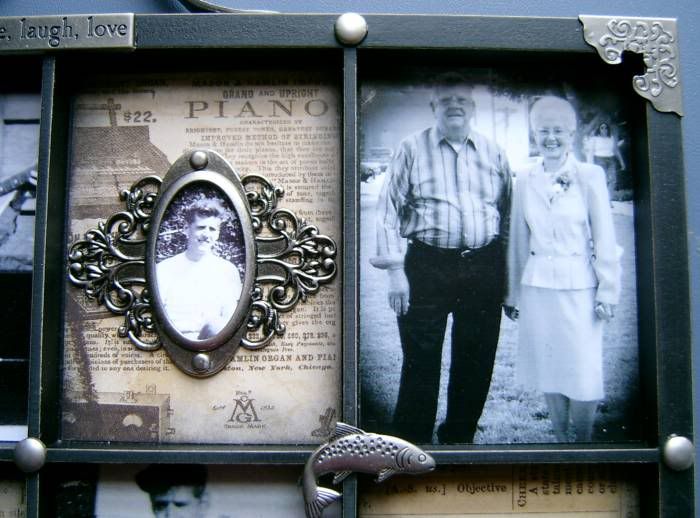
The third was one of my dad when he was a teen. I can't tell the year of the photo, I only know what I was told. The paper behind it caught my eye because of the word and picture of a piano. My dad could also play the piano "by ear." He could not read music but if he could hear a song he could play it on the piano. I loved to listen to him play. The frame that the picture is in reminded of me of something that would have been around when that picture was taken.
The forth frame is a picture of my dad with my mom at their grandson's (my nephew's) wedding. He carried a copy of this photo in his wallet. I remember taking dad to the doctor and while looking for his insurance card whipped out this picture and showed the receptionist and told her "This is the most beautiful woman in the world and she's mine."
My dad loved my mom unconditionally.
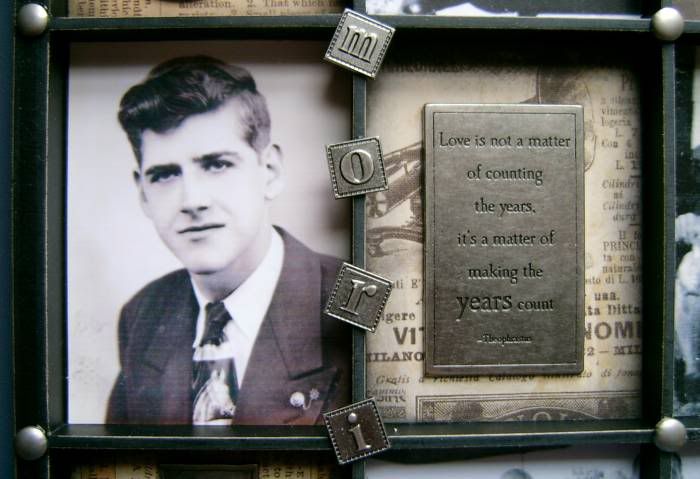
The second row of frames are some of my personal favorites. A formal picture of my dad, as young man. How handsome he was! I love the saying on the metal plaque in the next frame. I think my dad made every moment in his life count... not just the years. Although he was not perfect he was a family man and worked hard so that his family had what they needed.
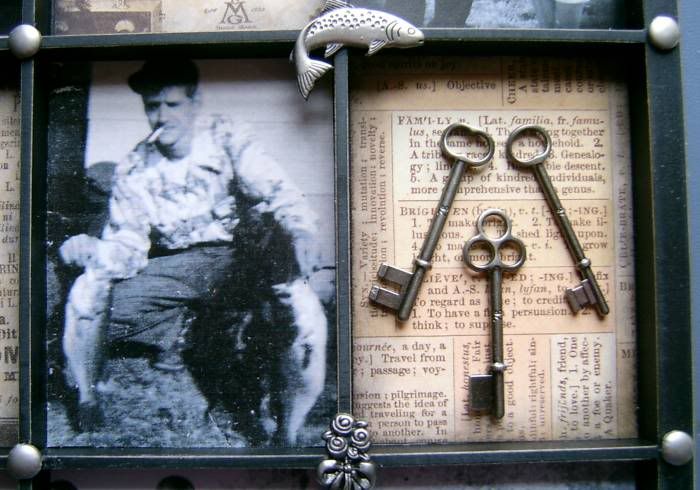
My dad love the outdoors and respected nature. He loved the sport of fishing but if he kept a catch it was on our dinner table. (The metal fish is a Karen Foster charm but we cut the charm ring off of it and smoothed out the burrs on it. Those are still available. ) There he is, my dad, tall, dark and handsome.
I love the box with the keys in it. My dad didn't throw away anything. This was both a blessing and a curse. These were not his keys but I can't tell you how many keys we found. I laugh and compare my dad to Hagrid from the Harry Potter Series because he was definitely "the keeper of keys."
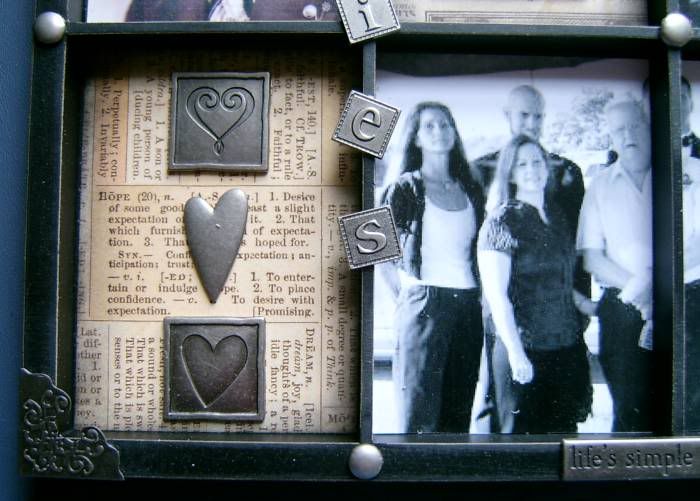
On the bottom rows of frames I used the first box and filled it with hearts because I loved my dad and he loved all of his family. In the definitions behind the hearts is the definition for the word "hope." My dad never lost hope when he was fighting his cancer. He looked to the next day and for the next miracle. Each new day was a mircle for my dad.
The last 3 frames on the bottom row is a family photo, taken at another grandson's (my nephew's) wedding. Like so many families it is hard for everyone to be at one place at the same time, so not all of the family is in the picture, but it was as close as I could get. I sectioned the photo so that it is one continuous photo across the three frames.

As you can see I used other plaques, on the top and bottom of the frame, used metal photo corners on the corners of the frame, used brads as accents, and other metals that pertained to the frames. I used metal letters to spell out the word "Memories" down one of the spines of the frames.
It is my hope that I made a gift that my mom will cherish because it was made with a lot of love and caring attention. I sat and cried everytime I worked on this frame because I miss my dad so much. It is as much a tribute to him as it is a gift for mom. I know how much she misses him because as much as I miss him she must feel it a hundred times more. Even death hasn't detoured their love.
I am hoping that the next time I need a gift for mom that I will be able to do one of these frames with her pictures so that her favorite photos can hang on the wall next to my father's.
It is also my hope that I have inspired you to try something new, trendy or all the rage the next time you need a gift for someone special. These can be made with or without photos and in almost any theme.
Happy Scrappin' ! ! !
Brenda