My Family Scrapbook

Sunday, September 9, 2012

Using The Cricut For Woodworking

Recently I started showing you some of the scroll saw (fret work) pieces that I have made.

This new found love of creating lots of sawdust has sent me on a mission of finding scroll saw patterns. There are patterns all over on the web but the best ones you have to pay for. I do understand that but for right now I am a novice at scrolling and want patterns that look complicated but really aren't and since I am practicing I don't want to have to pay for patterns.

The other thing is that I am in a "Christmas frame of mind" and I have started to make a few gifts for family, friends, and co-workers. My ultimate goal was to make each of the girls I work with something special. Something that not everyone would have. Since they all have their own homes and most love to cook I thought a Trivet would make a nice gift.

With that said this had me thinking of what I already owned that could help me on my quest. I sat for hours looking through my dies and then turned to my Cricut and started looking through the endless booklets to find the perfect pattern. Why stop there, I want each of them to have a unique Trivet.

I found several things in booklets that are able to be cut with the Cricut, scanned into my computer and then printed off so that I can use the printed copy as a scroll saw pattern. I ended up with 14 that I want to make but needed to start with one and then I would expand.

I am sharing the first of what I hope is many Trivet pattens and show you how I changed the pattern slightly to make it easier to cut and more streamline in design. This one comes from the "Ornamental Iron II" Cartridge.
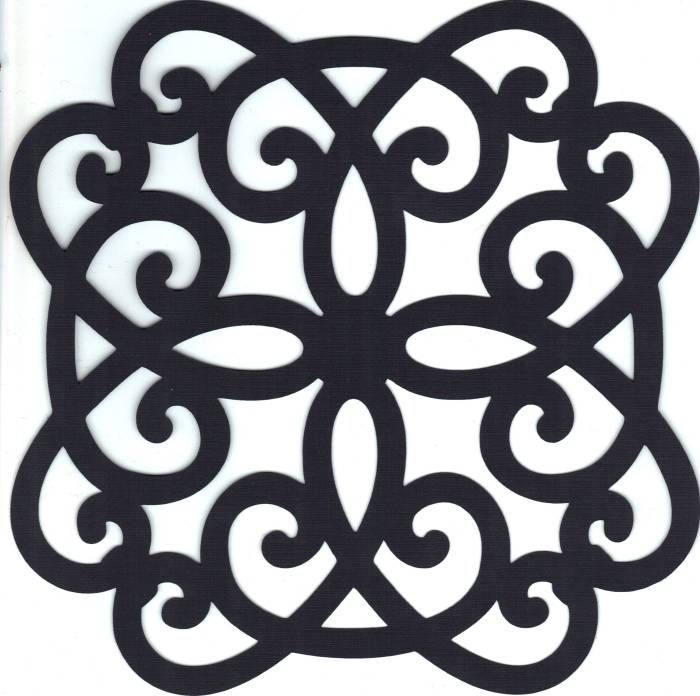


I think it is fine just as it is but because I am just learning to use the scroll saw and the less I a have to turn the wood the easier the pattern is to cut. So I wanted to alter the pattern and get rid of the "nubs" off each corner. Here is a picture of what I am referring to (the area the red arrows are pointing to.)
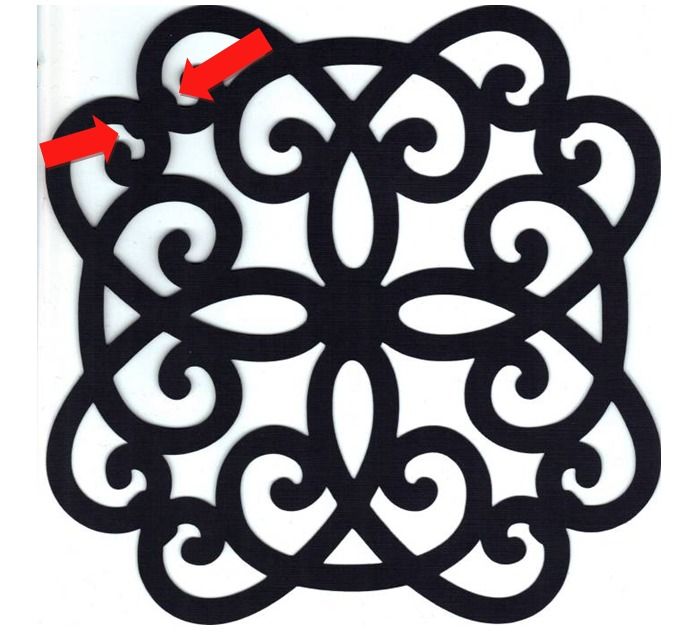


That pattern became this:
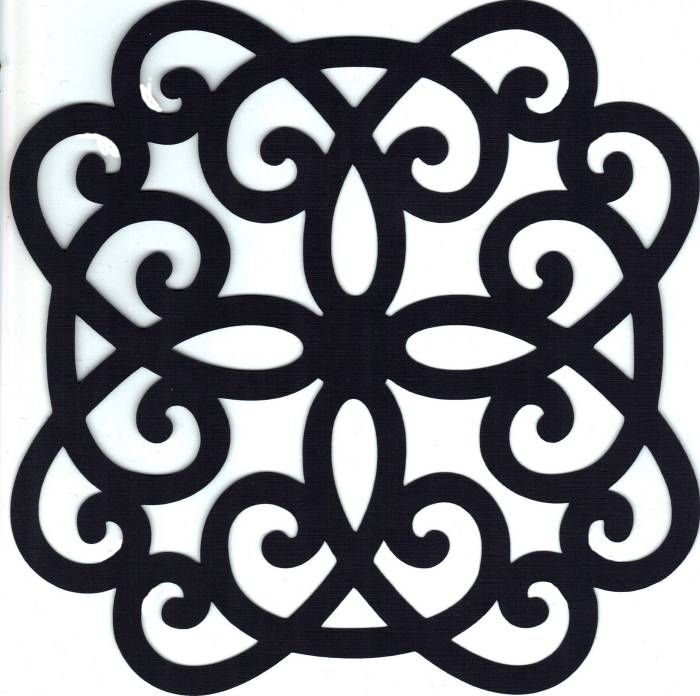


Then several hour later that pattern became this Trivet:
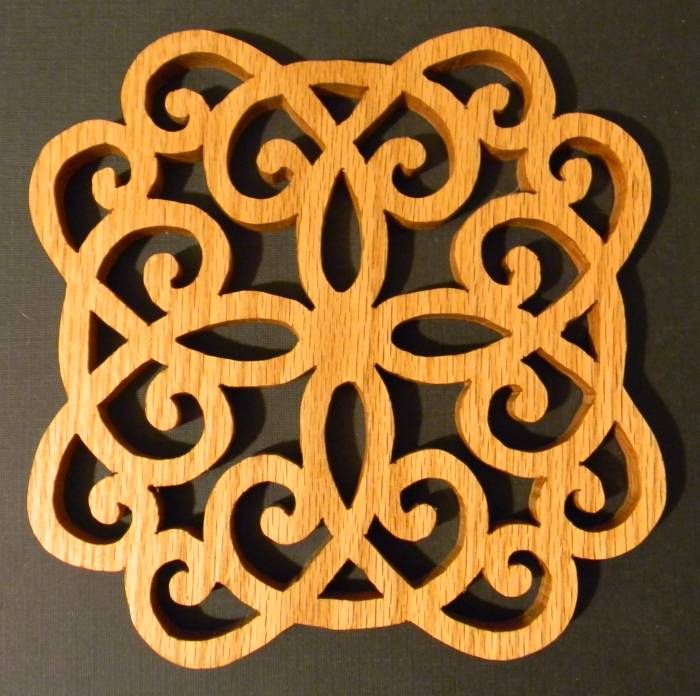


I learned a lot through this process and I am finding that this time consuming form of art is a lot of fun. I am hooked!

The entire time that I was cutting that Trivet I was thinking of my dad and wondered how many hours it took him to cut out the beautiful clocks and shelves that my mom still has. He loved his woodworking.

I am going to be working on more of these Trivets as well as more Christmas ornaments as time goes on. I have so many things that I want to try.

So many times we have more stored treasures than what we know. Today my treasure is my Cricut and those cartridges that these works of art are taken from and can be converted into other forms rather than only use them for scrapbooking or card making.

With that said I say "Happy Woodworking   ! ! !"

Brenda

Monday, September 3, 2012

Thank You Notes

I love Pinterest.  It is not a secret!  I find so many things there that I want to try.  Most of the time the items that I pin just sit there on a board but they are there if I ever want to make them.

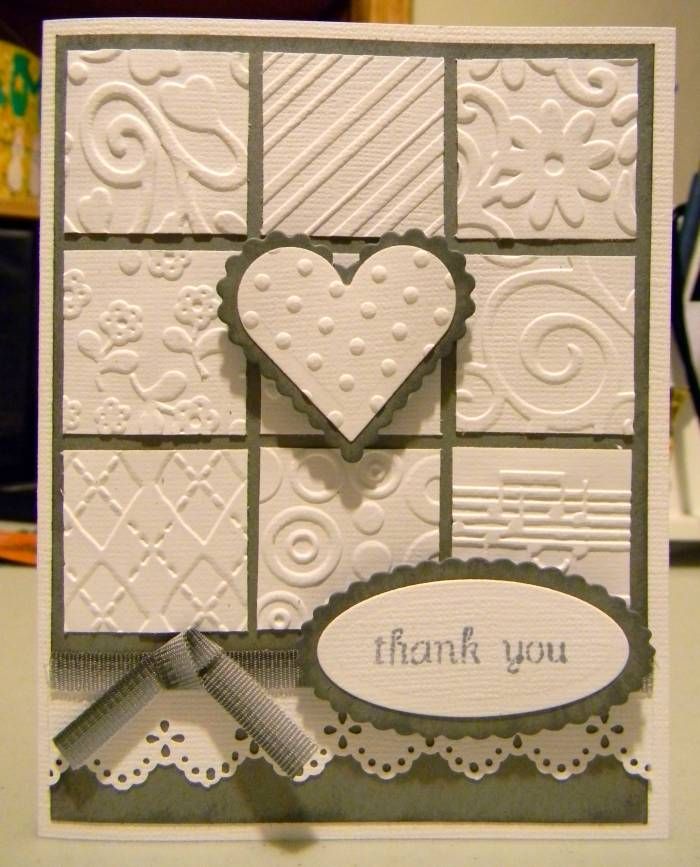
My mom called the other day and needed some Thank You notes.  So to the crafting table and to my computer I went.  I found this amazing card.

What is funny is that when I started backtracking to go to the person's blog to see how they made it, because let's face it, you want to see instructions if they are there, she said that she has also scrap lifted the idea.  Here is a link to "Created By Rosie" to see the card that caught my eye....  but then also please go to "Stamping Sanity,"  to see the card that inspired Rosie in the first place.  It is amazing the difference just changing the color makes.

It was Rosie's card that really caught my attention but wanted to give both girls a shout out because I thought that was fair.  So mine is actually a scrap lift of a scrap lift.  I have to be honest as well.  I also was going to change the colors but the colors I tried just didn't pop.  So I went back to Rosie's white on mid-grey.

I used the embossing folders I had on hand and scraps in my bin.  I also used the dies that I had so the shapes are a little different but it has the same feel to it.

Here is my scrap lift:


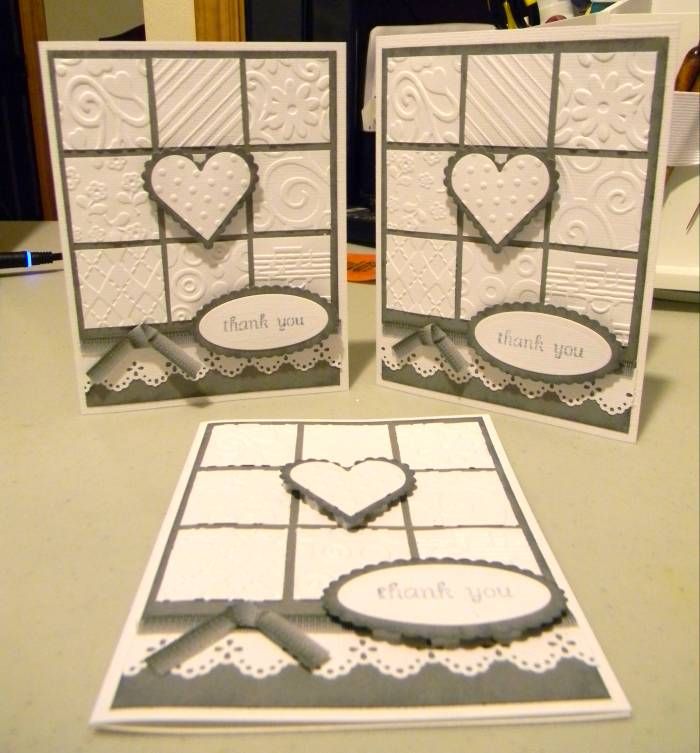
And since I made multiple cards one more picture:

 
My mom liked the cards and I would have made her a few extra but I ran out of ribbon and scraps of white and grey.

I wonder how many times a scrap lift is scrap lifted and how it changes through those lifts how the changes occur.  Scrap lifting evolution?  

For me too this card was all about finding a way to use those scraps and what I had on hand, which sometimes is a challenge in itself.

Happy Scrappin' ! ! !

Brenda

Monday, August 27, 2012

Santa Ornament

Well it is official, I am addicted to my scroll saw.  I am having so much fun with it.

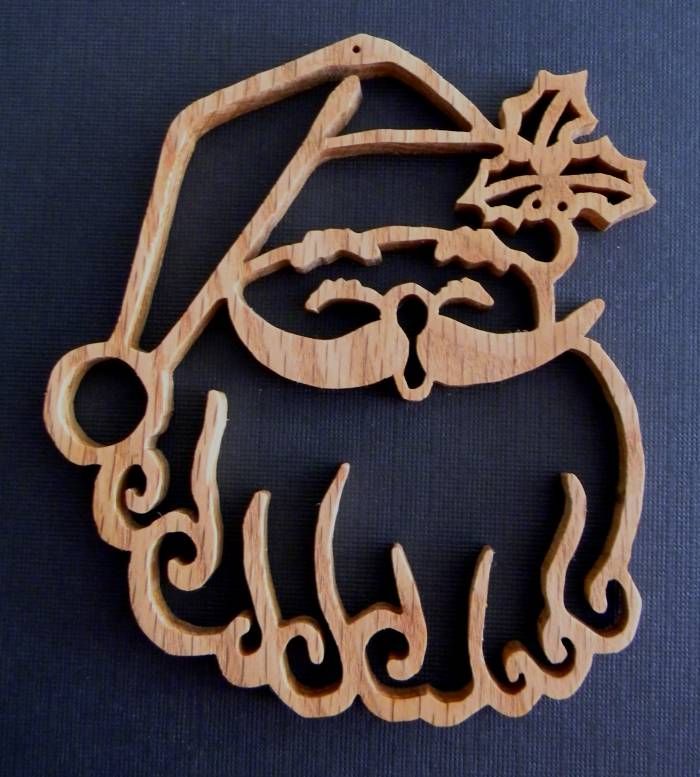
Here is my newest cut. 


I tried a technique, and put two pieces of wood together and cut both at the same time.  It worked without an issue. 

This is cut from 1/4" Red Oak, and the finished piece is about 4 1/2 inches long and 3 1/2 inches wide.  I found the pattern in a book called, "Scroll Saw Christmas Ornaments," by Tom Zieg. 

There will be more ornaments being cut.  I am practicing with these before I move to bigger things. 

Happy Crafting ! ! !

Brenda

Wednesday, August 22, 2012

Scroll Saw - My First Finished Piece

This is a little off the wall but I am going to share it with you anyway... I am all about showing a failure every now and again.

Although this is not an epic failure as it is a first try but I think it could have been better.

I will start with a little background. My dad who passed away 3 years ago loved to do wood working. I grew up watching him make sawdust.   The man made some of the most amazing things. His projects ranged from cabinets to children's toys. If he saw it made from wood he could duplicate it.

Recently I acquired a scroll saw and decided that I wanted to learn how to use it. Those who know me know that I jump in with both feet and no life preserver! I go for the gusto.

This was no different and I learned a lot in doing this first project. The main thing I learned is that I should have practiced with simple shapes first and then moved to something a little more complicated. BUT that wasn't what I did.... I started with the smallest thing I could find and got a bit frustrated. From that frustration came questions and answers from a pro. I stumbled on Steve's Blog and immediately started emailing him. He was so nice.  (Steve's site is also where you can download the program to make your own key chain!)

Everyone told me that I was very bold in starting with something so small and to start with fret work right out of the gate is unheard of.

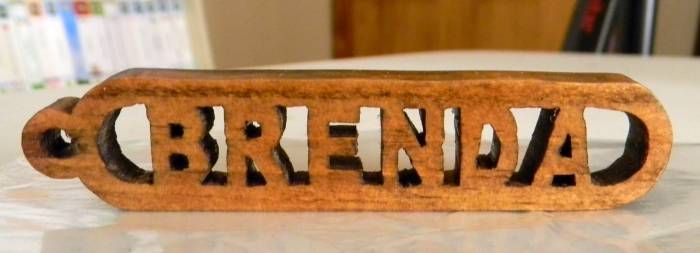
Here is my first piece:


It is a key chain.  It is very rough but I learned so much!  Although I will not use this one I will still keep it to be able to see my progress.

I will post more wood projects as I complete them.  Right now I am working on other projects.

I just wanted to share what I had been up to.

Happy Crafting ! ! !

Brenda

Monday, August 13, 2012

Gift Giving Idea - Handmade Photo Drink Coasters

A friend reminded me that Christmas is just around the corner. Oh don't remind me! Then I think it is time to start thinking about those hand-made gifts and the nudge to not wait too long to start making them.

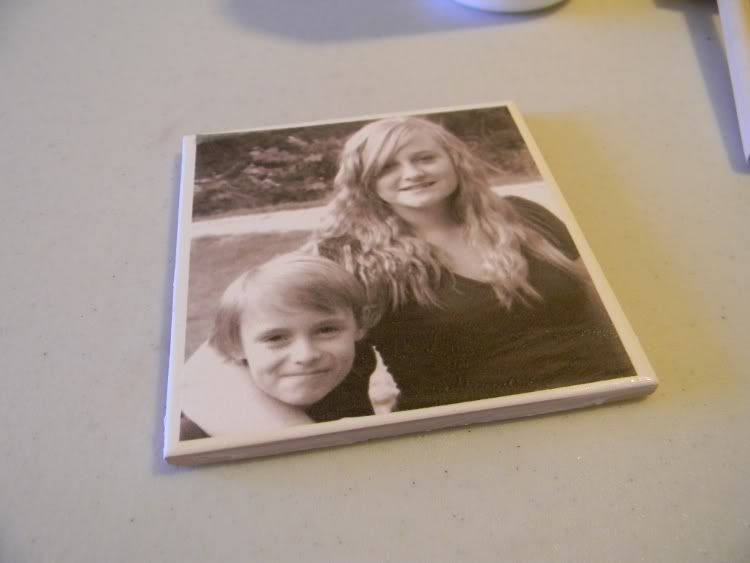
Last year I made many of my gifts. This is one I made for my husband's brother and sister. I really enjoyed making these drink coasters and decided to put together a how-to photo tutorial for the coasters. (My videos are not coming out like I want them to right now and this is the next best thing.)

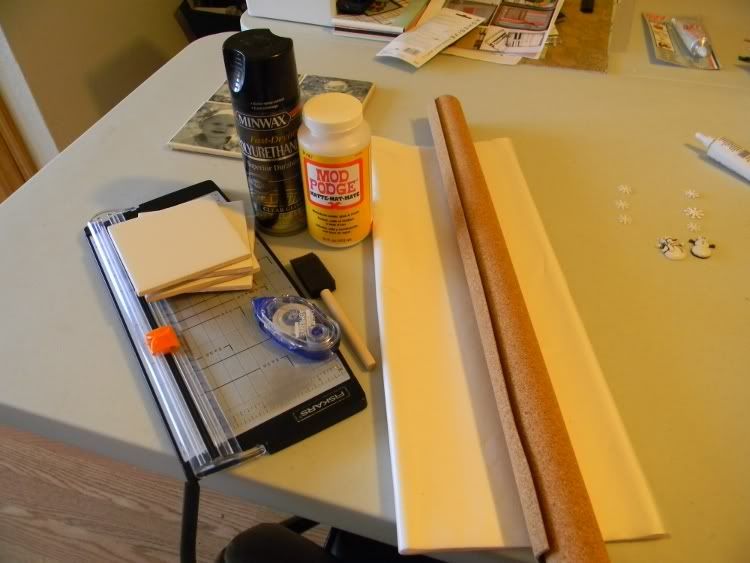
Supplies:

4" x 4" Ceramic Tiles (Lowe's or Home Depot)
Photos (Saved on a computer)
A Paper Cutter (Scissors are fine)
An Adhesive (I used Tombow)
Sponge Paint Brushes (I only used one)
A Good Spray Polyurethane (I used Minwax Fast Dry Clear Gloss)
Mod Podge
White Tissue Paper (The kind you use to wrap gifts)
Regular White Computer Paper
A Sheet of Thin Cork (I also found this at Lowe's)
Beacon 527 Glue (Or similar glue)


Step 1: Prepare your photos. Select photos that can be cropped into a square. You may leave them in color or convert them to grey scale. If you are doing your coasters as a set, select photos with a common theme or like colors or chose the grey scale option so that they do not clash.

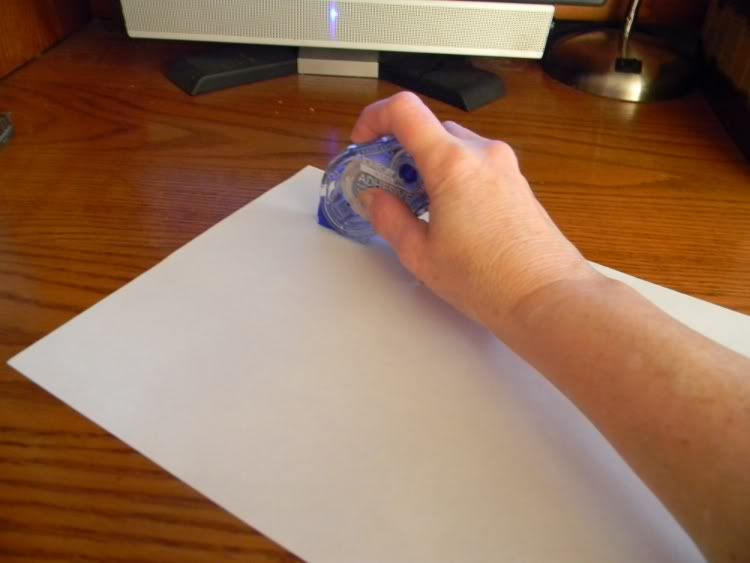
Step 2: To print your photos on the tissue paper you will need to run adhesive on the edges of a sheet of computer paper.


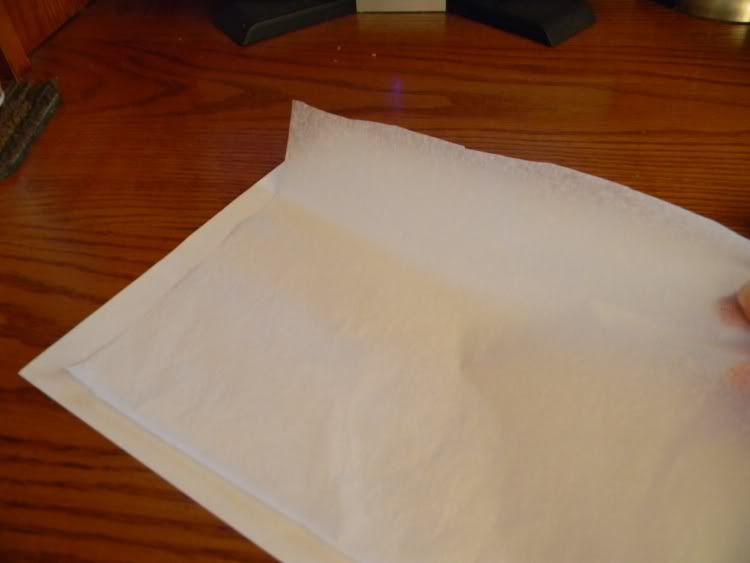
Carefully lay a piece of tissue paper on the sheet of the computer paper, being careful that there are no wrinkles.


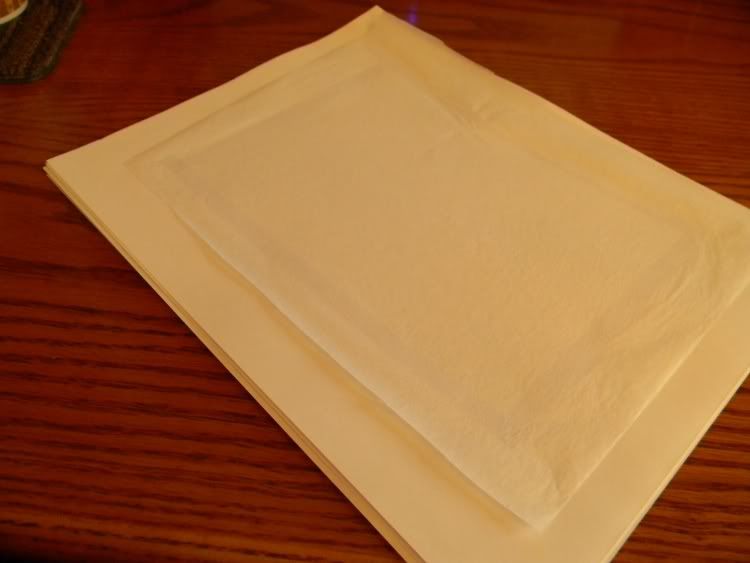
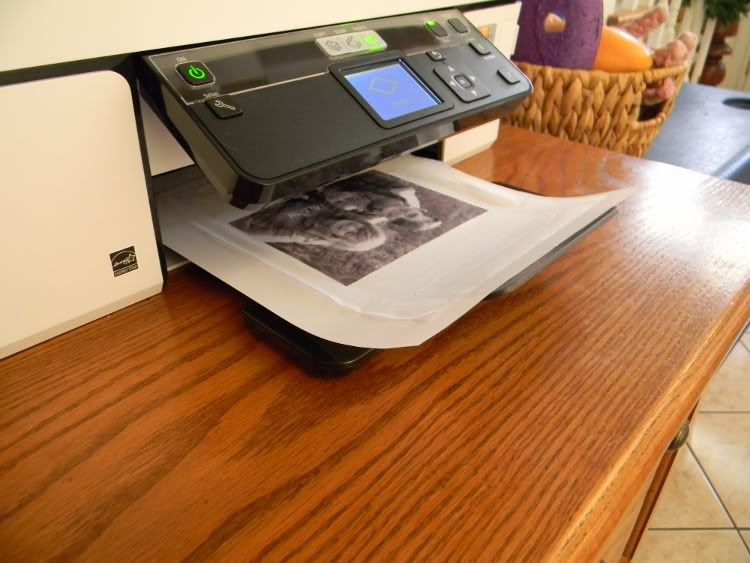
Step 3: Print the photo onto the tissue paper just by running the tissue mounted computer paper through the printer. Most printers will detect the paper and adjust the amount of ink used. In the event that you have to chose, the 600 setting is about right. I sized the photo so that it was just a little larger than the tile and I printed only one photo per sheet, and printed it centered on the page.


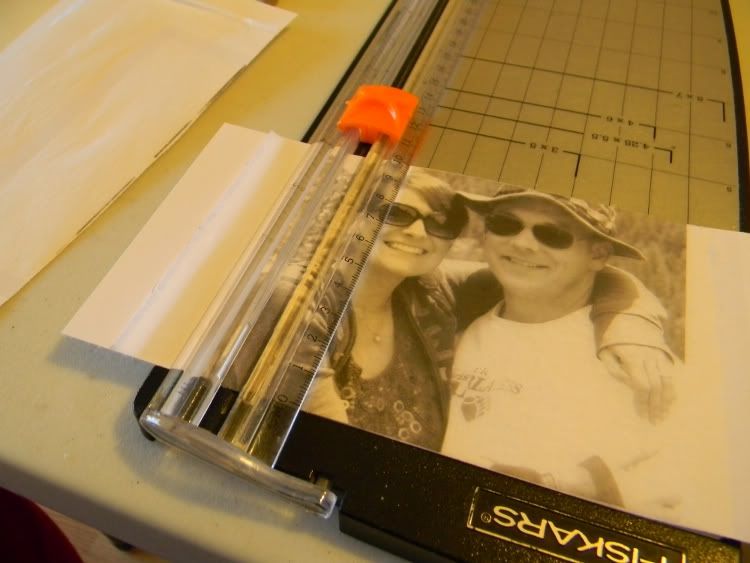
Step 4: I took the entire sheet and put it into my cutter. Holding it still in the cutter and cutting through both the sheet of computer paper and the tissue paper at the same time. This does three things; gives you stability when cutting, prevents the tissue from ripping and cuts away the adhesive leaving you with a perfect cut tissue photo. When you cut this you should cut it so it is just a little smaller than you 4 x 4 tile.


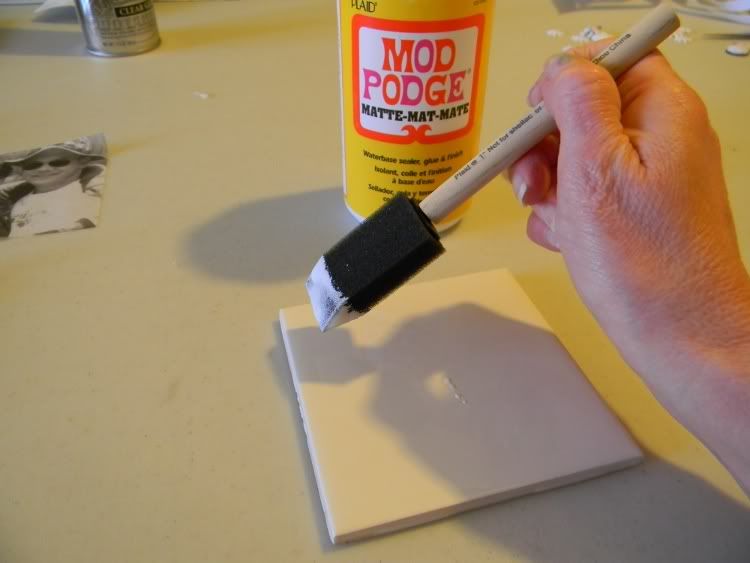
Step 5: Apply a thin, even layer of Mod Podge to the clean 4 x 4 tile. It is very important that this is a thin layer. If you apply the Mod Podge to heavy, it will take forever to dry and could create wrinkles later.


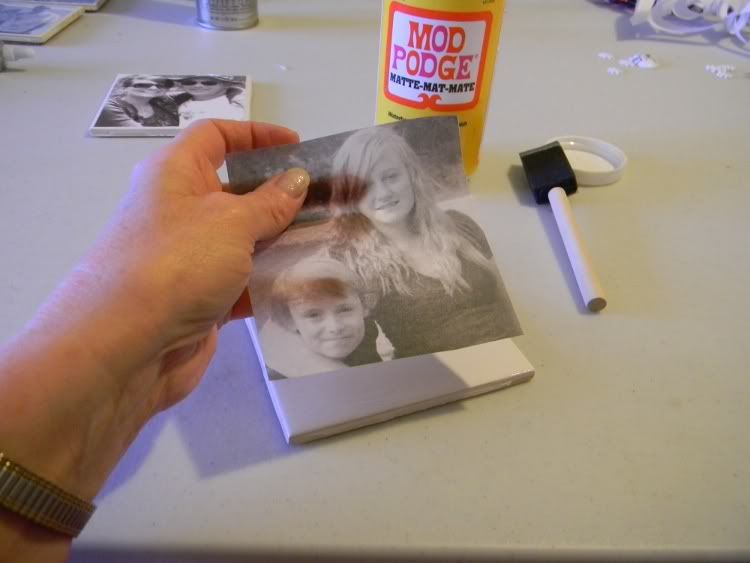
Step 6: Carefully place just the tissue layer photo over the wet layer of Mod Podge on the 4 x 4 tile.


Something that I learned through trial and error is that if you start at one edge of the photo and roll the photo onto the tile you will reduce wrinkles and avoid air bubbles from occurring. Then set the tiles aside to thoroughly dry. This is important. I do several tiles at a time so that I can keep working while the others are drying. BUT they should be completely dry even if these means you have to walk away for a couple of hours.


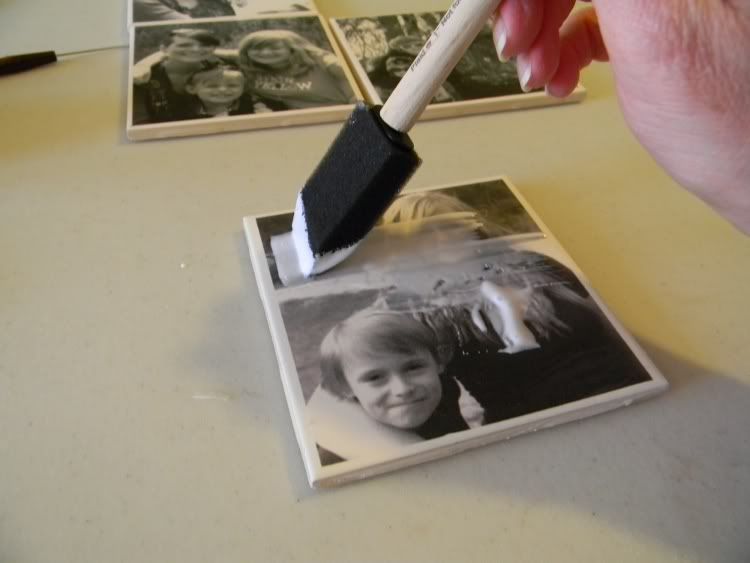
Step 7: After you are sure that the tissue layer is dry, apply 2 or 3 thin layers of Mod Podge over the tissue. If you have rushed and the tissue photo is not dry you risk tearing the photo and it is very had to repair. Should that happen I suggest that you scrap the tissue photo off with a razor, clean the tile with soap and water, and start over. I use a sponge brush for applying all layers of the Mod Podge. I brush up and down the first layer, and go the opposite direct for each additional layer. Don't be concerned that the Mod Podge is white, it will always dry clear. Allow to completely dry in between coats.


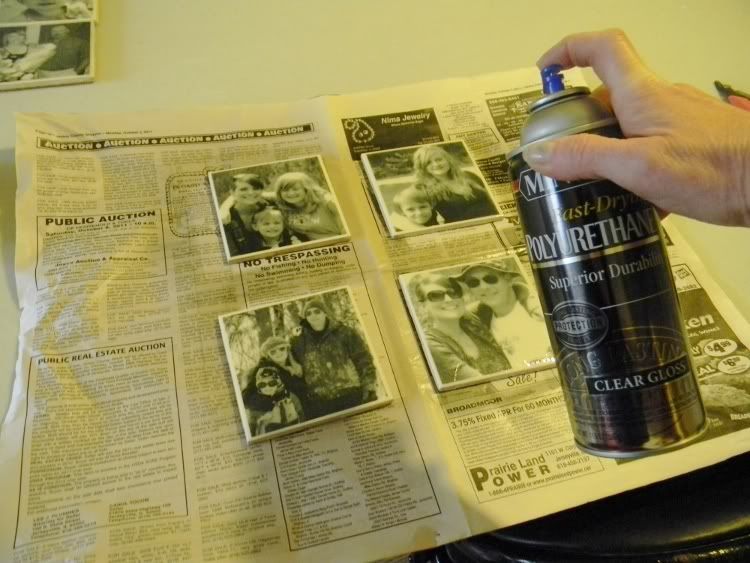
Step 8: After allowing the Mod Podge to completely dry, spay the tiles with at least two coats of a good polyurethane of your choice. DO NOT USE ACRYLIC POLYURETHANE. It was my experience that it will not dry over the Mod Podge. Allow the poly to completely dry. (I can't stress enough how important it is to allow everything to completely dry. Take your time and do not rush each step.)


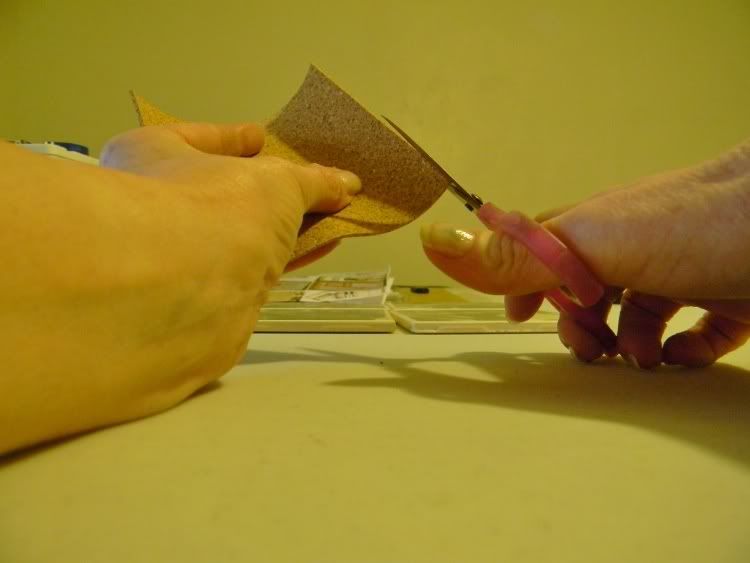
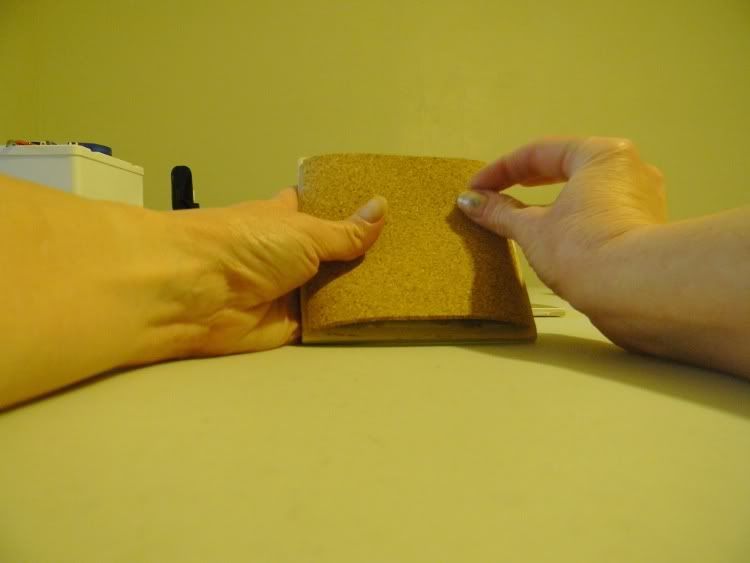
Step 9: Cut the thin cork just slightly smaller than the 4 x 4 tile.


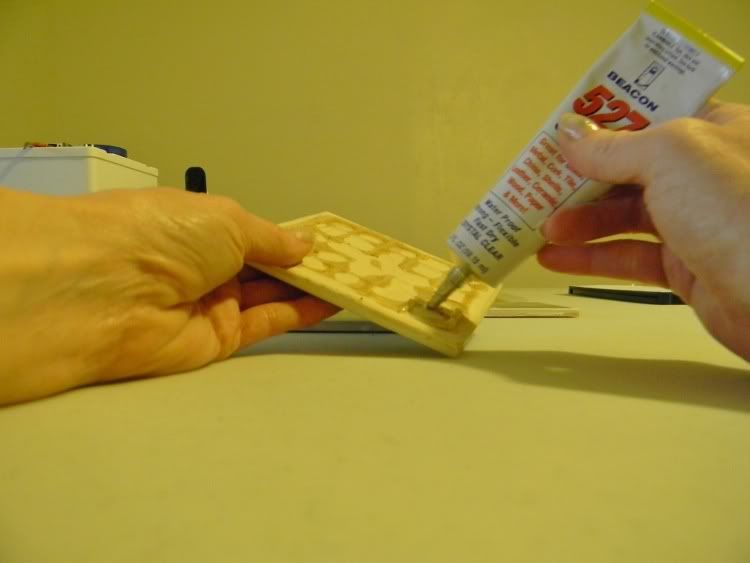
Step 10: Using Beacon 527 Glue, adhere the cork to the bottom of each tile.


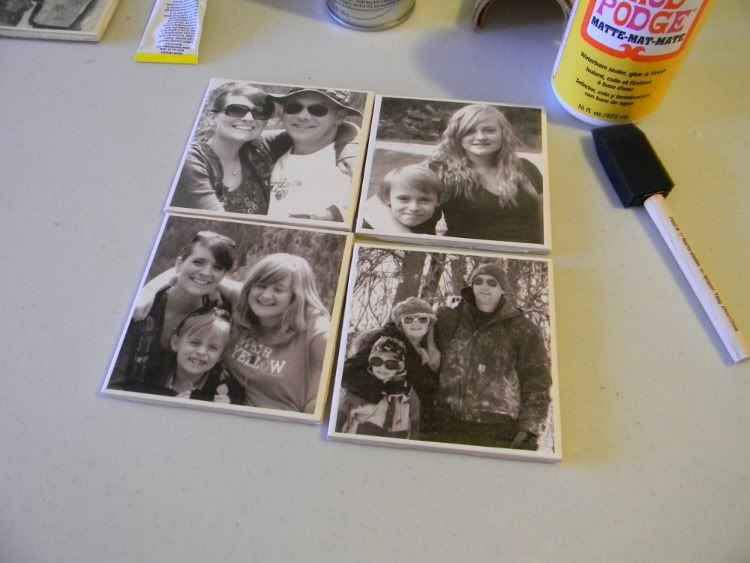
Allow everything to dry and here is the finished coasters.


This sounds like a lot of steps and a lot of work but they are well worth the time and effort. These not only make beautiful functional gifts but they can also be added to a ribbon to make an awesome wall hanging.

To me this is a mixture of crafting and scrapping. So today I say to you as I tell you that hand-made gifts are the best gifts I also say:

Happy Scrap-Crafting ! ! !

Brenda

Monday, August 6, 2012

Another Book Mark

When I start thinking about something it is hard to turn off the mind when I have more than one idea for a project. That was the case when I was asked to join a book mark swap. When my ideas came together I could not resist making more than one book mark for my swap friends.

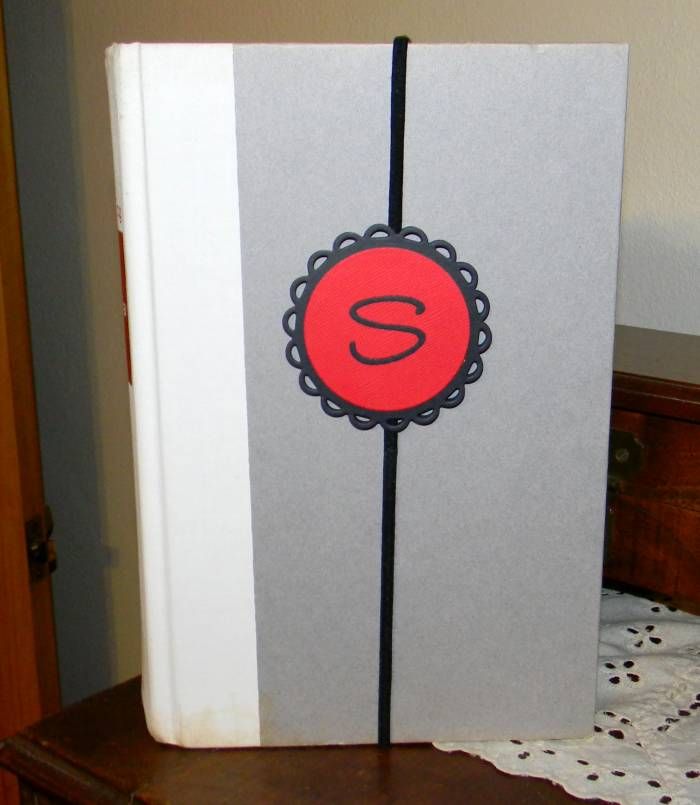
This is the second idea for the book marks that I had. I have a store bought book mark similar to this that I stole the idea from. Although the idea is not original it was harder to get it to come together than the other book mark because I had to have a continuous elastic band to make it work.

When school shopping with my daughter I ran across a set of headbands (one set was round and the other set was flat.) These headbands were 6 in a set for only one dollar. I also had a choice between a multicolored set or black. I decided to buy the flat set in black and give this a try because a dollar wasn't that much if the idea did not work and my daughter would probably use the headbands.

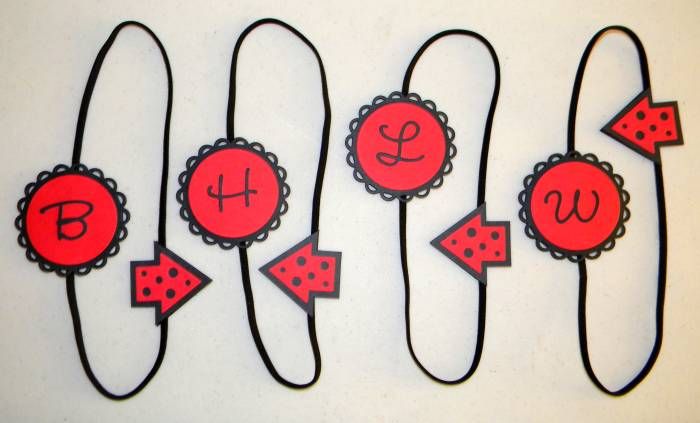
Luckily the idea worked and came together easily. Here is a picture of the finished book marks.


Each of the medallion is double sided and one side has the person's first name initial and on the reverse side is their last name initial. The medallion moves on the elastic band so that the reader can adjust it to where they want it positioned on the outside of the book.


In order for the medallion to be able to be moved I cut thick chipboard the same size as the medallion and then cut it in half and trimmed about 1/8 of an inch off each side of the center cut and separated the two pieces on the back of the medallion, inserted the elastic band and then put an identical die cut on the back.

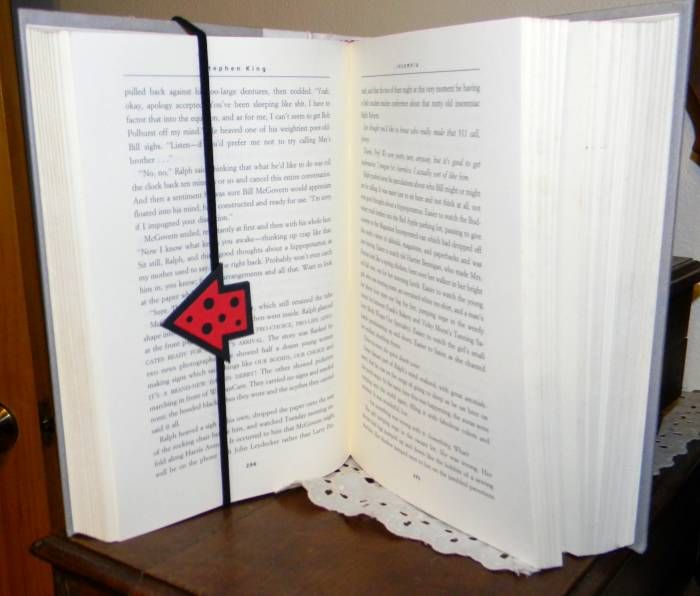
After that was completed I could have stopped but I love the idea of a place marker for the inside of the book. What a better marker than an arrow die cut. This too is double sided and I made it the same on both sides. I used the same technique of chip board, cut it the same shape as the arrow, cut it in half so that the arrow would be horizontal but would move vertically.


This arrow can be pointed at either page and can be moved up or down the entire length of the page in order to point to the area where you would like to start reading the page.

What I love most about this type of book mark is that it generally doesn't slip off the book. The thing that I least liked about this one is it works best with thicker books. I am searching for these elastic bands in a smaller size... maybe ones for babies if there is such a thing out there.

If you still read books made of paper (and I am one of those people who have not bought an electronic reading tool yet) these are wonderful book marks and the possibilities are endless!

Happy Scrappin' ! ! !

Brenda

Monday, July 30, 2012

Video For The Book Marks

I have tried several times to complete a how-to video for the magnetic slider book marks.  I am not sure why but when I tape the video and play it back on my computer it is fine BUT when I upload it to You-Tube in order to  share it with all of you it is very jerky.

I have no idea why it is doing this or how to fix it.

I have made other videos and shared them with no problem, just a week ago I made one on making faux chipboard and pop dots and didn't have these issues.

I am putting the video on the back burner and moving on to something else.  I have another book mark to share with you and it will be posted in a few days.

I apologize for promising something that I can't deliver at this time.  When we get the kinks worked out I will try again.

Brenda

Wednesday, July 25, 2012

Magnetic Slider Book Mark


I recently joined a swap for book marks and I wanted the one that I was sending to be very special. I love to read and one of my biggest pet peeves is losing my place and a book mark that comes out of the book easily. Another thing that really bothers me is not being able to remember which paragraph I left off at. I am one of those people who reads a little here and there and sometimes I have to stop before I get to the end of a chapter. So I guess, I wanted a book mark that was also a place marker.

I was on a mission!

I wasn't sure how to put all of my ideas into one element. I literally went to bed one night thinking about this project and dreamed about who and what to make. I woke thinking I already have the concept down in a spinner card that I had made previously.

If you missed that post here is the LINK to the Spinner Card.

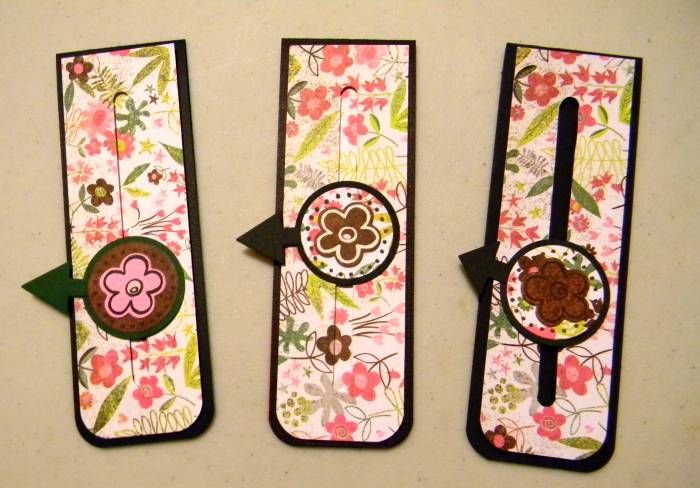
I took the concept of the spinner and altered it slightly. The book marks made from that concept are less bulking and lighter. There is no pennies in these and they do not "spin" but rather slide.

Here is the first picture. The one on the far left is my prototype. I wanted to make sure that this idea would work before I put too much effort into it. The basic idea worked but I did not like the look of the channel showing so I created a back by lining up the repeating pattern of the paper and putting a backer down before I mounted the slider. That is shown in the two book marks to the right.


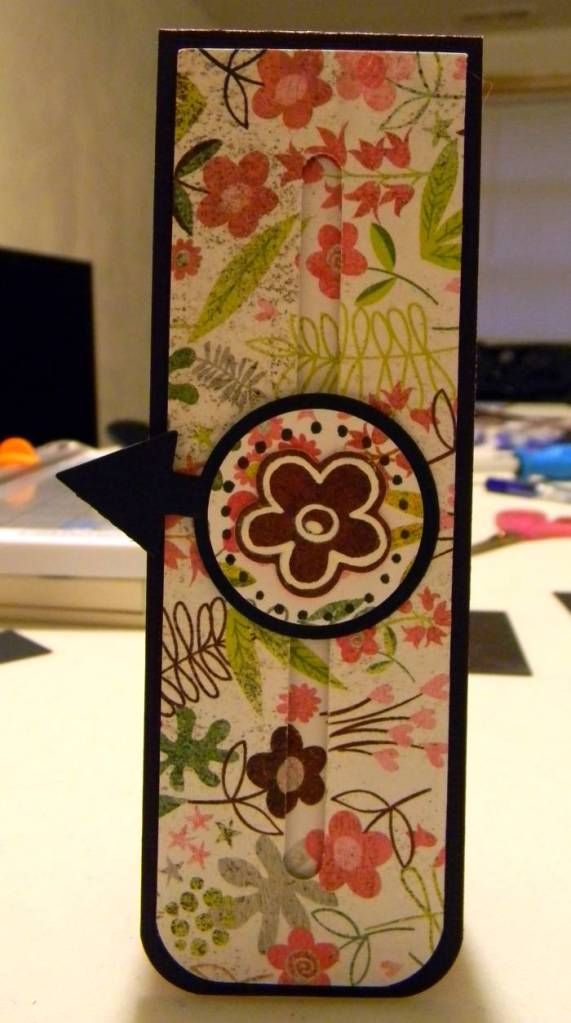
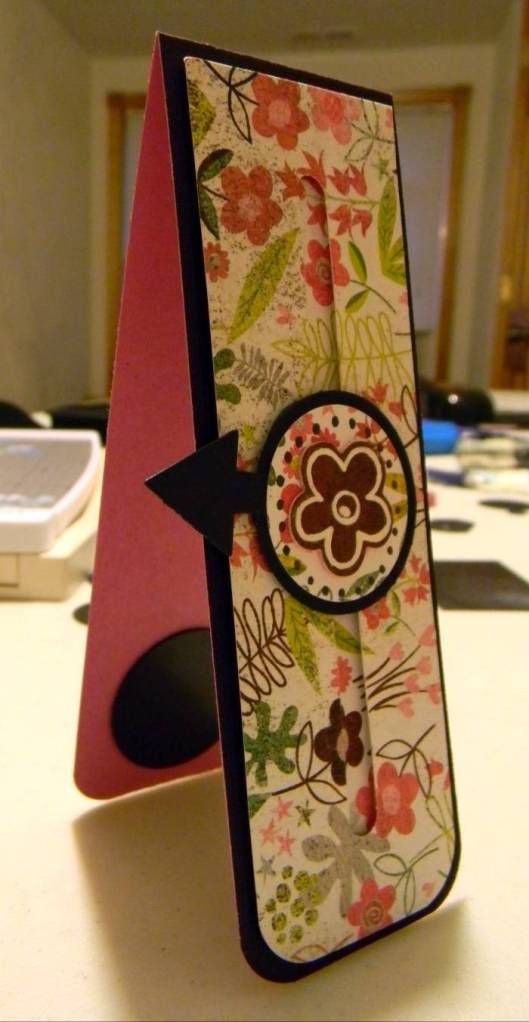
 Here is a close up of a finished book mark:


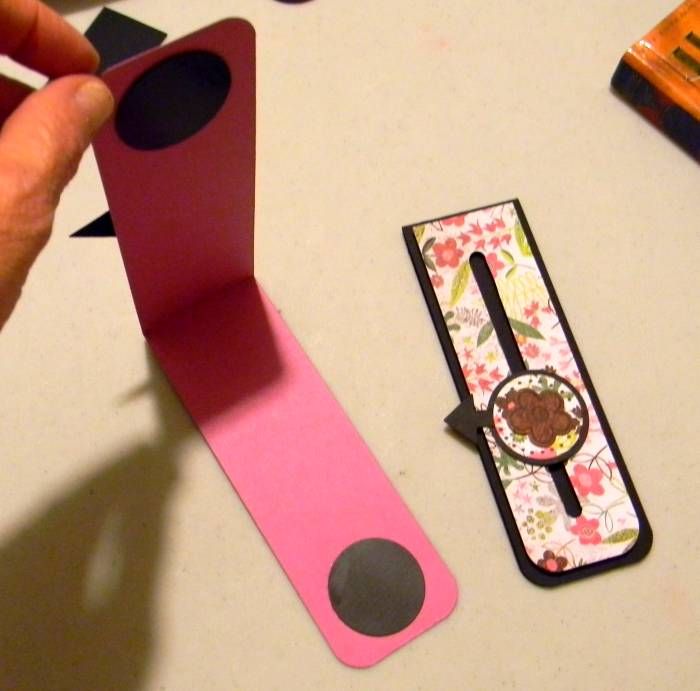
 This is made of a 12" x 2" strip of cardstock, scored and folded in half so that the book mark goes over the top of a page or two. To keep the book mark from flying off the page I used magnets so that it grabs the page and stays put. These magnets are made from recycled magnetic business cards that I receive in the mail. I simply peel off the business card and reuse the sheet of magnet.


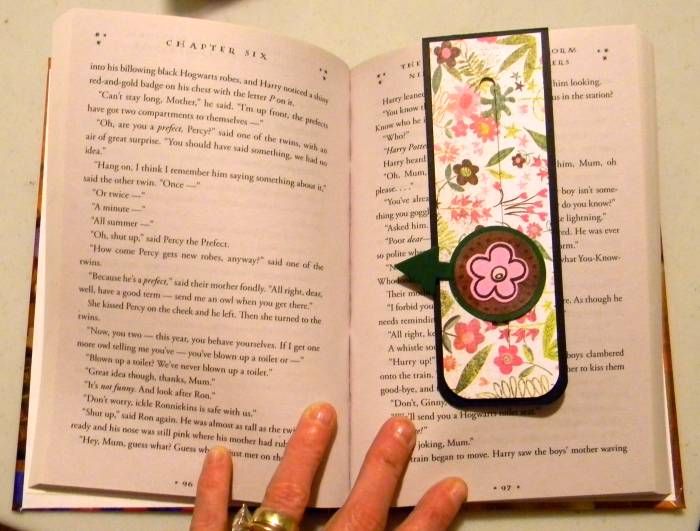
Here is the finished book mark on my book.  The medallion slides up and down and it also spins in order that you can point the arrow to the paragraph where you are ready to start reading when you open your book.


 I think I can say mission accomplished!

Now if you would like to know how I made this book mark, stay tuned as I am working on a video for it.

Don't stop there, use the technique to make a card or something move on a scrapbook lay-out.


Happy Scrappin' ! ! !

Brenda

Monday, July 23, 2012

A New Video And A Project On The Horizon

I am trying to get back into the swing of things. Trying to scrapbook, crochet, and do various crafts. I used to make videos when I was on the design teams but I've long since given up that crazy paced life where I must craft.

To be honest with you when I had to make things using specific products and had deadlines the whole process became tedious and mechanical. I just wasn't enjoying myself anymore. I think that was why I took a step back from all of it.

Now on my days off I craft or scrapbook because I want to and it is back to being fun!

In the mist of everything I still belong to one message board that was formed because of scrapbooking but now it is just five very close friends with the scrapbooking thread in common. One of the girls, Rainy, began to post challenges in order to get us back to our scrap tables. It worked!

Rainy has also asked us to join in a small swap. I used to love swaps but didn't have time for those either. Life is just too busy, or at least we make it that way.

I sat down to try to work on an idea for a swap and it turned into making how-to videos again. So here is a how to video on making Faux Chipboard and Pop-Dots. This is a technique that I used to make my swap items.


 It is fun to make a how-to video when you do not have to sell something or told what has to be used, said, or included and excluded. 

I am planning on another video soon showing how to make what we swapped. I hope this video helps others save a little money and realize that you don't have to travel to scrap stores to get those pricey things. You can raise something off the page without those spongy little dots or make paper stiff like cardboard just by layering it.

Stay tuned because I will be back with another video, it might be another how-to leading up to the swap item or I may just jump to the swap.  Ignore the little flubs and glitches, it has been awhile.  This time you even get to see me.

You never know about me, what I am going to say or do!

Happy Scrappin' ! ! !

Brenda

Monday, July 2, 2012

Not Turning Into A Recipe Blog

There are a million blogs out there that share recipes and I love them. I am not turning into a food blogger but thought once in a while it would be fun to share one of my food items. I spend a lot of time in the kitchen and have a few original recipes that I would put up against some of the best Food Network stars. I do not claim to be a master chef by any means but I enjoy cooking and baking and know my way around the kitchen and have the hips to prove it!

This is a dessert that I love to make that has 4 layers. A little bit of everything that any one might like or love in a dessert.

The first (bottom) layer is a fudge chocolate cake. No secrets here, this is a box cake mix that has been mixed and baked according to the package directions but is baked in a very old pan. To get those pans you had to buy a Duncan Hines Tiarra Cake Kit. I loved those kits. I found an extra set of those in a resale shop recently and bought them. They join my other four sets. They are great pans.

The next layer is a chocolate ganache. Simple terms, melted chocolate and cream. Pour a thin layer in the well of the cake.

Third layer is a mousse. This is the simplest thing to make. One small box of instant pudding, 1 cup of cold milk, mixed well, with one cup of Cool-Whip folded in.

Fourth layer is Cool-Whip.

Photobucket

It is hard to see that ganache layer, but it gives it a rich chocolate boost.

Photobucket

A little slice of heaven if you ask me! If you want to mix this up you can add a teaspoon or two of extract to the vanilla pudding to change the flavor. My favorite there is almond, or you can just get a different flavor pudding. Another thing that can be done, instead of the mousse layer, omit the mousse complete and add a can of your favorite pie filling and top each slice with a dollop of whipped topping.

Photobucket

The possibilities with this simple dessert are endless.

I will be back to the crafting and scrapping ... but today I say Happy Cooking ! ! !

Brenda