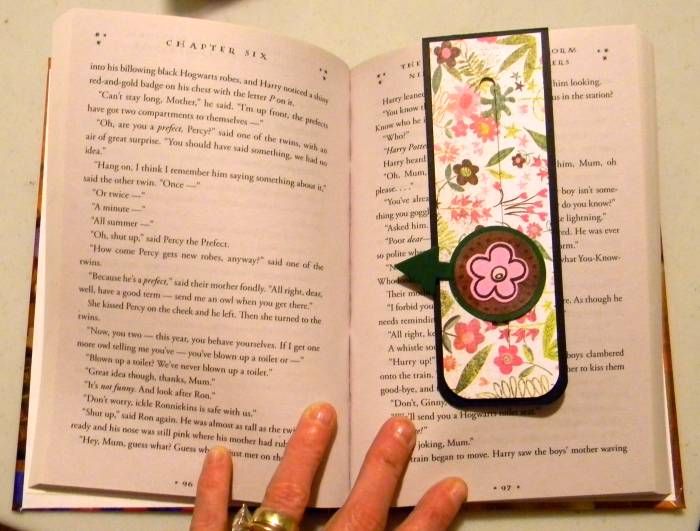
My Family Scrapbook

Monday, August 6, 2012

Another Book Mark

When I start thinking about something it is hard to turn off the mind when I have more than one idea for a project. That was the case when I was asked to join a book mark swap. When my ideas came together I could not resist making more than one book mark for my swap friends.

This is the second idea for the book marks that I had. I have a store bought book mark similar to this that I stole the idea from. Although the idea is not original it was harder to get it to come together than the other book mark because I had to have a continuous elastic band to make it work.

When school shopping with my daughter I ran across a set of headbands (one set was round and the other set was flat.) These headbands were 6 in a set for only one dollar. I also had a choice between a multicolored set or black. I decided to buy the flat set in black and give this a try because a dollar wasn't that much if the idea did not work and my daughter would probably use the headbands.

Luckily the idea worked and came together easily. Here is a picture of the finished book marks.
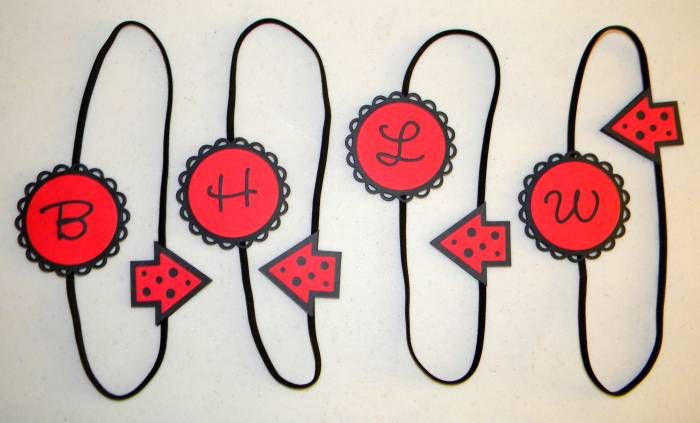


Each of the medallion is double sided and one side has the person's first name initial and on the reverse side is their last name initial. The medallion moves on the elastic band so that the reader can adjust it to where they want it positioned on the outside of the book.
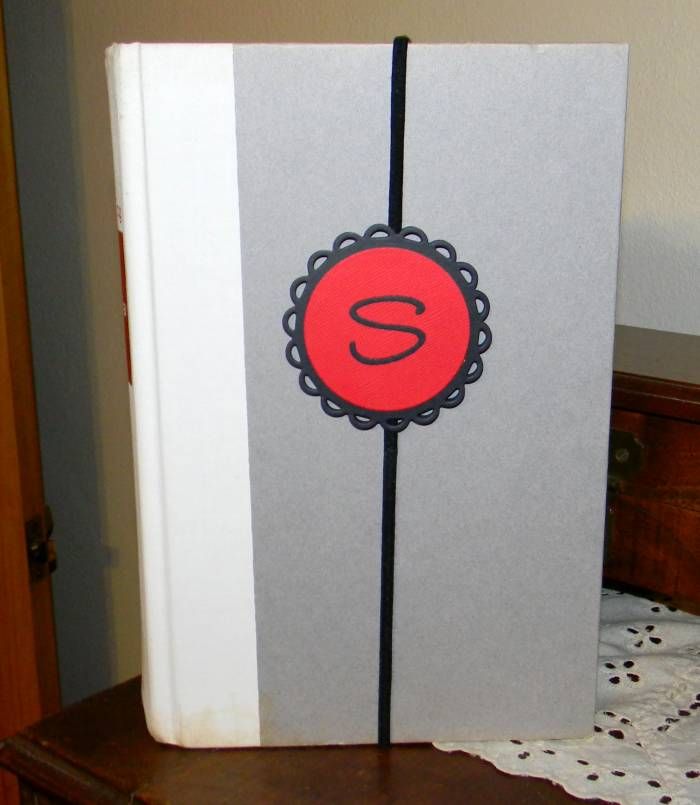


In order for the medallion to be able to be moved I cut thick chipboard the same size as the medallion and then cut it in half and trimmed about 1/8 of an inch off each side of the center cut and separated the two pieces on the back of the medallion, inserted the elastic band and then put an identical die cut on the back.

After that was completed I could have stopped but I love the idea of a place marker for the inside of the book. What a better marker than an arrow die cut. This too is double sided and I made it the same on both sides. I used the same technique of chip board, cut it the same shape as the arrow, cut it in half so that the arrow would be horizontal but would move vertically.
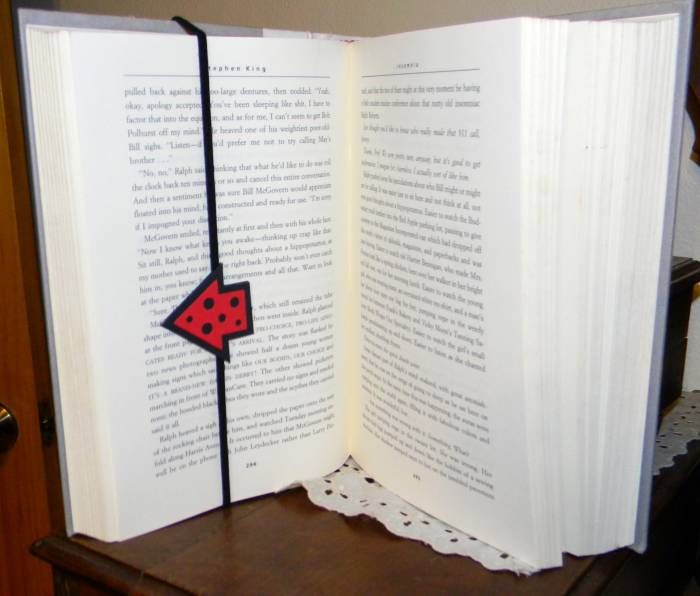


This arrow can be pointed at either page and can be moved up or down the entire length of the page in order to point to the area where you would like to start reading the page.

What I love most about this type of book mark is that it generally doesn't slip off the book. The thing that I least liked about this one is it works best with thicker books. I am searching for these elastic bands in a smaller size... maybe ones for babies if there is such a thing out there.

If you still read books made of paper (and I am one of those people who have not bought an electronic reading tool yet) these are wonderful book marks and the possibilities are endless!

Happy Scrappin' ! ! !

Brenda

Monday, July 30, 2012

Video For The Book Marks

I have tried several times to complete a how-to video for the magnetic slider book marks.  I am not sure why but when I tape the video and play it back on my computer it is fine BUT when I upload it to You-Tube in order to  share it with all of you it is very jerky.

I have no idea why it is doing this or how to fix it.

I have made other videos and shared them with no problem, just a week ago I made one on making faux chipboard and pop dots and didn't have these issues.

I am putting the video on the back burner and moving on to something else.  I have another book mark to share with you and it will be posted in a few days.

I apologize for promising something that I can't deliver at this time.  When we get the kinks worked out I will try again.

Brenda

Wednesday, July 25, 2012

Magnetic Slider Book Mark


I recently joined a swap for book marks and I wanted the one that I was sending to be very special. I love to read and one of my biggest pet peeves is losing my place and a book mark that comes out of the book easily. Another thing that really bothers me is not being able to remember which paragraph I left off at. I am one of those people who reads a little here and there and sometimes I have to stop before I get to the end of a chapter. So I guess, I wanted a book mark that was also a place marker.

I was on a mission!

I wasn't sure how to put all of my ideas into one element. I literally went to bed one night thinking about this project and dreamed about who and what to make. I woke thinking I already have the concept down in a spinner card that I had made previously.

If you missed that post here is the LINK to the Spinner Card.

I took the concept of the spinner and altered it slightly. The book marks made from that concept are less bulking and lighter. There is no pennies in these and they do not "spin" but rather slide.

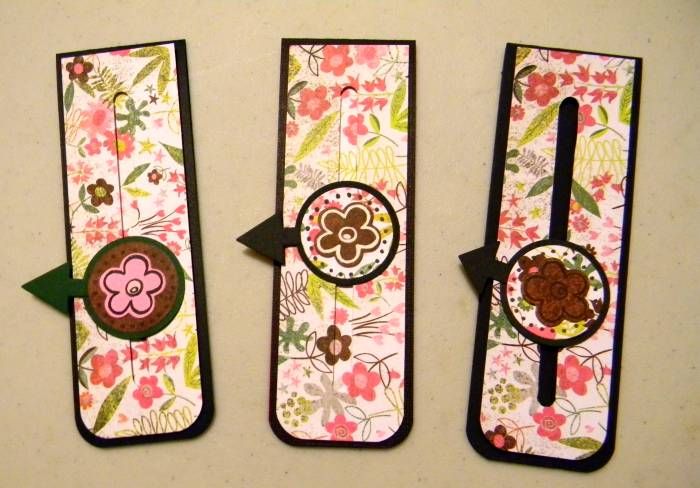
Here is the first picture. The one on the far left is my prototype. I wanted to make sure that this idea would work before I put too much effort into it. The basic idea worked but I did not like the look of the channel showing so I created a back by lining up the repeating pattern of the paper and putting a backer down before I mounted the slider. That is shown in the two book marks to the right.


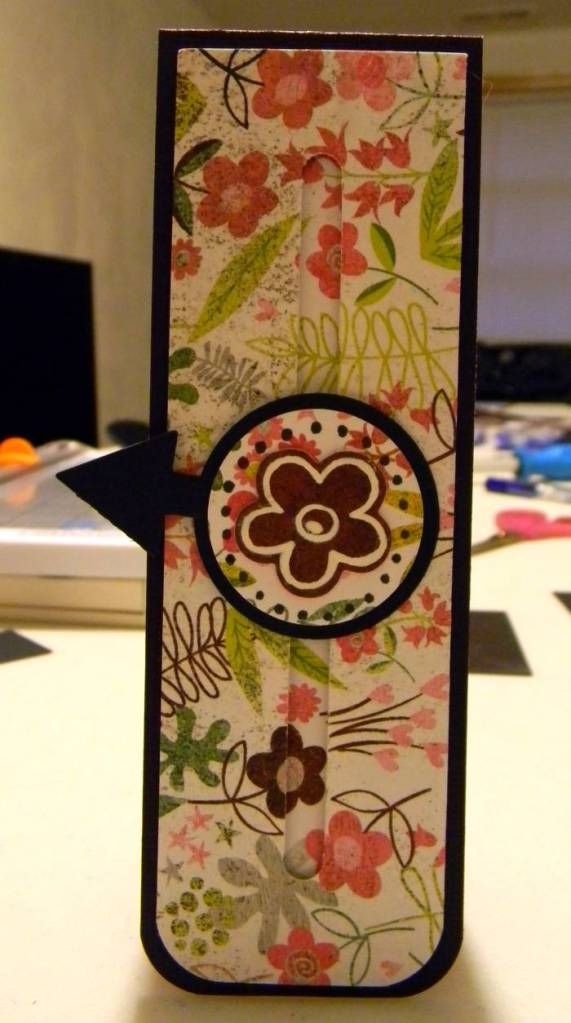
 Here is a close up of a finished book mark:


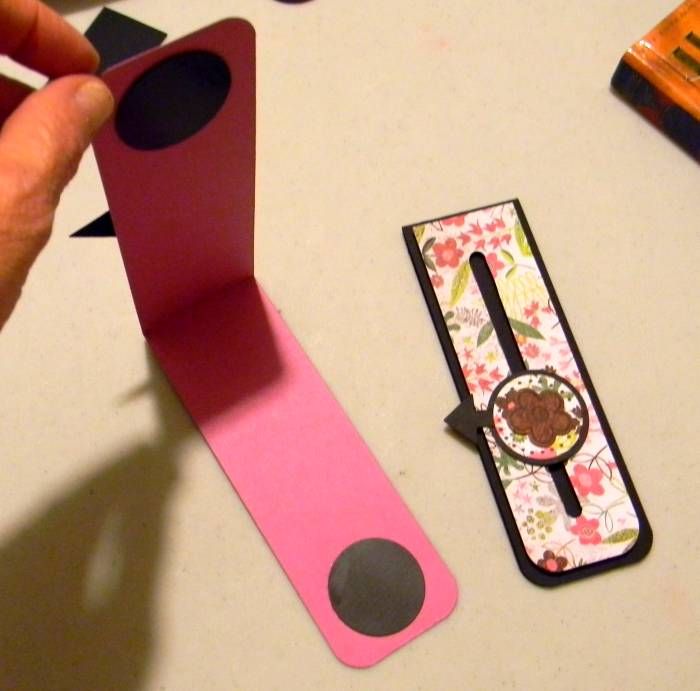
 This is made of a 12" x 2" strip of cardstock, scored and folded in half so that the book mark goes over the top of a page or two. To keep the book mark from flying off the page I used magnets so that it grabs the page and stays put. These magnets are made from recycled magnetic business cards that I receive in the mail. I simply peel off the business card and reuse the sheet of magnet.


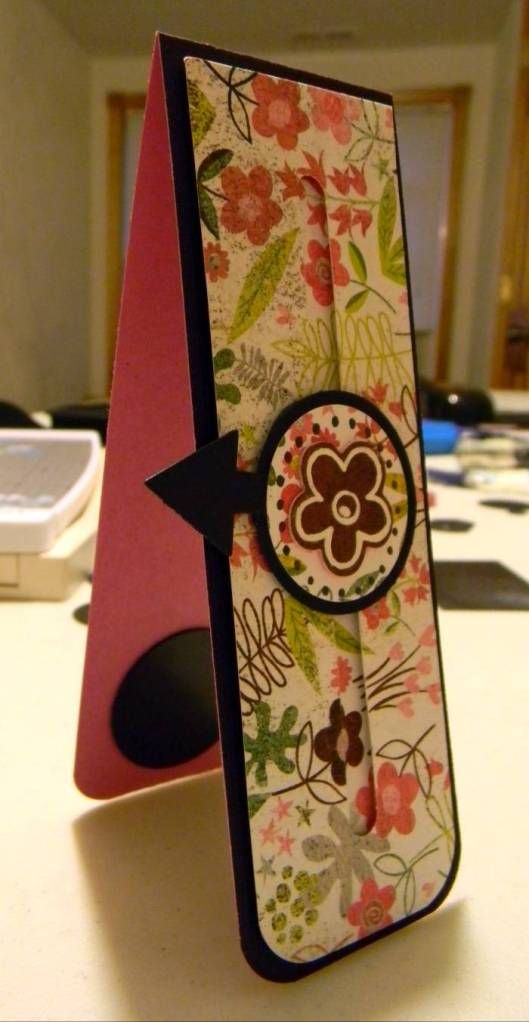
Here is the finished book mark on my book.  The medallion slides up and down and it also spins in order that you can point the arrow to the paragraph where you are ready to start reading when you open your book.


 I think I can say mission accomplished!

Now if you would like to know how I made this book mark, stay tuned as I am working on a video for it.

Don't stop there, use the technique to make a card or something move on a scrapbook lay-out.


Happy Scrappin' ! ! !

Brenda

Monday, July 23, 2012

A New Video And A Project On The Horizon

I am trying to get back into the swing of things. Trying to scrapbook, crochet, and do various crafts. I used to make videos when I was on the design teams but I've long since given up that crazy paced life where I must craft.

To be honest with you when I had to make things using specific products and had deadlines the whole process became tedious and mechanical. I just wasn't enjoying myself anymore. I think that was why I took a step back from all of it.

Now on my days off I craft or scrapbook because I want to and it is back to being fun!

In the mist of everything I still belong to one message board that was formed because of scrapbooking but now it is just five very close friends with the scrapbooking thread in common. One of the girls, Rainy, began to post challenges in order to get us back to our scrap tables. It worked!

Rainy has also asked us to join in a small swap. I used to love swaps but didn't have time for those either. Life is just too busy, or at least we make it that way.

I sat down to try to work on an idea for a swap and it turned into making how-to videos again. So here is a how to video on making Faux Chipboard and Pop-Dots. This is a technique that I used to make my swap items.


 It is fun to make a how-to video when you do not have to sell something or told what has to be used, said, or included and excluded. 

I am planning on another video soon showing how to make what we swapped. I hope this video helps others save a little money and realize that you don't have to travel to scrap stores to get those pricey things. You can raise something off the page without those spongy little dots or make paper stiff like cardboard just by layering it.

Stay tuned because I will be back with another video, it might be another how-to leading up to the swap item or I may just jump to the swap.  Ignore the little flubs and glitches, it has been awhile.  This time you even get to see me.

You never know about me, what I am going to say or do!

Happy Scrappin' ! ! !

Brenda

Monday, July 2, 2012

Not Turning Into A Recipe Blog

There are a million blogs out there that share recipes and I love them. I am not turning into a food blogger but thought once in a while it would be fun to share one of my food items. I spend a lot of time in the kitchen and have a few original recipes that I would put up against some of the best Food Network stars. I do not claim to be a master chef by any means but I enjoy cooking and baking and know my way around the kitchen and have the hips to prove it!

This is a dessert that I love to make that has 4 layers. A little bit of everything that any one might like or love in a dessert.

The first (bottom) layer is a fudge chocolate cake. No secrets here, this is a box cake mix that has been mixed and baked according to the package directions but is baked in a very old pan. To get those pans you had to buy a Duncan Hines Tiarra Cake Kit. I loved those kits. I found an extra set of those in a resale shop recently and bought them. They join my other four sets. They are great pans.

The next layer is a chocolate ganache. Simple terms, melted chocolate and cream. Pour a thin layer in the well of the cake.

Third layer is a mousse. This is the simplest thing to make. One small box of instant pudding, 1 cup of cold milk, mixed well, with one cup of Cool-Whip folded in.

Fourth layer is Cool-Whip.

Photobucket

It is hard to see that ganache layer, but it gives it a rich chocolate boost.

Photobucket

A little slice of heaven if you ask me! If you want to mix this up you can add a teaspoon or two of extract to the vanilla pudding to change the flavor. My favorite there is almond, or you can just get a different flavor pudding. Another thing that can be done, instead of the mousse layer, omit the mousse complete and add a can of your favorite pie filling and top each slice with a dollop of whipped topping.

Photobucket

The possibilities with this simple dessert are endless.

I will be back to the crafting and scrapping ... but today I say Happy Cooking ! ! !

Brenda

Friday, June 29, 2012

Crocheted Baby Booties for the Triplets

It is TRIPLETS!!!!

There is excitement stirring in our family. My son is an uncle three times over! This is the first time that Phillip is an uncle and wow, his brother-in-law and sister-in-law have been truly blessed. Two boys and one girl join the Perry family.

Kim, my daughter-in-law was wanting to make booties for each baby but she could not find a pattern that she could follow, so I helped her out and made 3 sets of booties.

This pattern was handed down to me by mother. I think she got it out of a 1960's Work Basket Magazine. The pattern is timeless.

Photobucket

Photobucket

The babies have already wore these and I was surprised when they fit. Each baby weighed less than four pounds.

I am happy to report than all of the babies are finally home and doing well.

Happy Crafting ! ! !

Brenda

Wednesday, June 27, 2012

Hand-Made Soap Dispenser


Sometimes it is nice to get away from the normal scrapbooking and do a different craft.

For the longest time, I have been admiring the hand-made soap dispensers and wanted to make one of these but didn't know where to start. I found myself searching for a set of good directions. I found those on the Internet through Pinterest.

Then I was on a mission to find a jelly jar or other small canning jar for the project. That mission was completed when I was at our dollar store.

Here is my finished bathroom soap dispenser.

Photobucket

I have to say, that I am very pleased with the finished project and the soap is much cheaper for a refill!

If there is something that you want to make, search the Internet for the directions and give a new craft a try. Nothing ventured, nothing gained.

Happy Crafting ! ! !

Brenda

Monday, June 25, 2012

Birthday Banner

One more Birthday project and then it is time to move on to something else.

Banners have become the "in" thing to have at every event. I would think a birthday party would come to mind as the first thing I would make a banner for but any party or celebration event is fair game.

I was approached by a friend asking me to make her a birthday party banner for her grand-daughter's 3rd birthday. So I started asking questions such as theme and color scheme. When she said bright bold colors and a farm theme I thought boy not girl but then she told me an endearing story about her grand-daughter making the farm animals sounds and other stories I could not say no to making it or to the theme.

Then the hard part came. Have you looked for farm animal papers and cardstocks. They just are not out here AND when you do find them they were the wrong colors. So I bought what I could find and the rest was done with the Cricut Machine, dies, and bright colored cardstock.

Having never made a banner I had to figure out how to put it all together so that it would last through a party! I found examples where crafters used clothes pins, staples, glue or brads to hold the pennants to rope, chain, or ribbon. I ended up getting out my sewing machine and sewing the paper pennants to a bright colored grosgrain ribbon that matched one of my colors of cardstock.

My friend loved the banner! Here are several pictures of my finished project:

Photobucket

Photobucket

Photobucket

Photobucket

Photobucket

Photobucket

Try something new and different with your scrap supplies.... they aren't just for lay-outs or card making.

Happy Scrappin' ! ! !

Brenda

Friday, June 22, 2012

Time Is Getting Away - Birthday Time

Where does the time go? I had very good intentions of being a better blogger but life always seems to get in the way. Working full time, having a teenage daughter who is very active, trying to keep up with housework, pets, cooking, laundry, and making sure the grocery shopping is done is more than twp full time jobs and then when I try to add in crafting or scrapbooking the world gets a little fuzzy.

So I will make it brief and post a quick birthday card today. This is a way to use scraps and extra findings such as buttons. I also used an old Boss Kut die for the 'Happy Birthday.' I always forget that I have those dies.

Photobucket

I will try to be better about posting.

Happy Scrappin'

Brenda

Friday, March 2, 2012

Right Now It Is All About Birthdays

The next few posts will be all about birthdays. My daughter just celebrated her 17th birthday a few days ago. Wow, that just doesn't seem possible. How do you celebrate birthdays?

We have a laid back approach around our house. I try to make them special. The birthday girl gets to pick the dinner menu... and of course lets me know what she wants to celebrate the day with... cake, pie, or other special decadent treat. Every year it is something different for her.

With my son who will be 32 years old this May it is always a home-made ice cream cake. My husband on the other hand doesn't really care.

There is always a gift. This year Bree wants money so that she can go clothes shopping. Oh that universal gift that is always the right size and color!

I also try to make a special card but sometimes I get scraper's block and need a little help. There are millions of ideas for cards out there on the net. Use those resources to grab and idea to make your own. Change the card or outright scrap lift it.

I have always been told that imitation is the best form of flattery. I have to admit that I am always flattered when someone likes something that I have made that they want to make one like it and personally I don't care if they change it or not.

Here I've taken someone else's idea and used what I had on hand to make it. So even though the original idea for the face of the card is not my own it doesn't look like the original. Very few of my scrap-lifted idea do. I also took components from the face of the card to jazz up the inside because let's face it the inside of the card is as important as the outside. The inside of the card is not part of the scrap-lift.

This is the front of the card:


And this is the inside of the card:


I used the same colors, same papers, same embossing, but took those elements to the inside.

Don't just stop with the outside of the card... make the inside just as special.

Happy Scrappin' ! ! !

Brenda