My Family Scrapbook

Thursday, March 17, 2011

Top Of The Morning To You ! ! !

Happy St. Patrick's Day.

Yesterday I posted small gifts that I gave to my CCD/PSR students.... and today it is a card for a dear friend.

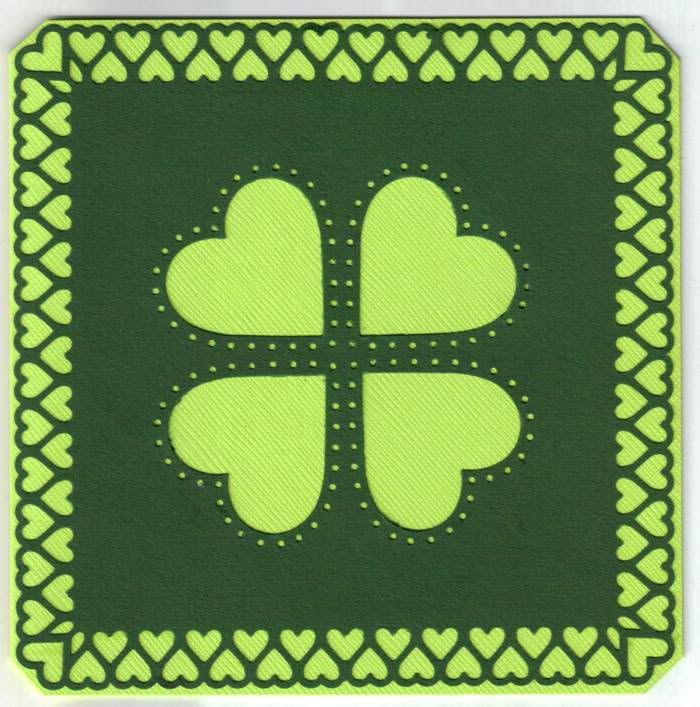
I received a couple of Martha Stewart punches which I had to use immediately. I LOVE punches and I LOVE anything with hearts so these were two-fold for me. I had received an email back in October from another blog that I subscribe to.... Capadia Designs. Ever since her post I've watched for these punches.

When I got them just 3 days ago I quickly made duplicates of the cards she created and then thought that I had to find another use for those punches. That "Punch All Over The Page Punch" had me intrigued. The design I had in my mind was for a shamrock and I tried several times to line up the small holes and punch them so that a single set of holes was between the hearts but because the large heart has a slight curve it wasn't happening so I re-thought the way I was trying to do this. Then with a graph drawn on the back side of the cardstock and careful alignment I was able to punch 4 hearts to represent my shamrock.

Here is the front of my card:


I was very pleased with my St. Patrick's Day card for my Irish friends. Inside the card I used a Celtic Font and wrote, " Lucky To Have You As My Friend." They should receive their cards today in the mail.

I am sure that I will find many uses for these punches (both sets) and that many of my fellow scrapbookers will help me out and I hope that I inspired just one of you.

Happy Scrappin' ! ! !

Brenda

Wednesday, March 16, 2011

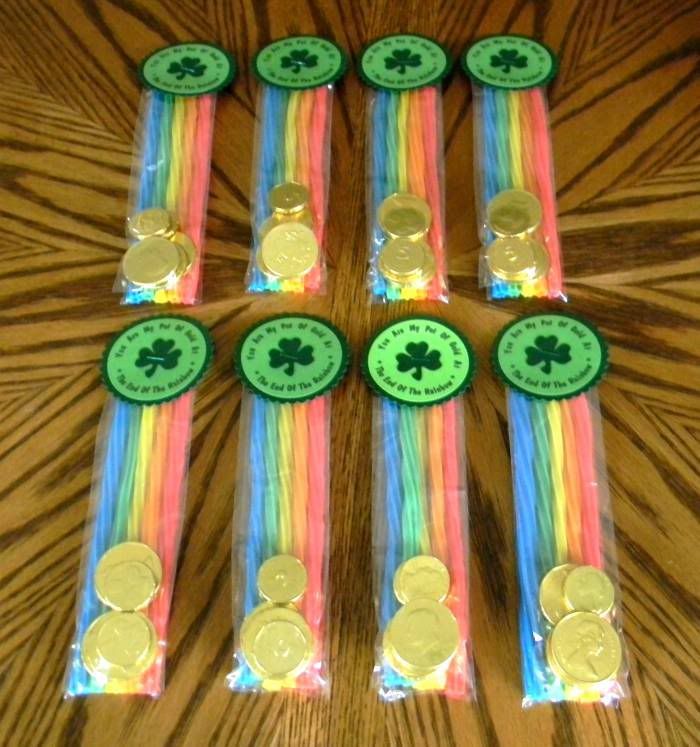
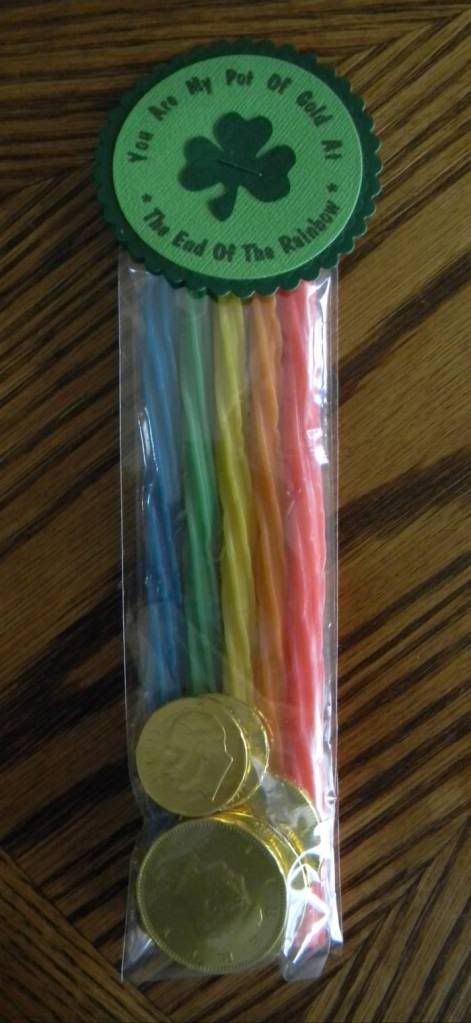
St. Patty's Day Gifts

I try to give my CCD/PSR Students a little gift for each holiday that involves one of our Catholic Saints in addition to those religious holidays such as Christmas and Easter.

This holiday is a little bit more special to me since I have that Irish Heritage as well.

I can't take credit for the original idea on this little gift but I did make my own topper. Here is a link to the original St. Patty's Day Gift. She offers a printable topper if you are in a rush and don't want to think of one of your own.

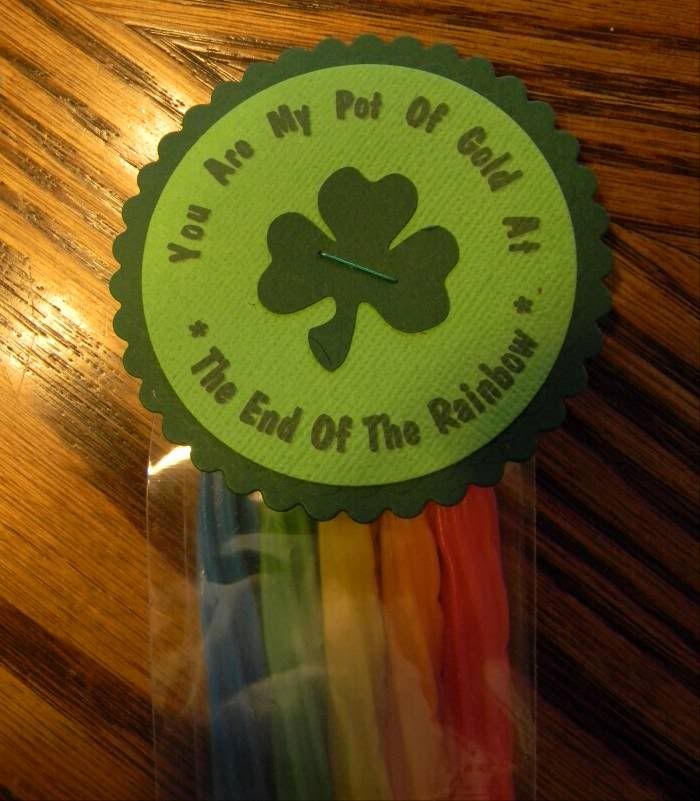
I used Wilton Pretzel bags as she suggested but I used two bags putting the licorice in one bag and the chocolate coins in the second and then layered the bags. I used a Spellbinder Scalloped Circle and a Spellbinder Circle to make my topper. I printed her saying on the circle but instead of making the saying the focal point I put it around the edges in an arc and then my focal point is a Shamrock made with my Cricut and the Paper Doll Dress Up Cartridge.

I found the Rainbow Twizzlers at Wal-Mart and the Chocolate Gold Coins at Wal-Greens.

This project was quick and easy to make and I enjoyed making it.


There is still a little time to make these treats/gifts for the little ones in your life and make St. Patrick's Day Special.

Happy Scrappin' ! ! !

Brenda

Monday, February 7, 2011

What's All The Rage ? ? ?

What do you give as a gift to someone who is so hard to buy for?

That is exactly what my question was when it came time for a gift for my mom. I always go out of my way to find exactly what she asks for. There are the times when she doesn't give hints as to what she wants or will tell us, "I have everything I need or want right now."

I've never made my mom a scrapbook or a photo frame because she never seemed interested in my scrapbook pages or projects. I think at one point she had made the comment that scrapbooking was "expensive and a waste of time." I guess I wanted her to have something that I had made and to show her that the time I spend crafting is not a waste of time. Plus this gift is something that I would proudly display on my own wall.

I've noticed that my mom, now that my dad has passed away, has older pictures of my dad displayed around the house. They aren't in frames, but rather just laying here and there. She has the funeral program hanging from her computer table. She loves the having those pictures around.

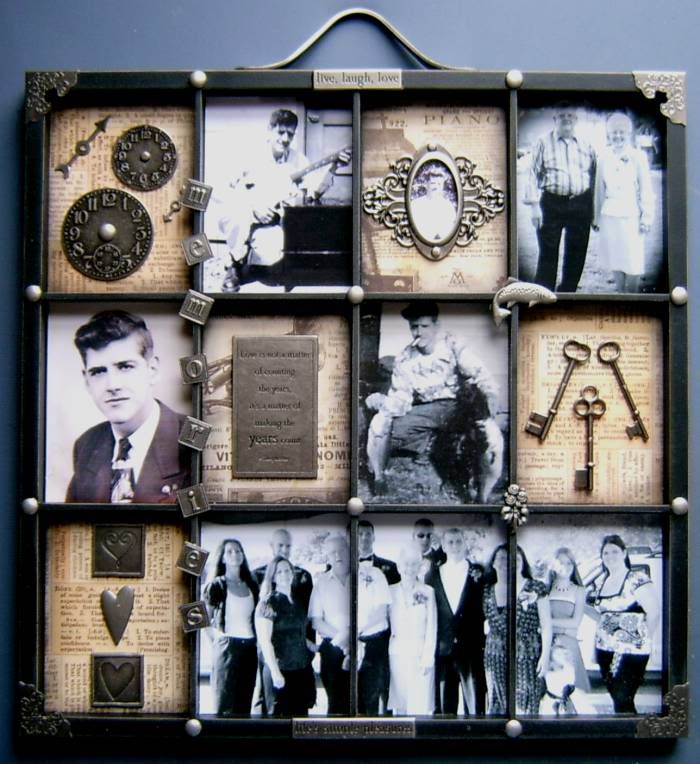
Since the photo frames that look like old time shadow boxes are all the rage, I thought it would be a good idea to organize a few of her favorite pictures of my dad into one of those frames.

I contacted my younger sister who "borrowed" the boxes of old photographs from my mom's home and made sure that I got them to make copies. I copied more than what I needed so that I could pick and choose which photos/snapshots would work best in the frame. I wanted a mix of older photos and some of the more recent ones as well. I had the photos reprinted in black & white tones so that the photos were uniform and looked more heritage.

I carefully chose metal embellishments that reflected interests of my dad or were symbols of what was going on in the photos. Other metal embellishments like brads with the back cut off were used to accent and balance the frame. Many of the metals that I used I had on hand, metals that I fell in love with, purchased, and knew someday that I would find the perfect project for. Many of them are retired pieces by Making Memories but others are brand new on store shelves, marketed by one of my favorite people in the scrapbooking industry, Tim Holtz. I also used sepia toned papers and the papers also reflect interest of my dad.

Here is the finished frame:


I will start in the upper left hand corner and show you two frames at a time a little closer.

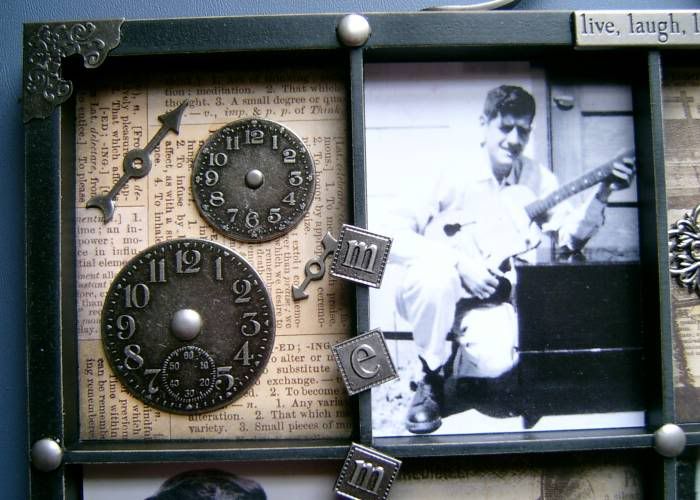
My dad loved clocks. He used to make them. He was actually very crafty and made many things including the guitar and amplifier in the second frame. Music was another interest.


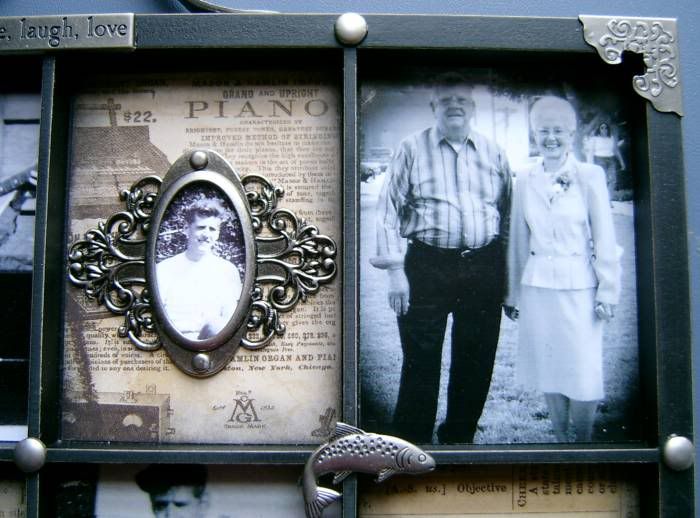
The third was one of my dad when he was a teen. I can't tell the year of the photo, I only know what I was told. The paper behind it caught my eye because of the word and picture of a piano. My dad could also play the piano "by ear." He could not read music but if he could hear a song he could play it on the piano. I loved to listen to him play. The frame that the picture is in reminded of me of something that would have been around when that picture was taken.

The forth frame is a picture of my dad with my mom at their grandson's (my nephew's) wedding. He carried a copy of this photo in his wallet. I remember taking dad to the doctor and while looking for his insurance card whipped out this picture and showed the receptionist and told her "This is the most beautiful woman in the world and she's mine."

My dad loved my mom unconditionally.


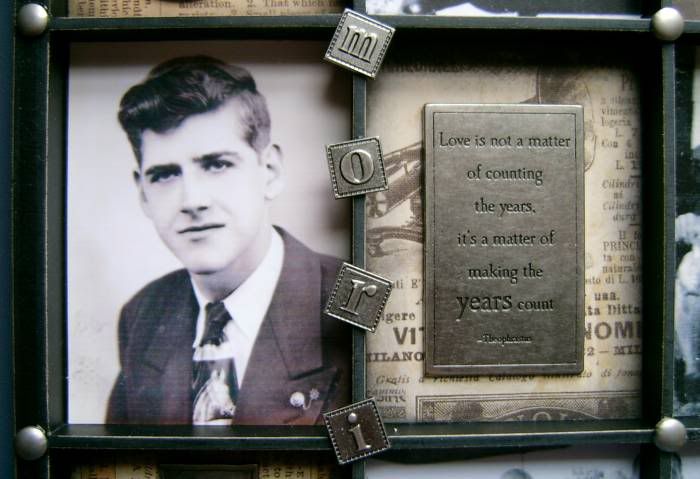
The second row of frames are some of my personal favorites. A formal picture of my dad, as young man. How handsome he was! I love the saying on the metal plaque in the next frame. I think my dad made every moment in his life count... not just the years. Although he was not perfect he was a family man and worked hard so that his family had what they needed.


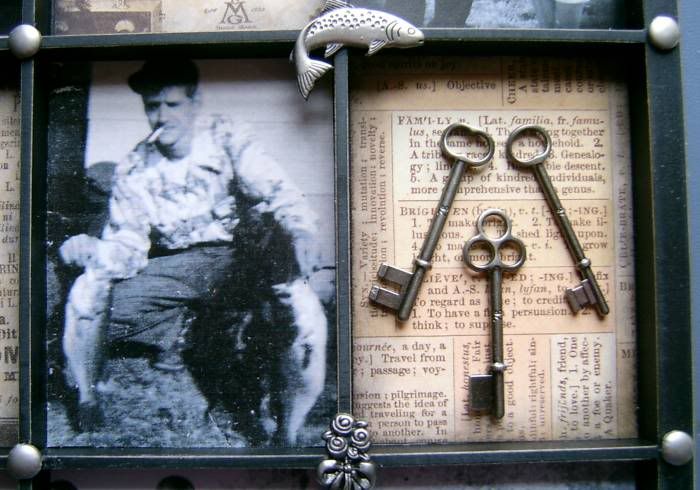
My dad love the outdoors and respected nature. He loved the sport of fishing but if he kept a catch it was on our dinner table. (The metal fish is a Karen Foster charm but we cut the charm ring off of it and smoothed out the burrs on it. Those are still available. ) There he is, my dad, tall, dark and handsome.

I love the box with the keys in it. My dad didn't throw away anything. This was both a blessing and a curse. These were not his keys but I can't tell you how many keys we found. I laugh and compare my dad to Hagrid from the Harry Potter Series because he was definitely "the keeper of keys."


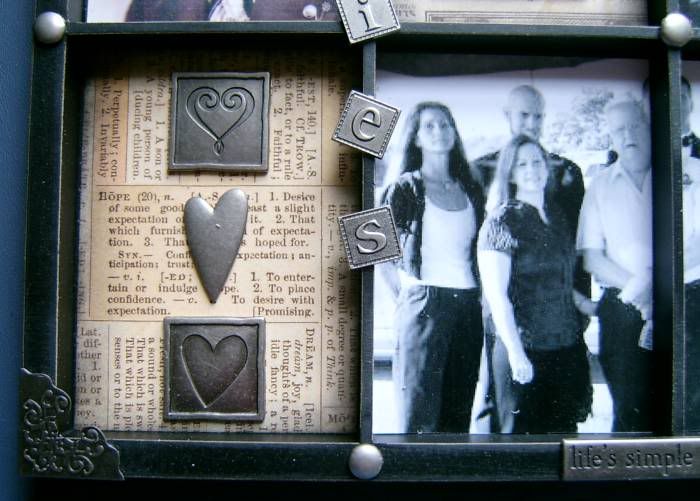
On the bottom rows of frames I used the first box and filled it with hearts because I loved my dad and he loved all of his family. In the definitions behind the hearts is the definition for the word "hope." My dad never lost hope when he was fighting his cancer. He looked to the next day and for the next miracle. Each new day was a mircle for my dad.

The last 3 frames on the bottom row is a family photo, taken at another grandson's (my nephew's) wedding. Like so many families it is hard for everyone to be at one place at the same time, so not all of the family is in the picture, but it was as close as I could get. I sectioned the photo so that it is one continuous photo across the three frames.


As you can see I used other plaques, on the top and bottom of the frame, used metal photo corners on the corners of the frame, used brads as accents, and other metals that pertained to the frames. I used metal letters to spell out the word "Memories" down one of the spines of the frames.

It is my hope that I made a gift that my mom will cherish because it was made with a lot of love and caring attention. I sat and cried everytime I worked on this frame because I miss my dad so much. It is as much a tribute to him as it is a gift for mom. I know how much she misses him because as much as I miss him she must feel it a hundred times more. Even death hasn't detoured their love.

I am hoping that the next time I need a gift for mom that I will be able to do one of these frames with her pictures so that her favorite photos can hang on the wall next to my father's.

It is also my hope that I have inspired you to try something new, trendy or all the rage the next time you need a gift for someone special. These can be made with or without photos and in almost any theme.

Happy Scrappin' ! ! !

Brenda
Friday, February 4, 2011

St, Valentine's Day Gifts

Each year I make Valentine's cards for my CCD/PSR students and for my children, but sometimes a card just doesn't seem like it is enough but I can't spend a lot of money.

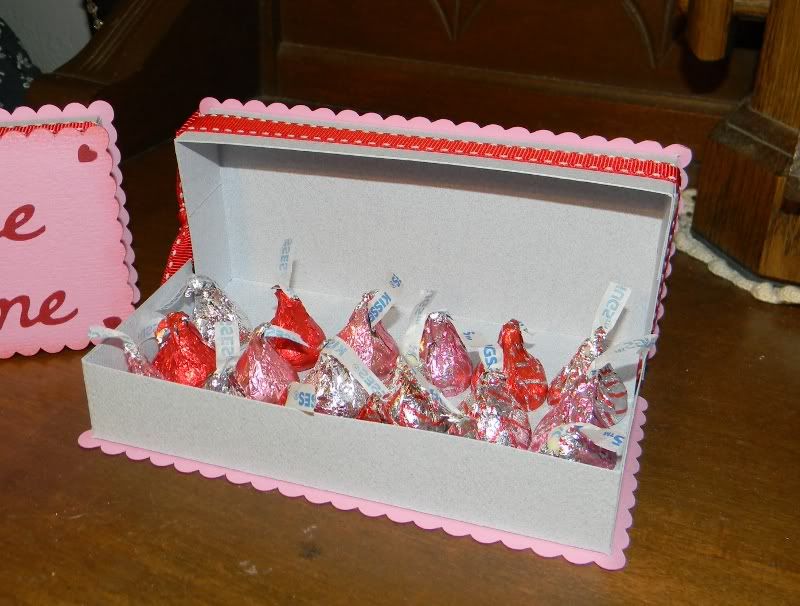
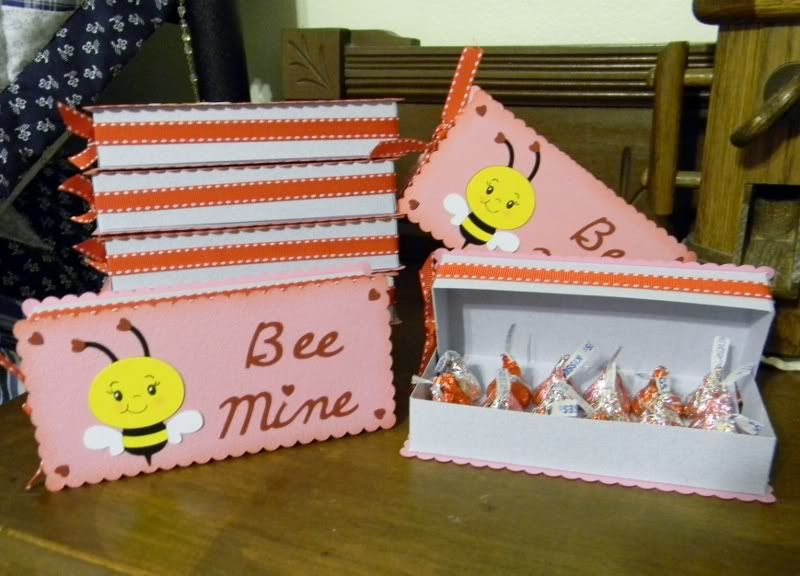
This year I took an old project and revamped it slightly and was able to make a special Valentine Candy Box for about $1 per child.

Do you remember this project?


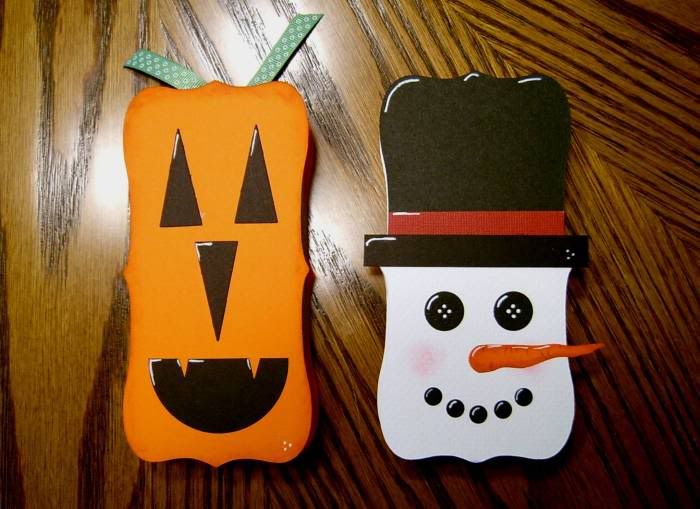
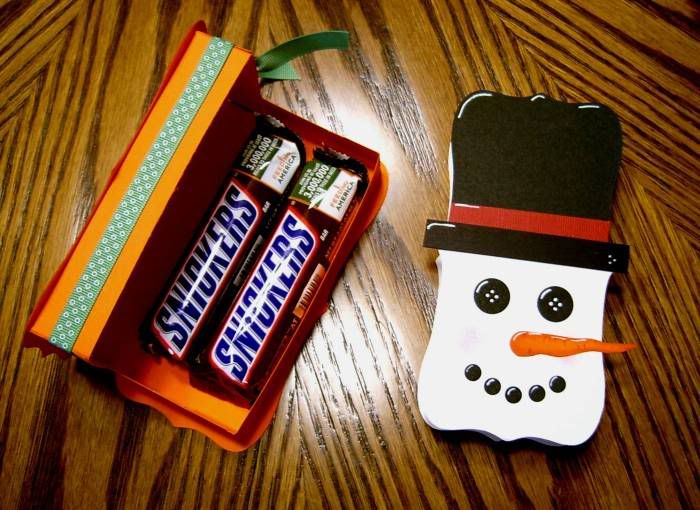
I will give where credit is due for this project and also share where you will find the directions for the box. Scrapy Land Susan posted the original "Pumpkin Box" on the ScrapyLand Blog. Here is the link to her VIDEO. I had taken her idea and turned it into a snowman because she challenged us.

I love the idea of the little box being a blank canvas so I changed it up yet again for my Valentine's Candy Box.

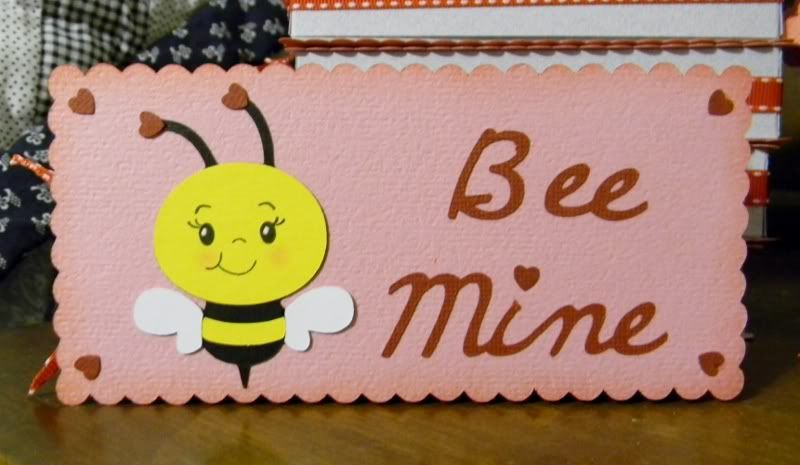
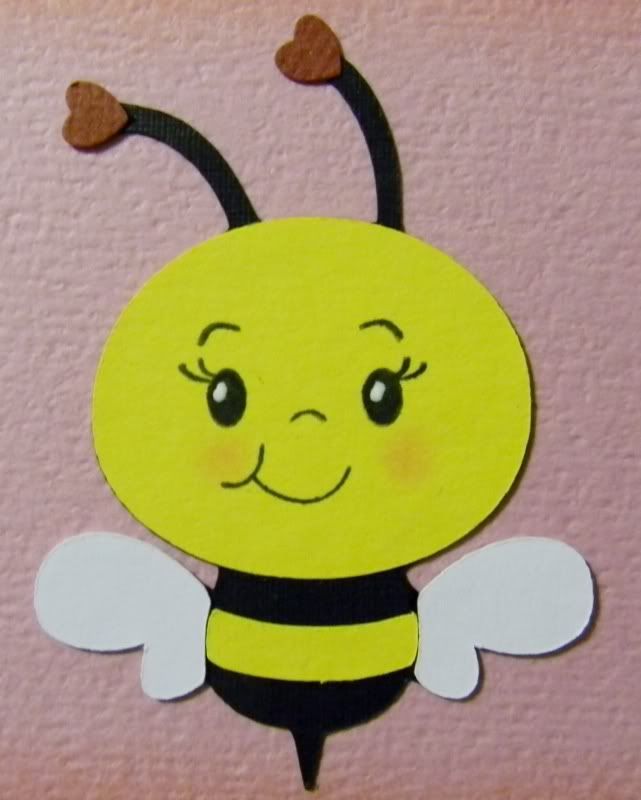
I used my Cricut Design Studio (DS) and designed a new scalloped box top and bottom which gave me a new area to create on. That scalloped rectangle for the top and bottom of the box was created by using the George Cartridge. I also broke out the Create-A-Critter Cricut Cartridge and used the bee from that cartridge. By using my DS I was able to cut 10 bees (with all of the layers) on one mat. Although I love the bee made just as it was on the Cricut Cartridge I used the hide contour option in DS and hid the facial cuts on the Bee and then I used some awesome Peachy Keen Stamps and stamped those adorable faces and then used a white gel pen to put the highlight in the eyes and a little chalk to makes his cheeks blushed. The words were created using Cursive 101 Cartridge and my DS to weld the letters. I used a little red ink to accent the edges of the scalloped rectangles. The hearts for the corners of the box, on the bee's antenna, and to replace the dot on the "i" were made with a hand punch.


I filled the boxes with 18 (9 each) Hershey Hugs and Kisses. They fit perfectly! Nothing says I love you like a hug and kiss.


Here is a close up of just the Bee:


From start to finish it took about 3 hours to make these and I figured while I was doing it I would make enough for all of my CCD/PSR students, my children, and a few extras because I know there will be someone else that I want to give one to.... maybe the girls at work.


There are still time to makes these or something similar for your little Valentines. So my challenge today is to use what you have on hand and create a little "I Love You" gift.

Happy Scrappin' ! ! !

Brenda

Wednesday, February 2, 2011

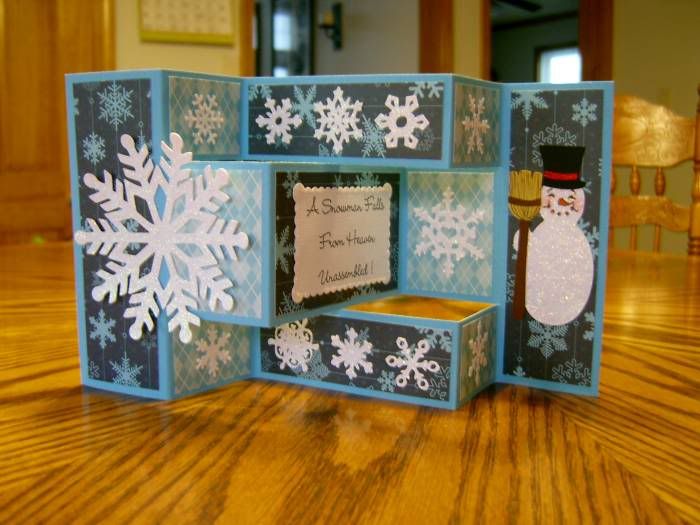
Tri-Shutter Card

I guess that winter boredom has taken over because I am trying different cards. Like I said in my last post, these cards are not new but I have never tried to make any of them before.

This card has a few names but when I did a search for unique cards, it came up as a Tri-Shutter Card more than under any other name. With that said ScrapyLand Susan, who is the blog master at ScrapyLand.com had the easiest to follow directions. Let's face it a video is always helpful because you can see exactly how she made it and get exact measurements. I will even share the link to her video at the ScrapLand Blog so that you can go watch it if you are interested in trying one of these cards. She called hers a "Plantation Shutter Card."

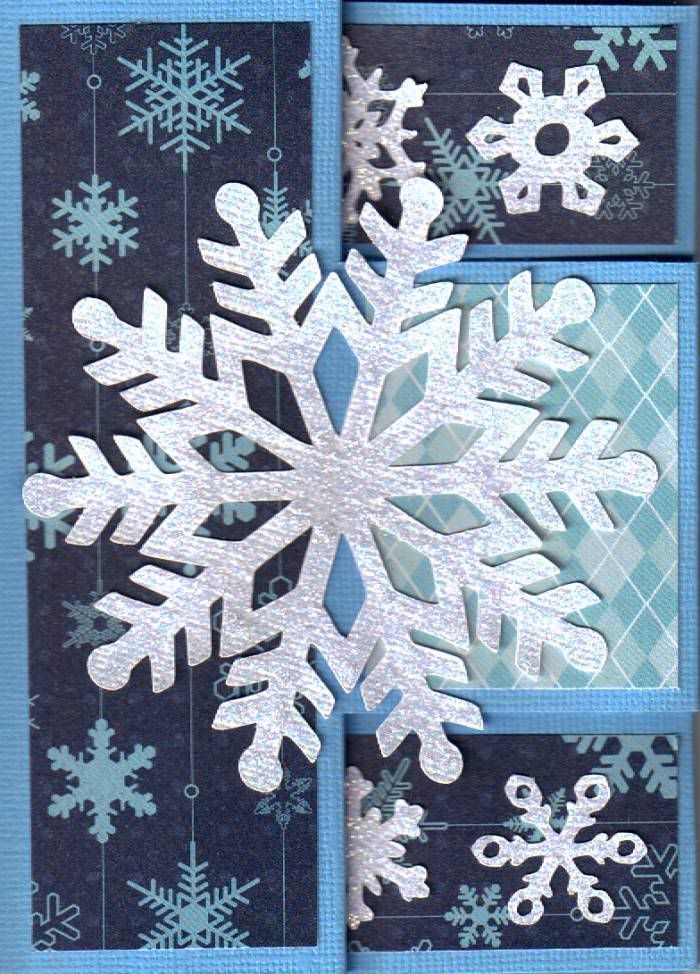
Here is my finished card. I made several of these but in the back of my mind I had the same question that I had with the Easel Card from my previous post, "Will the recipient of this card know that it is a free-standing card?" This expanding shelf sitting card has some great concepts to it though..... if you watch Susan's video you can see that you can hang things from the different sections so that they overlap and when the card is sitting open it will give it great dimension. I did not do that with mine.

This is the card when it is completely folded up and ready to go into an envelope:


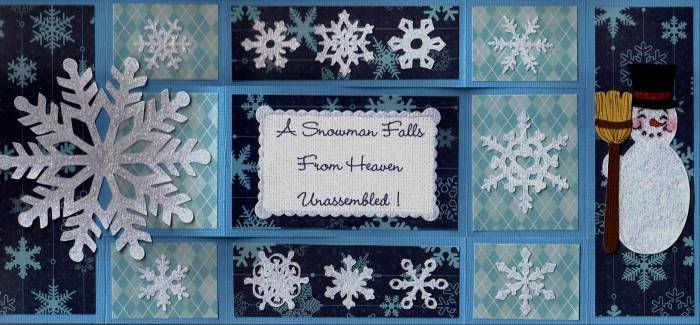
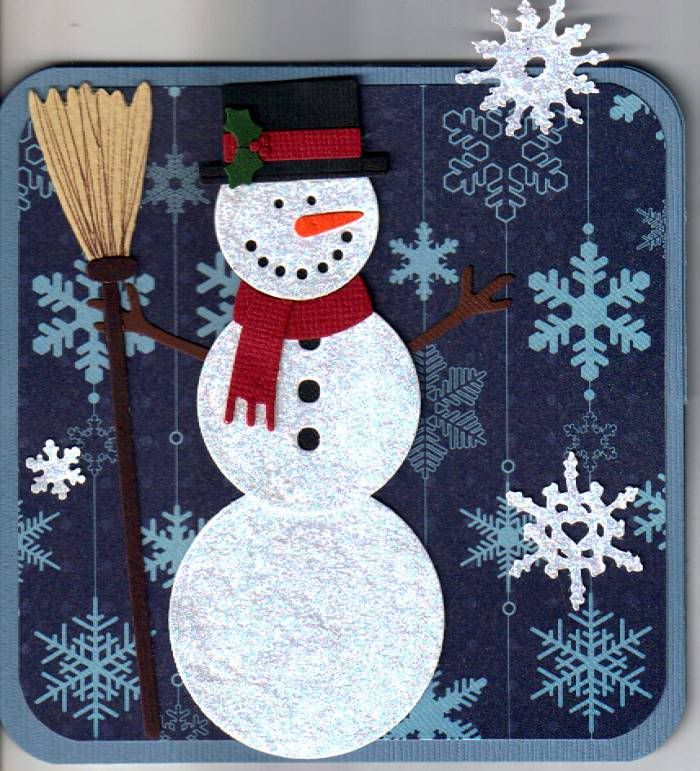
Then this view is of the card laying completely flat:


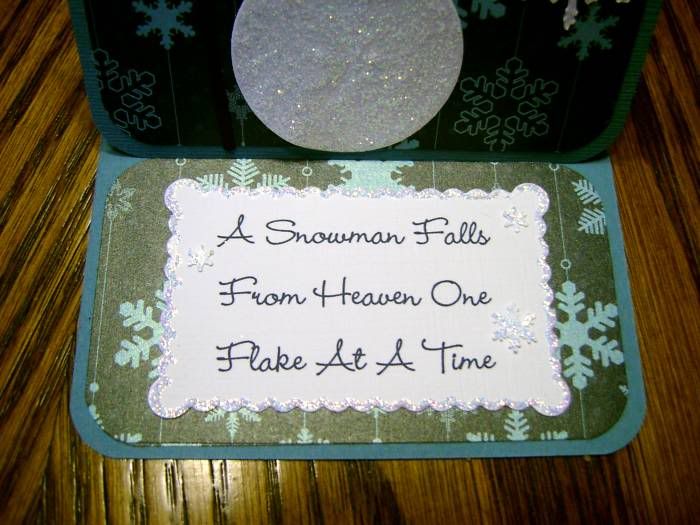
As you can see I used a lot of snowflakes. Some of the snowflakes were made with my Cricut and others were made with punches. The snowman is also made with my Cricut.

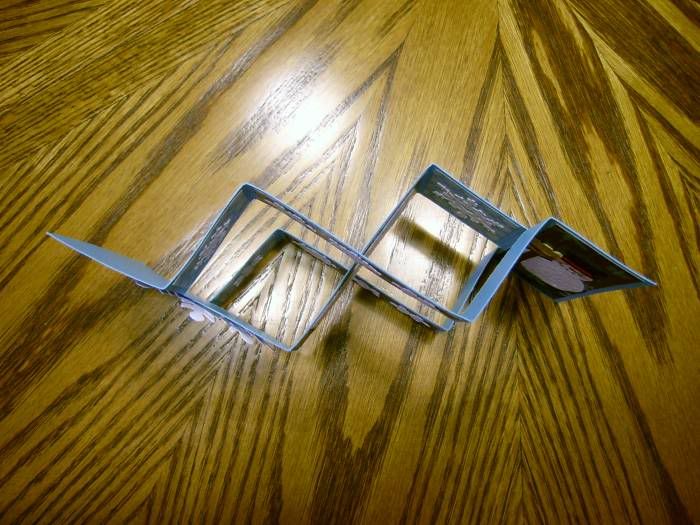
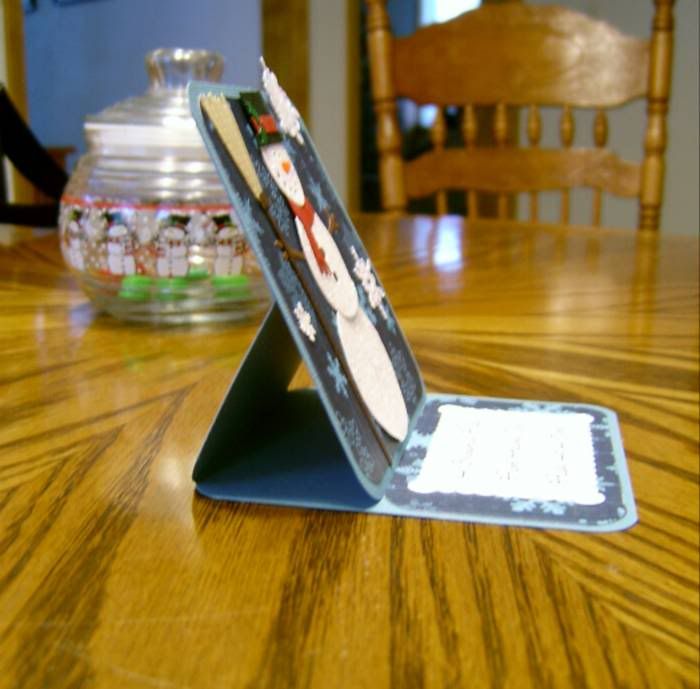
I took a picture of the card sitting on the table but a top view so that you can see how the card supports itself:


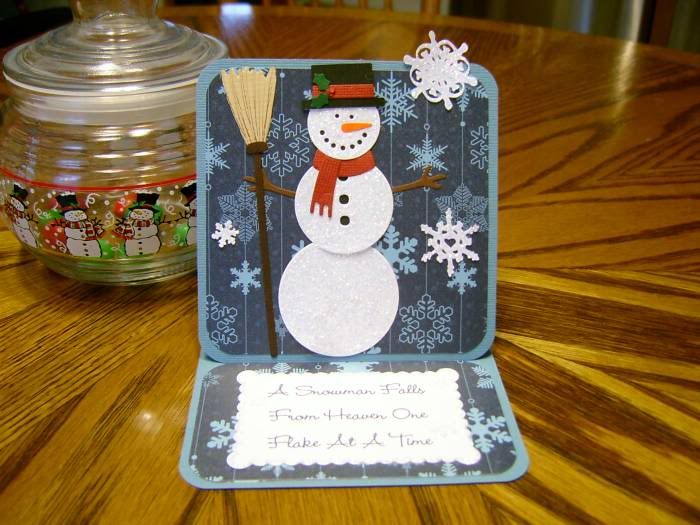
And finally a pictures of the finished card sitting open the way that you would hope that the recipient would display it:


I liked this easy to make card and I am looking forward to making a few more of these for Birthday's or other occasion cards and next time I will try to make them with things hanging from the "shutters" like Susan did in her video.

Happy Scrappin' ! ! !

Brenda

Monday, January 31, 2011

Easel Card

I am trying to expand and do a few new things. To many these aren't new at all, they have been around for years and made the home party circuit with the Stamp It Up camps and other creative card making groups. I am just a little tired of making the traditional "plain Jane" cards.

I don't need any "Get Well," "Happy Birthday," or "Wedding Cards" right now and there are no "Baby Showers" or "Bridal Showers" to plan for. I have a several "Thinking Of You" and "All Occasion" cards in my card tin and ready to be mailed out. Since I have all of my cards caught up for the time being, I decided pull out a few Christmas and Winter dies and start making cards for next Christmas. I've decided to not wait until the last minute to make up a few of these.
I've also decided to make a variety of different cards for the Christmas 2011 season. Who says that when you send out Christmas and Holiday cards that everyone on the list must have the exact same card?
In this post I am I am going to share an "Easel Card" with you. This card really does remind me of an artist's easel. My concern is that when the recipient opens the card will they know how to set it up so that it is a free-standing card. I only made 2 of these for that reason.

I was pleased with the card and thought since it is a free-standing card it would be great for any occasion.


I used a variety of things to make these cards, I pulled out a couple of old QuicKutz Dies, a couple of Cricut Cartridges, and then of course glue, Stickles, pens, printed paper, cardstock, and I used my computer to do the sentiment box.

Think ahead to the next holiday or even almost a year in advance to next Christmas and try to get out of the rut of the traditional card and try something new.

Happy Scrappin" ! ! !

Brenda


Friday, January 28, 2011

Happy Birthday To My Husband, Joe

Back in November my husband, Joe, celebrated his birthday.

One of his favorite all time movies is "Toy Story." We own both Toy Story and Toy Story 2. Just before his birthday Toy Story 3 was released on DVD and Provo Craft Cricut released a Toy Story Cartridge. This was just an excuse for me to buy another Cricut Cartridge and to buy the movie for my husband.

My husband is one of those men who has never grown up. He loves his toys, mainly his die cast car collection but toys never the less. His favorite Toy Story Character is Woody. We have watched Toy Story so much that he can quote almost every line in the movie.

So for his birthday I took a page out of his mother's book and planned a themed birthday party for him.... and yes, you guessed it, Toy Story was the theme. I purchased Toy Story 3 plates, cups, napkins, and party favors. I bought the movie for his gift. I even bought a gift bag but I wanted to use my new cartridge so I made the card.

I was feeling a little creative so I decided to try my hand at a cut-out card. I updated my Cricut Design Studio and Gypsy and decided to give it a try. This was not without challenges. I am not as versed in my Cricut Design Studio as some of the ladies on the Cricut website but I was very determined.

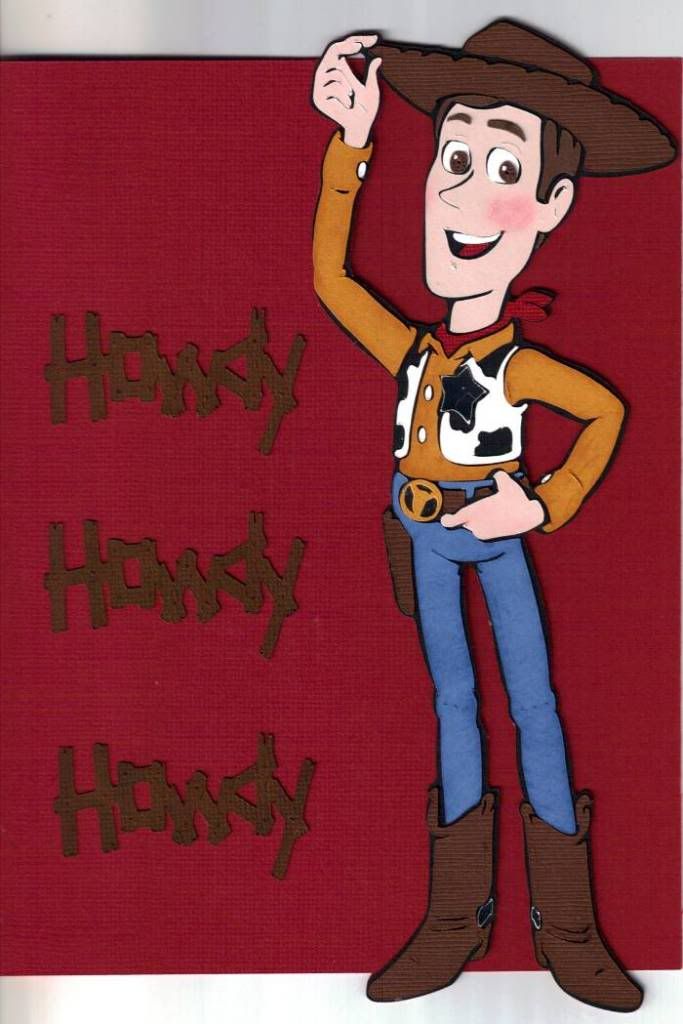
I made the base of the card first. Then did the overlay Woody. Some of the obstacles that I ran into was that some of the pieces on Woody are very small and it is not always easy to figure out where the pieces go in the scheme of things. It took a little longer than I had anticipated but I finally finished Woody for the card. I made this card a half fold size. If I had made this any smaller it would have been hard to cut the pieces and to put this card together. I think that Cricut means for these characters to be made a little larger. The thought to make all of the characters and mount them on toothpicks for cupcake toppers quickly disappeared after making the card.

This is the completed card..... folded and ready to go into the envelope. The word "Howdy" I found on another Cricut Cartridge called "Wild West." (It was pre made and pre-welded.)


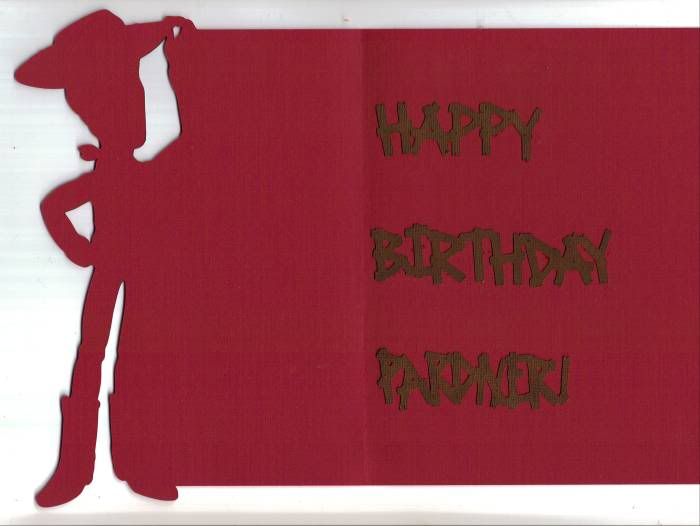
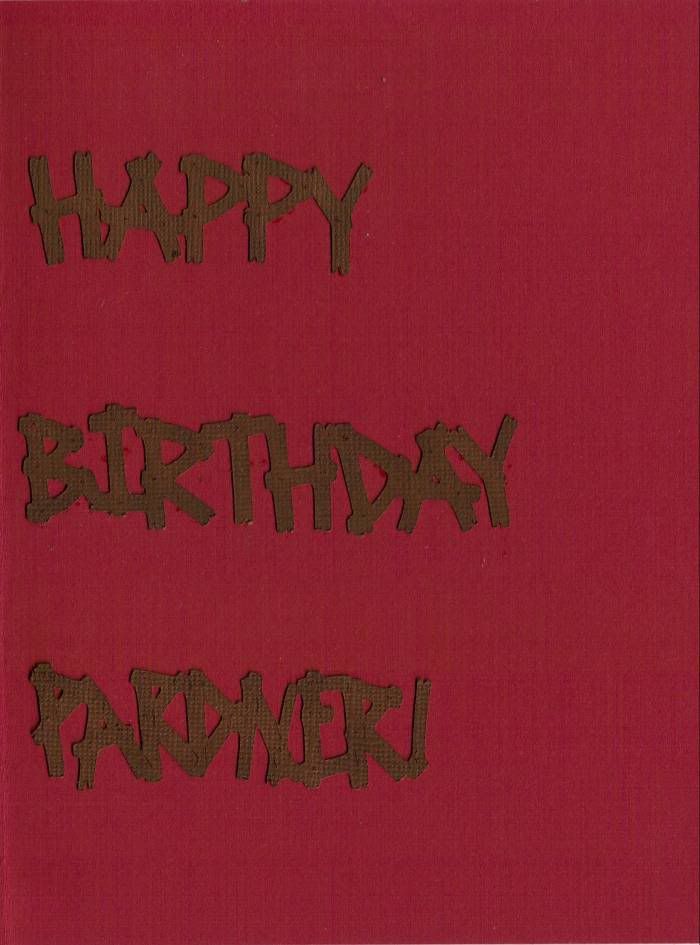
This is the inside of the card. (The words Happy Birthday had to be welded but the word "Pardner" was already there on the Wild West Cartridge for me. )


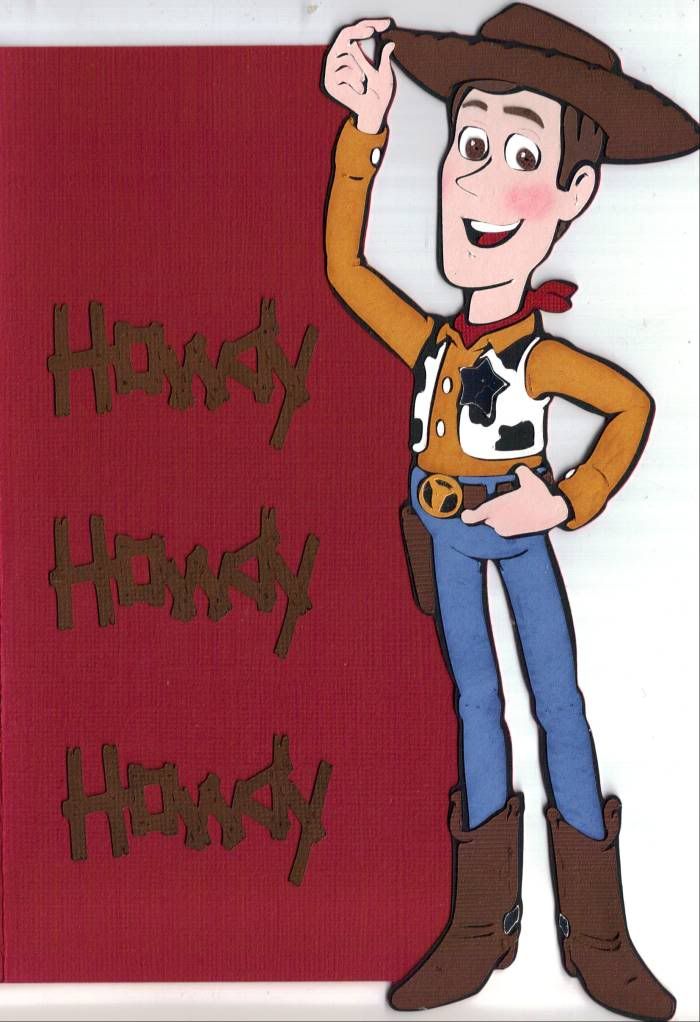
I also wanted you to see the cut out from the front view.... there is holes in Woody's hand, between his arms and body and open space between his legs. Don't forget the little extras like some chalk to blush Woody's cheeks.


I offset the words on the inside of the card so that you can't see them when the card is closed. That way when you open the card the words are all to the left, close to the card fold.


This was a learning experience for me. It was also a labor of love.

My mother-in-law would have gotten a kick out of the party.... and my husband laughed at the fact that I made him remember his mom. (She passed away 2 years ago and we all miss her.) She was notorious for doing things in a theme. She was always the first to think about ways to make a birthday special. Granted my 46 year old husband thought the whole theme was a little lame he secretly enjoyed it.

I guess my message is to try something new and different when you are making a card. Look for new things to try. In this case a cut out card. Reach for something that you already have on your shelf whether it be a die or a Cricut cartridge.

Happy Scrappin' ! ! !

Brenda
Wednesday, January 26, 2011

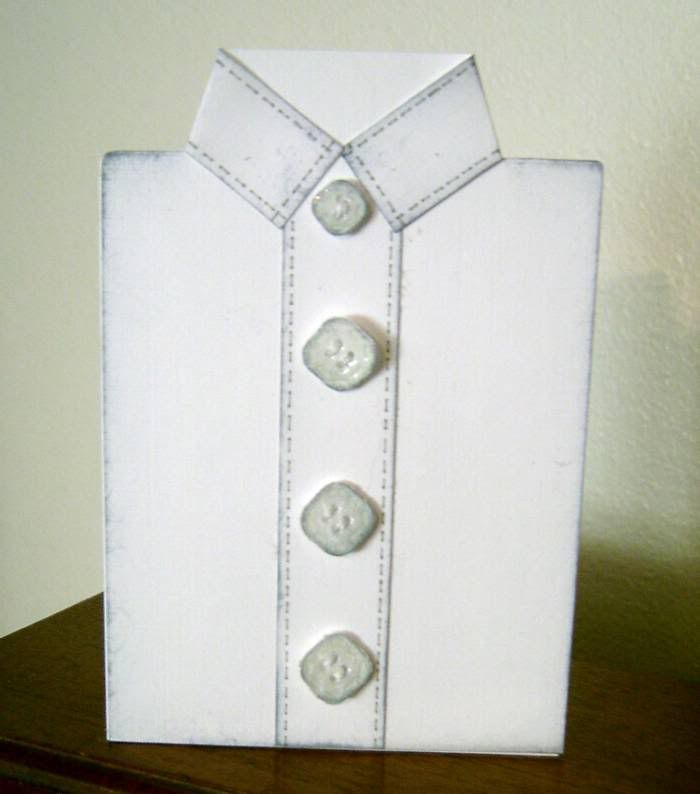
A Shirt With Buttons Card (Last Design Team Project)

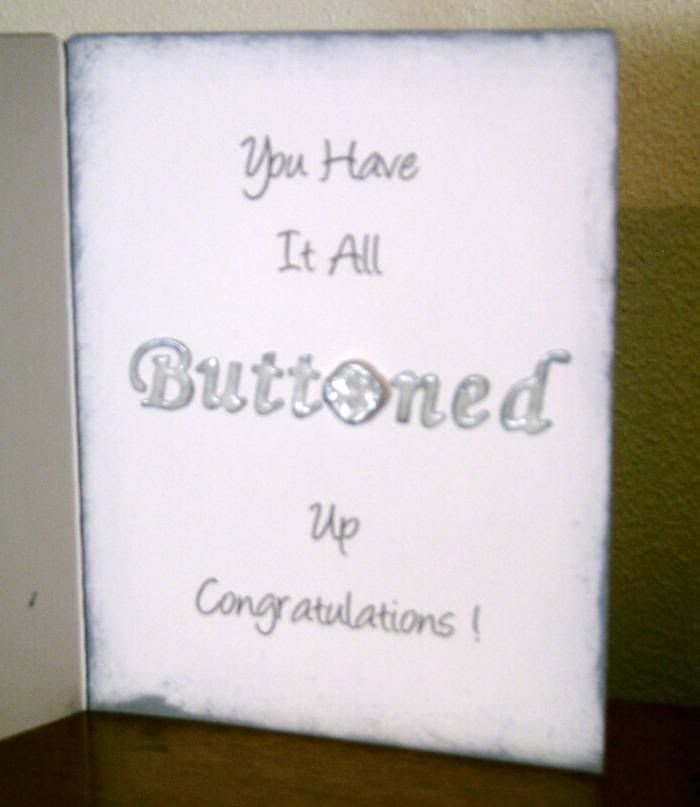
When Die Direct sent me their new release of buttons the only thing I could think of was sewing. I love to use real buttons on a scrapbooking project but I use them for dimension or for the center of a flower. I wasn't sure what to do with these but then a friend gave me a little inspiration when he called and said he had a job interview the next day. He went on and on about what he was going to wear and colors. That is when it hit me - make a shirt card with the buttons on the outside of the card... and the saying inside "you have it all buttoned up!" How perfect is that?

To give a little dimension to these I cut them, used a little ink on the edges, and then a generous amount of diamond glaze to give them depth and shine. I did the same thing on die cut letters on the inside of the card and I used a button to replace the "o."


As soon as he called and said he got the job I mailed the card. He loved it.

You never know where you are going to find a little inspiration. Mine came from a friend who had no idea that he was helping me!

When you are in a rut listen to what others are saying.... inspiration is everywhere!

Happy Scrappin' ! ! !

Brenda

Monday, January 24, 2011

Design Team/More Recycling/Gift Box All-In-One

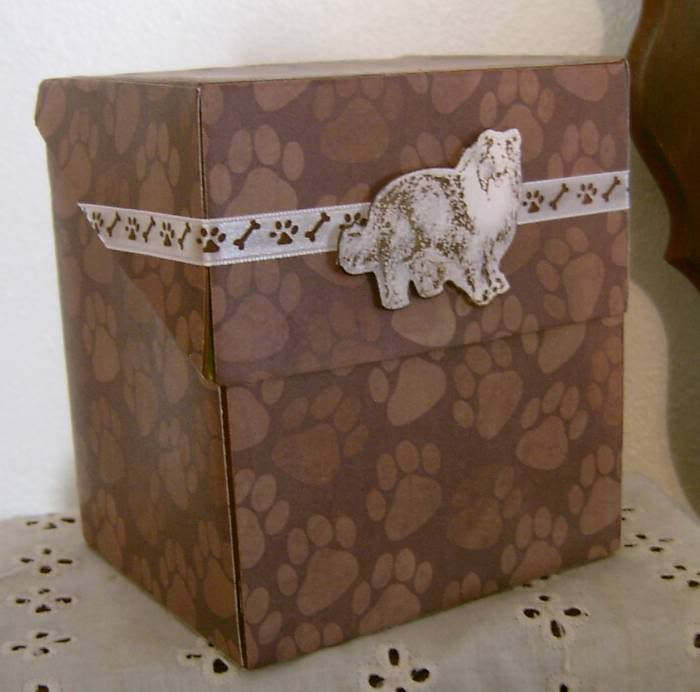
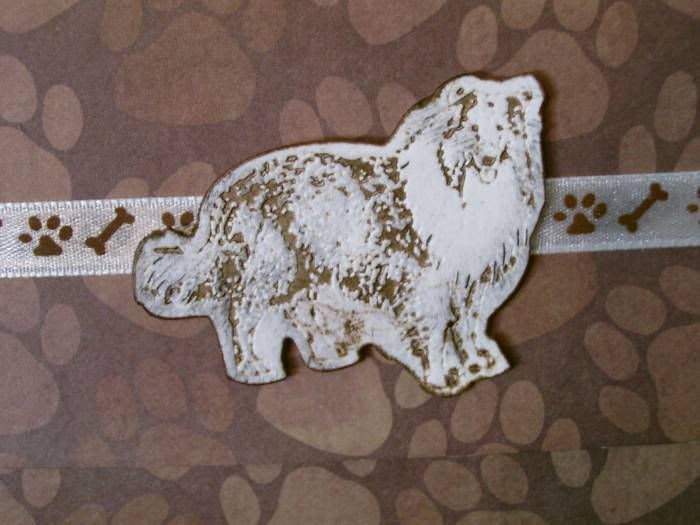
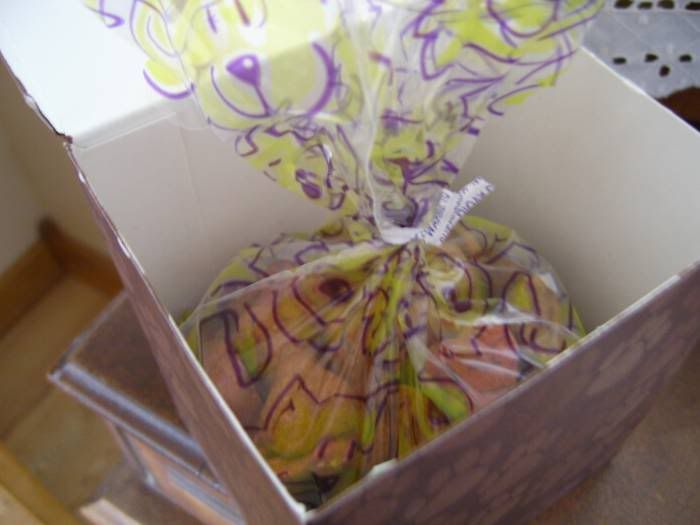
I needed a gift box for a dog's birthday party. Celebrating a dog's birthday - YES - there are people around here that really do give their dog a party for their birthday. Although we were not attending the party I will send a gift.

The dog in question is a Sheltie and I am a little partial to the bread since my own dog, Shelby is a registered Sheltie. I ran to Petco and picked up some of their gourmet dog cookies and dog biscuits and came home and needed a special box to put the treats in.

So once again I reached for the Truvia boxes. These boxes come in 2 sizes. For this project I reached for the bigger box. I also grabbed some animal print papers, dog bone and paw print ribbon and a new Dies Direct die that not only cuts the shape but also embosses all in one step. There is a trick to these dies. If you want a lot of detail grab a stamp pad, and working quickly, ink the die, put the paper down, and run it through the die cutting machine. When you are done use a baby wipe to clean the remainder of the ink off of the die.


A perfect gift for their perfect dog.

When in doubt as to how to wrap a gift, make your own gift box or bag. I would almost guarantee that they kept the box to reuse themselves or to re-gift for the next party they go to. These pampered pets won't appreciate anything except the treats but the owner will love the time and thought that you put into the gift wrap.

Happy Scrappin' ! ! !

Brenda
Friday, January 21, 2011

More Design Team Projects

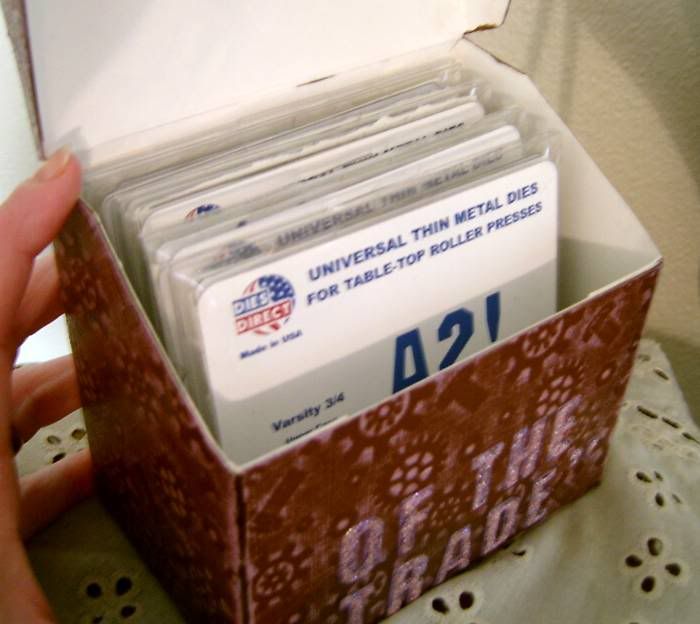
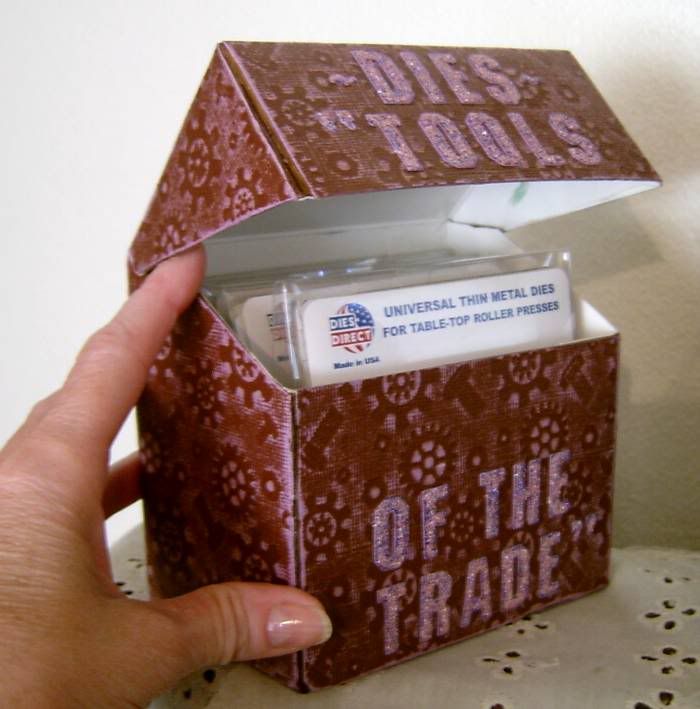
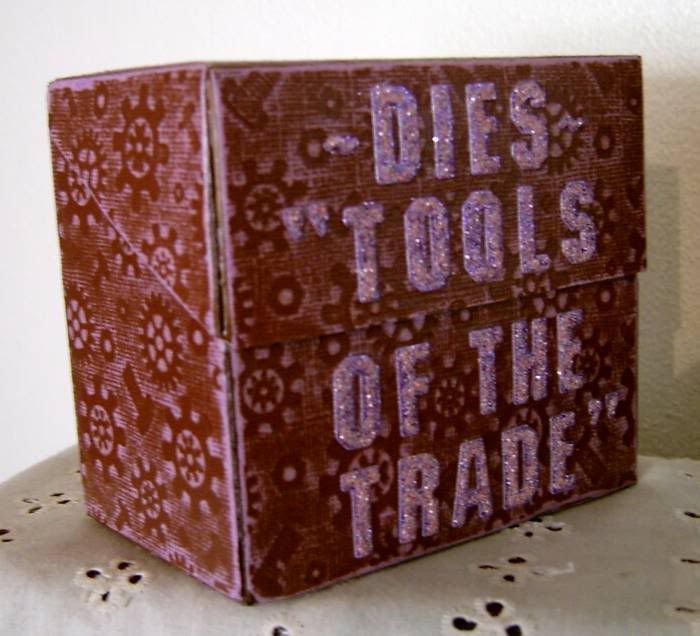
This project served 3 purposes.... the first was using a new Dies Direct texture plate, the second was that it helps me store my 4x4 dies and third I found a use for a Truvia box. (I LOVE TO RECYCLE!)
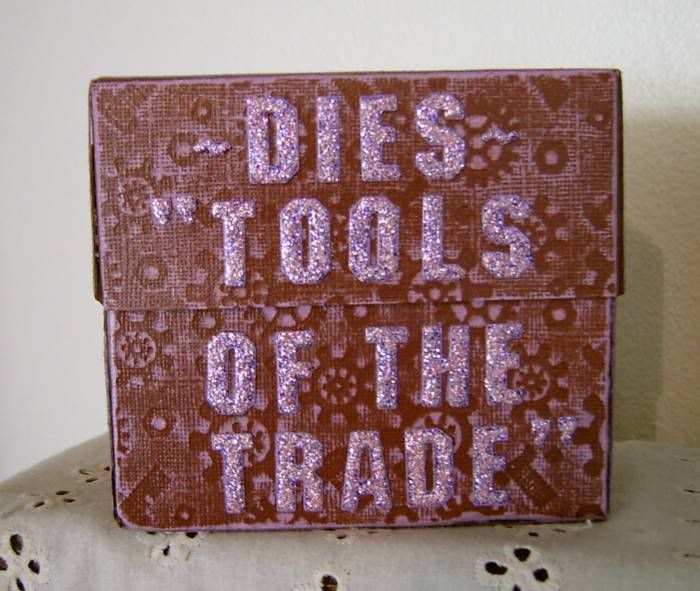
The Truvia box is a sturdy box that has a tapered lid that I just love. I had about 10 of these boxes and knew that I would find a use for them eventually. I had these boxes sitting near my scrapbooking table and had an assortment of my 4x4 laying on the table and they were in the way. I grabbed a box and started stuffing the dies in the boxes just to temporarily clean up my table. Then it hit me that these boxes really were useful.

The new dies direct texture plates with the nuts and bolts seemed perfect to decorate the boxes and I also reached for the Varsity alpha dies.


One I embossed/debossed the cardstock I took a sandpaper block to it and really liked the results. To make the letters pop I hit them with Stickles.

I decided to do a variety of these boxes for the storage of my 4x4 dies. Needless to say I will continue to make these boxes because I thought that I would make one for my Christmas Dies, and one box for each of the other holidays that I have dies for and decorate the box to reflect what is in the box.

Dig deep into the trash and see what you can recycle into something useful.

Happy Scrappin' ! ! !

Brenda