My Family Scrapbook

Wednesday, February 2, 2011

Tri-Shutter Card

I guess that winter boredom has taken over because I am trying different cards. Like I said in my last post, these cards are not new but I have never tried to make any of them before.

This card has a few names but when I did a search for unique cards, it came up as a Tri-Shutter Card more than under any other name. With that said ScrapyLand Susan, who is the blog master at ScrapyLand.com had the easiest to follow directions. Let's face it a video is always helpful because you can see exactly how she made it and get exact measurements. I will even share the link to her video at the ScrapLand Blog so that you can go watch it if you are interested in trying one of these cards. She called hers a "Plantation Shutter Card."

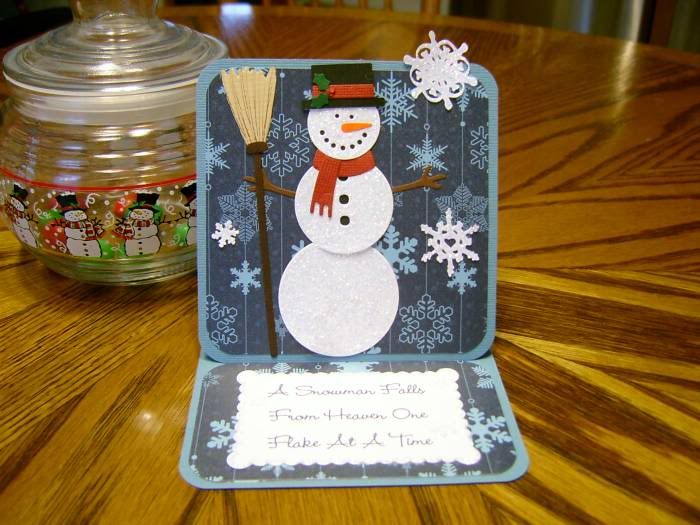
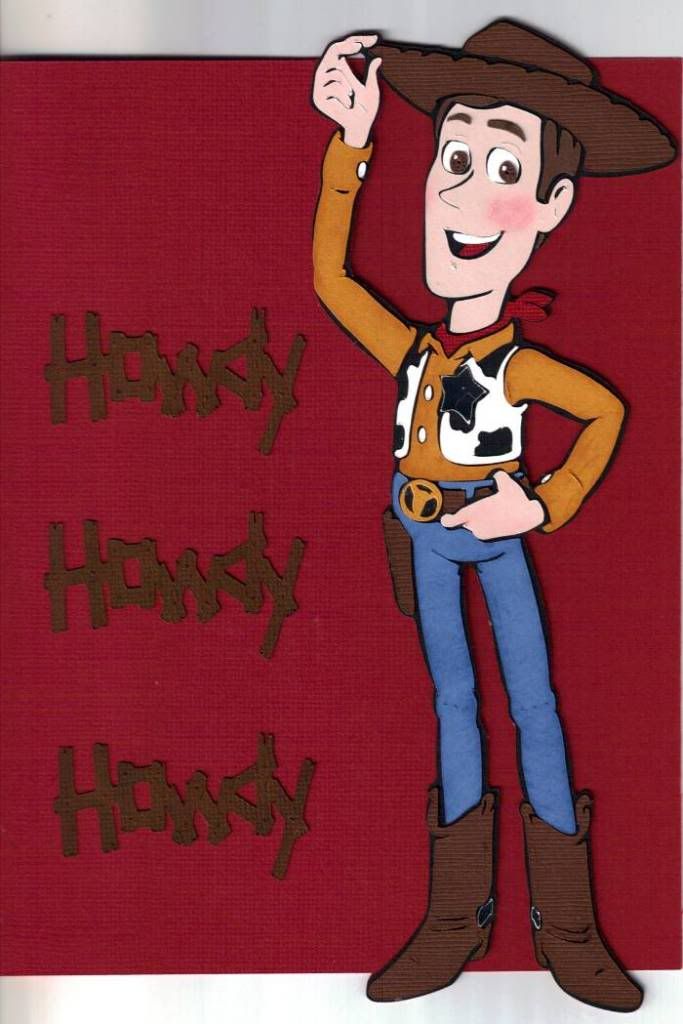
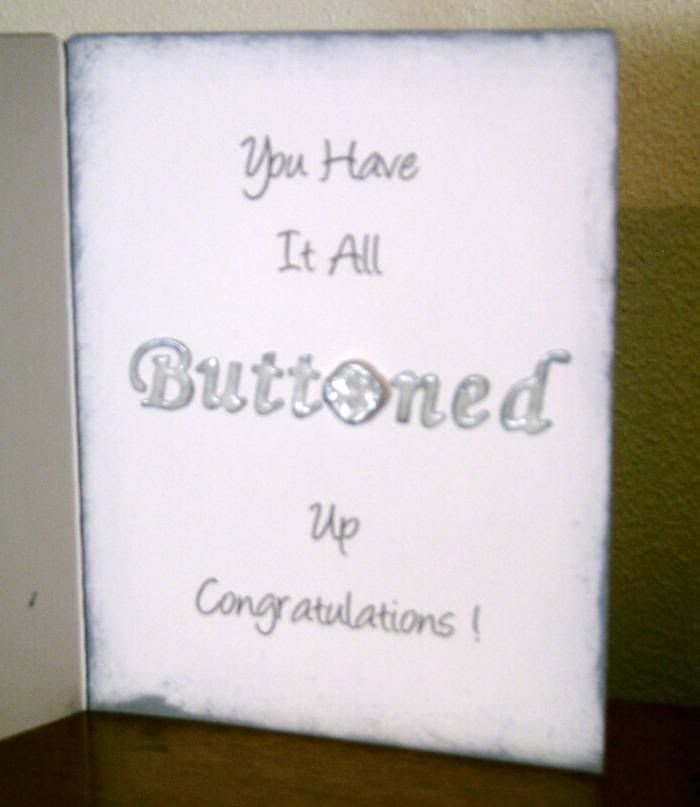
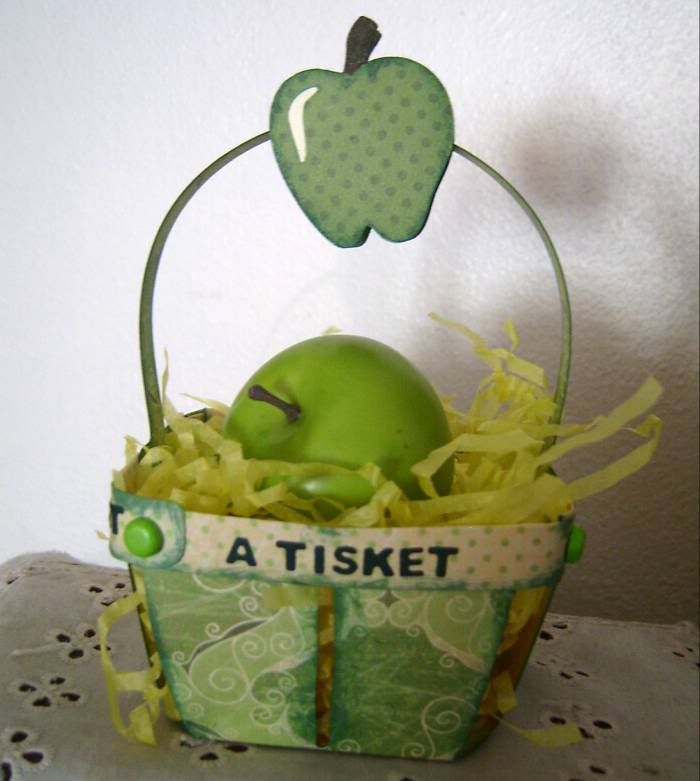
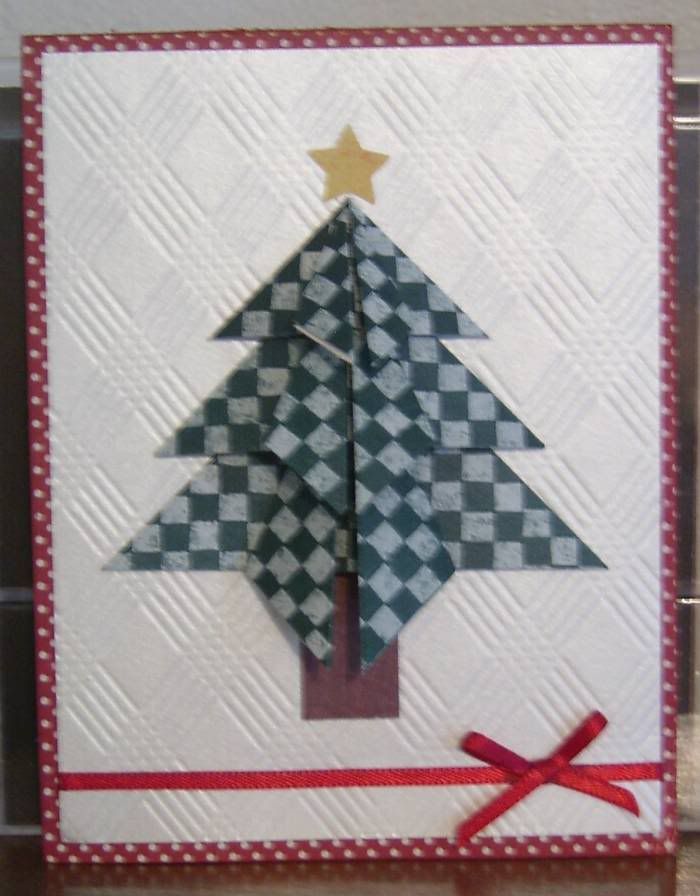
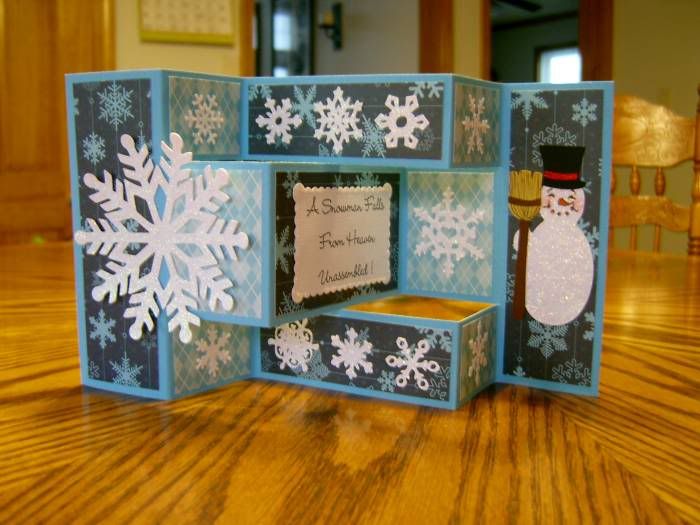
Here is my finished card. I made several of these but in the back of my mind I had the same question that I had with the Easel Card from my previous post, "Will the recipient of this card know that it is a free-standing card?" This expanding shelf sitting card has some great concepts to it though..... if you watch Susan's video you can see that you can hang things from the different sections so that they overlap and when the card is sitting open it will give it great dimension. I did not do that with mine.

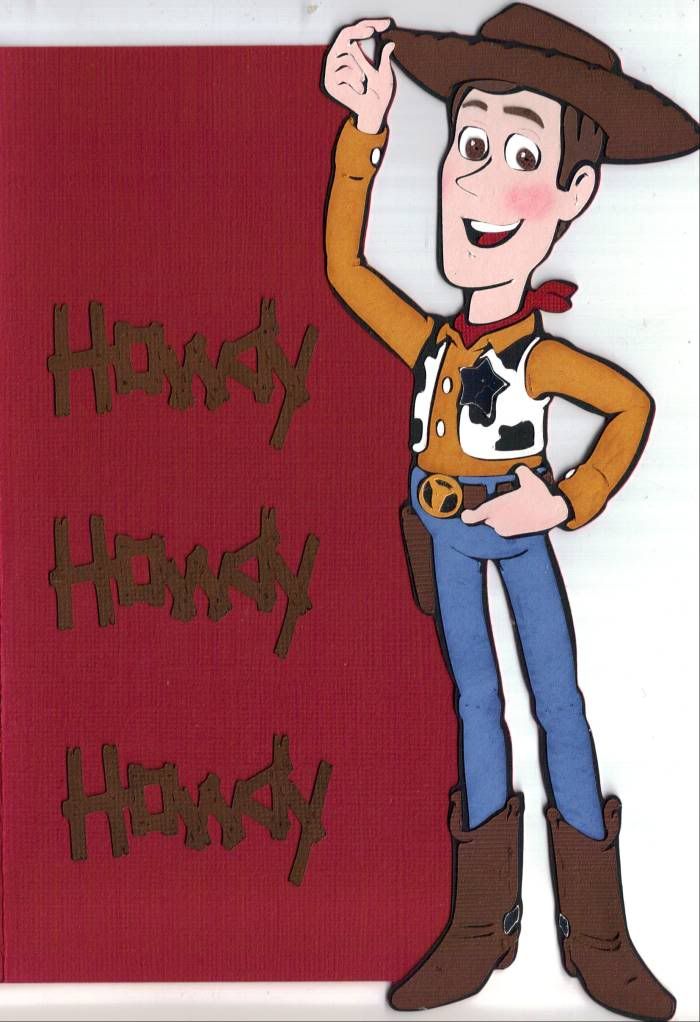
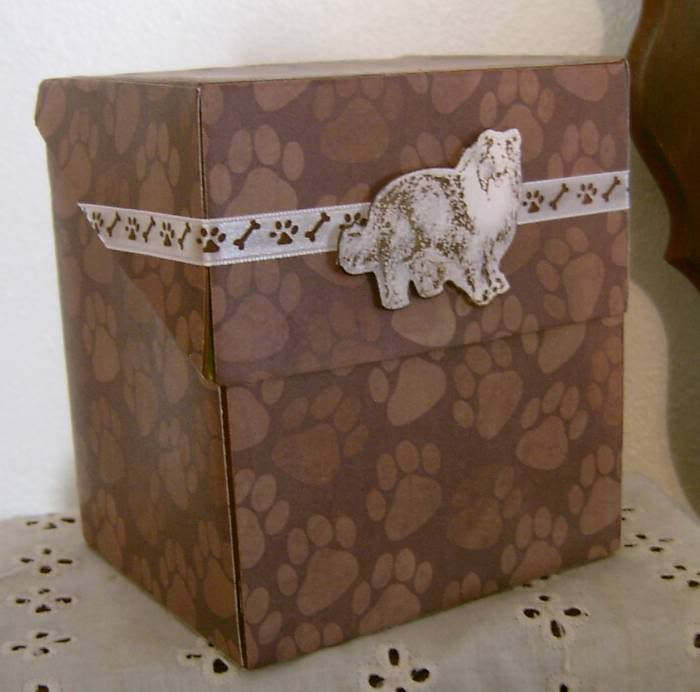
This is the card when it is completely folded up and ready to go into an envelope:


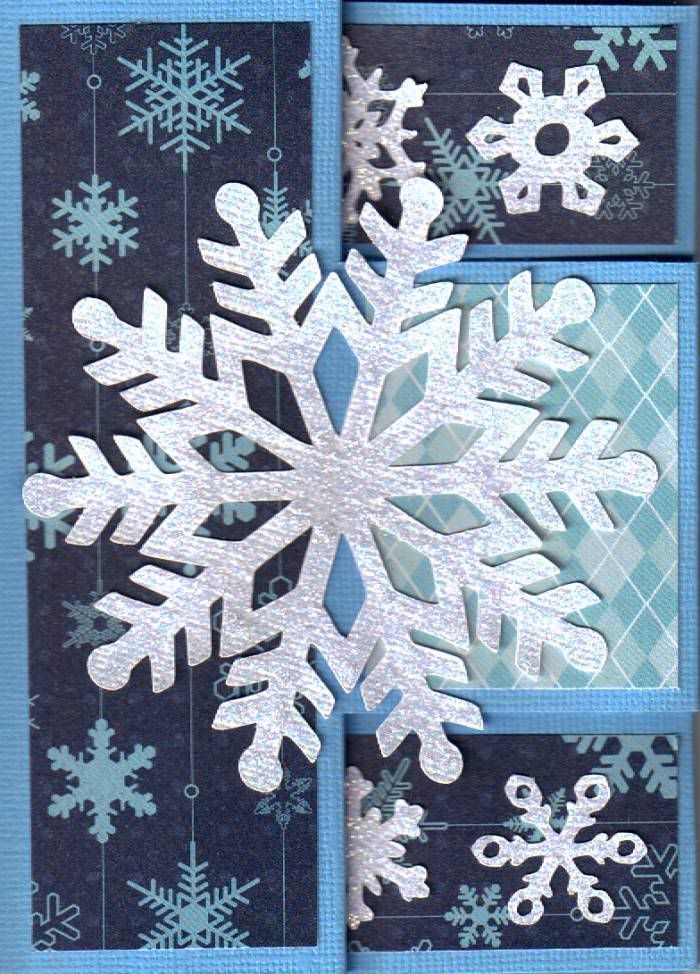
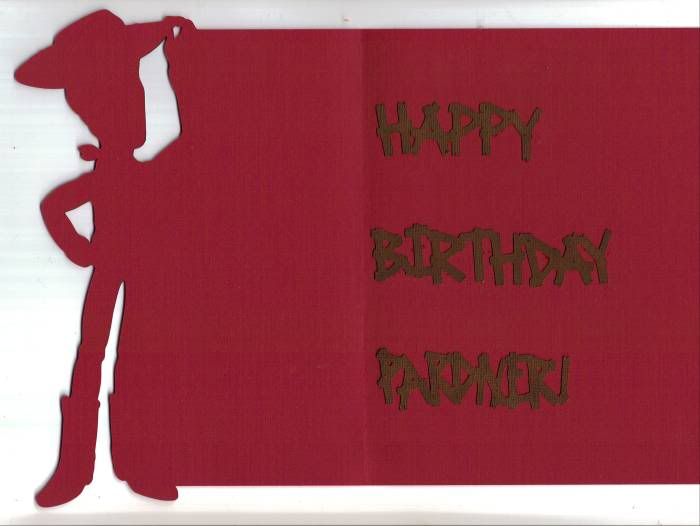
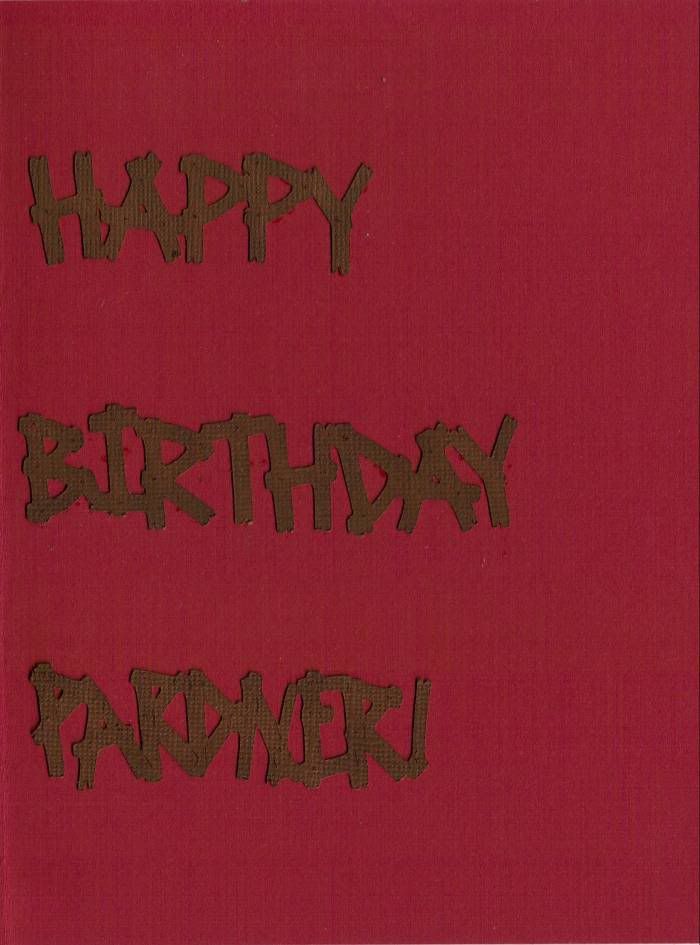
Then this view is of the card laying completely flat:


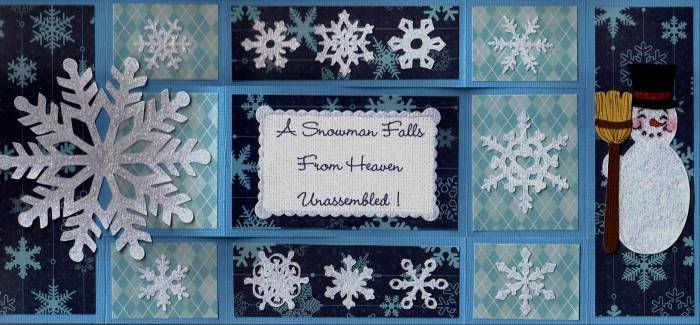
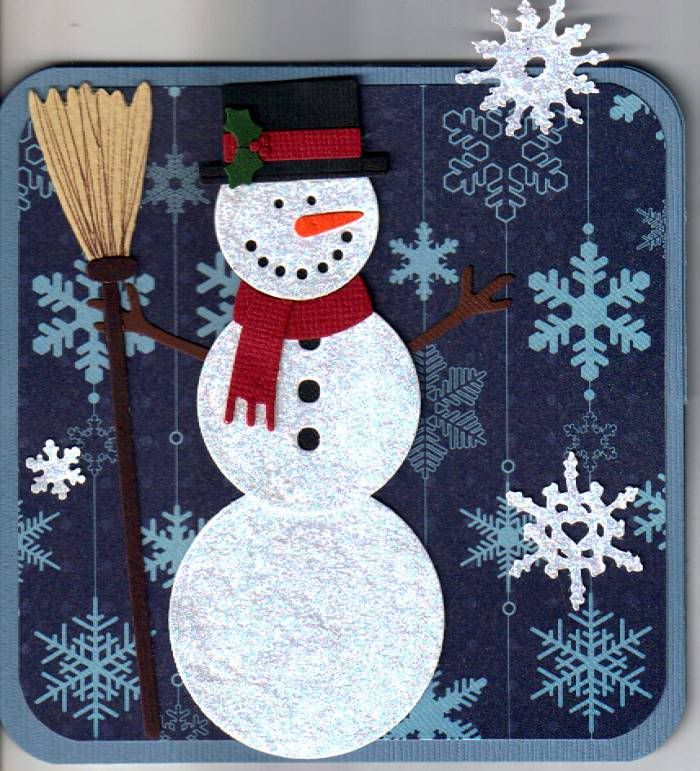
As you can see I used a lot of snowflakes. Some of the snowflakes were made with my Cricut and others were made with punches. The snowman is also made with my Cricut.

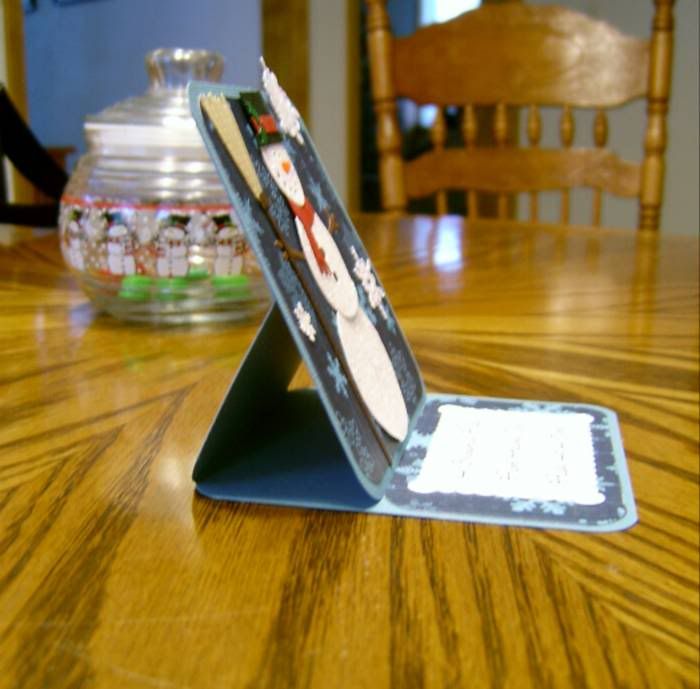
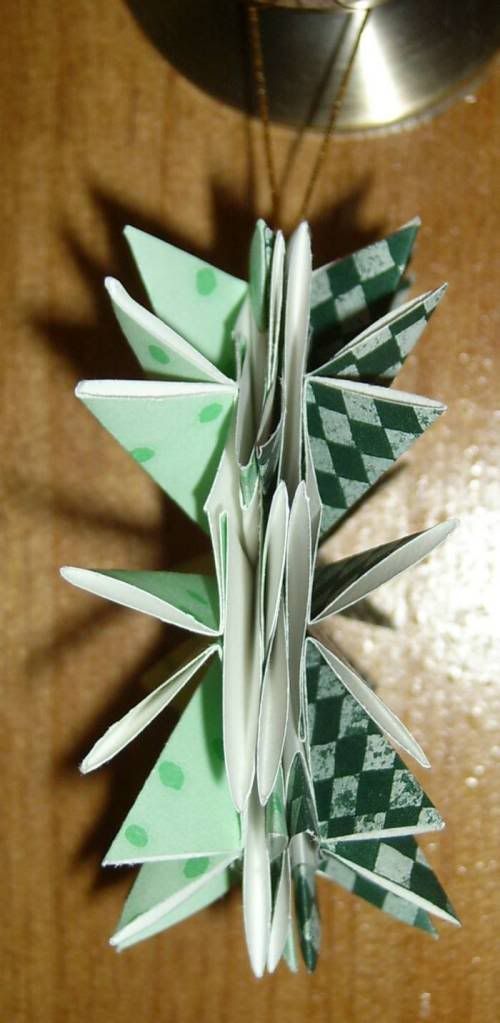
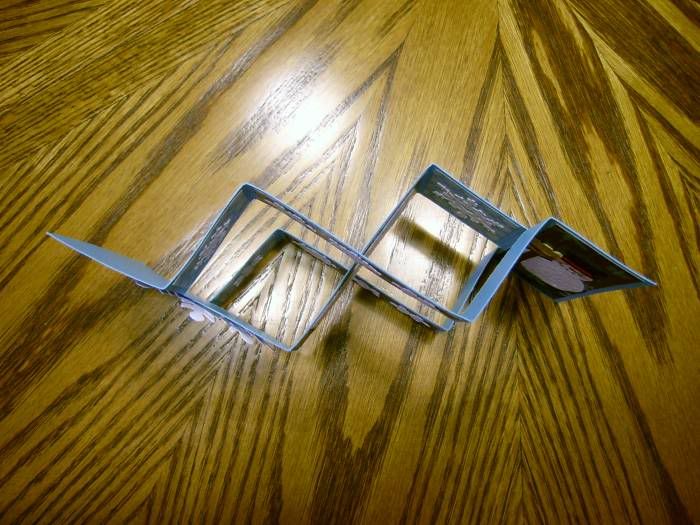
I took a picture of the card sitting on the table but a top view so that you can see how the card supports itself:


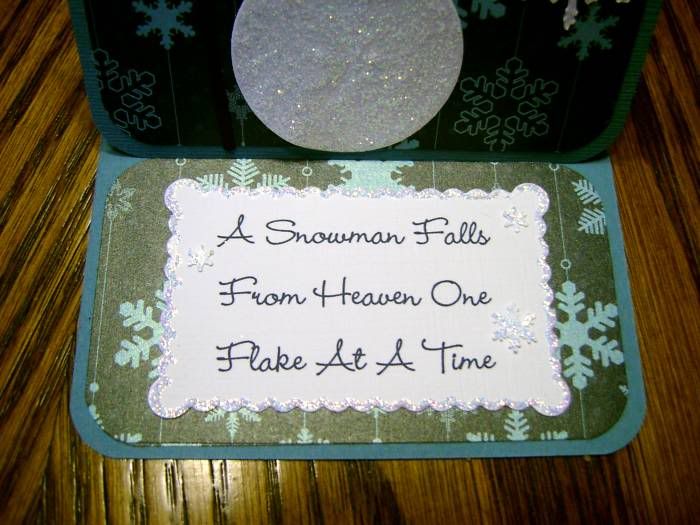
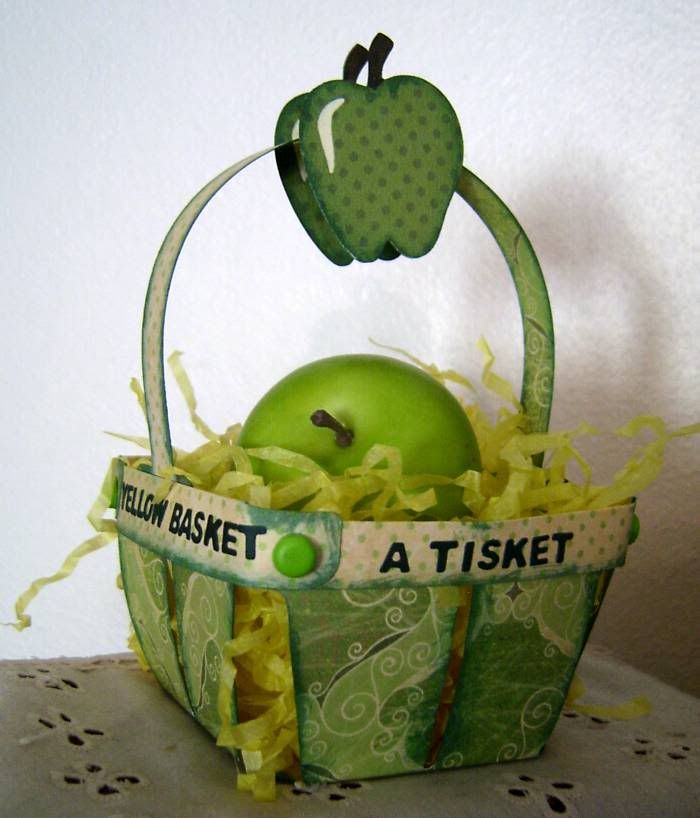
And finally a pictures of the finished card sitting open the way that you would hope that the recipient would display it:


I liked this easy to make card and I am looking forward to making a few more of these for Birthday's or other occasion cards and next time I will try to make them with things hanging from the "shutters" like Susan did in her video.

Happy Scrappin' ! ! !

Brenda

Monday, January 31, 2011

Easel Card

I am trying to expand and do a few new things. To many these aren't new at all, they have been around for years and made the home party circuit with the Stamp It Up camps and other creative card making groups. I am just a little tired of making the traditional "plain Jane" cards.

I don't need any "Get Well," "Happy Birthday," or "Wedding Cards" right now and there are no "Baby Showers" or "Bridal Showers" to plan for. I have a several "Thinking Of You" and "All Occasion" cards in my card tin and ready to be mailed out. Since I have all of my cards caught up for the time being, I decided pull out a few Christmas and Winter dies and start making cards for next Christmas. I've decided to not wait until the last minute to make up a few of these.
I've also decided to make a variety of different cards for the Christmas 2011 season. Who says that when you send out Christmas and Holiday cards that everyone on the list must have the exact same card?
In this post I am I am going to share an "Easel Card" with you. This card really does remind me of an artist's easel. My concern is that when the recipient opens the card will they know how to set it up so that it is a free-standing card. I only made 2 of these for that reason.

I was pleased with the card and thought since it is a free-standing card it would be great for any occasion.


I used a variety of things to make these cards, I pulled out a couple of old QuicKutz Dies, a couple of Cricut Cartridges, and then of course glue, Stickles, pens, printed paper, cardstock, and I used my computer to do the sentiment box.

Think ahead to the next holiday or even almost a year in advance to next Christmas and try to get out of the rut of the traditional card and try something new.

Happy Scrappin" ! ! !

Brenda


Friday, January 28, 2011

Happy Birthday To My Husband, Joe

Back in November my husband, Joe, celebrated his birthday.

One of his favorite all time movies is "Toy Story." We own both Toy Story and Toy Story 2. Just before his birthday Toy Story 3 was released on DVD and Provo Craft Cricut released a Toy Story Cartridge. This was just an excuse for me to buy another Cricut Cartridge and to buy the movie for my husband.

My husband is one of those men who has never grown up. He loves his toys, mainly his die cast car collection but toys never the less. His favorite Toy Story Character is Woody. We have watched Toy Story so much that he can quote almost every line in the movie.

So for his birthday I took a page out of his mother's book and planned a themed birthday party for him.... and yes, you guessed it, Toy Story was the theme. I purchased Toy Story 3 plates, cups, napkins, and party favors. I bought the movie for his gift. I even bought a gift bag but I wanted to use my new cartridge so I made the card.

I was feeling a little creative so I decided to try my hand at a cut-out card. I updated my Cricut Design Studio and Gypsy and decided to give it a try. This was not without challenges. I am not as versed in my Cricut Design Studio as some of the ladies on the Cricut website but I was very determined.

I made the base of the card first. Then did the overlay Woody. Some of the obstacles that I ran into was that some of the pieces on Woody are very small and it is not always easy to figure out where the pieces go in the scheme of things. It took a little longer than I had anticipated but I finally finished Woody for the card. I made this card a half fold size. If I had made this any smaller it would have been hard to cut the pieces and to put this card together. I think that Cricut means for these characters to be made a little larger. The thought to make all of the characters and mount them on toothpicks for cupcake toppers quickly disappeared after making the card.

This is the completed card..... folded and ready to go into the envelope. The word "Howdy" I found on another Cricut Cartridge called "Wild West." (It was pre made and pre-welded.)


This is the inside of the card. (The words Happy Birthday had to be welded but the word "Pardner" was already there on the Wild West Cartridge for me. )


I also wanted you to see the cut out from the front view.... there is holes in Woody's hand, between his arms and body and open space between his legs. Don't forget the little extras like some chalk to blush Woody's cheeks.


I offset the words on the inside of the card so that you can't see them when the card is closed. That way when you open the card the words are all to the left, close to the card fold.


This was a learning experience for me. It was also a labor of love.

My mother-in-law would have gotten a kick out of the party.... and my husband laughed at the fact that I made him remember his mom. (She passed away 2 years ago and we all miss her.) She was notorious for doing things in a theme. She was always the first to think about ways to make a birthday special. Granted my 46 year old husband thought the whole theme was a little lame he secretly enjoyed it.

I guess my message is to try something new and different when you are making a card. Look for new things to try. In this case a cut out card. Reach for something that you already have on your shelf whether it be a die or a Cricut cartridge.

Happy Scrappin' ! ! !

Brenda

Wednesday, January 26, 2011

A Shirt With Buttons Card (Last Design Team Project)

When Die Direct sent me their new release of buttons the only thing I could think of was sewing. I love to use real buttons on a scrapbooking project but I use them for dimension or for the center of a flower. I wasn't sure what to do with these but then a friend gave me a little inspiration when he called and said he had a job interview the next day. He went on and on about what he was going to wear and colors. That is when it hit me - make a shirt card with the buttons on the outside of the card... and the saying inside "you have it all buttoned up!" How perfect is that?

To give a little dimension to these I cut them, used a little ink on the edges, and then a generous amount of diamond glaze to give them depth and shine. I did the same thing on die cut letters on the inside of the card and I used a button to replace the "o."


As soon as he called and said he got the job I mailed the card. He loved it.

You never know where you are going to find a little inspiration. Mine came from a friend who had no idea that he was helping me!

When you are in a rut listen to what others are saying.... inspiration is everywhere!

Happy Scrappin' ! ! !

Brenda

Monday, January 24, 2011

Design Team/More Recycling/Gift Box All-In-One

I needed a gift box for a dog's birthday party. Celebrating a dog's birthday - YES - there are people around here that really do give their dog a party for their birthday. Although we were not attending the party I will send a gift.

The dog in question is a Sheltie and I am a little partial to the bread since my own dog, Shelby is a registered Sheltie. I ran to Petco and picked up some of their gourmet dog cookies and dog biscuits and came home and needed a special box to put the treats in.

So once again I reached for the Truvia boxes. These boxes come in 2 sizes. For this project I reached for the bigger box. I also grabbed some animal print papers, dog bone and paw print ribbon and a new Dies Direct die that not only cuts the shape but also embosses all in one step. There is a trick to these dies. If you want a lot of detail grab a stamp pad, and working quickly, ink the die, put the paper down, and run it through the die cutting machine. When you are done use a baby wipe to clean the remainder of the ink off of the die.


A perfect gift for their perfect dog.

When in doubt as to how to wrap a gift, make your own gift box or bag. I would almost guarantee that they kept the box to reuse themselves or to re-gift for the next party they go to. These pampered pets won't appreciate anything except the treats but the owner will love the time and thought that you put into the gift wrap.

Happy Scrappin' ! ! !

Brenda

Friday, January 21, 2011

More Design Team Projects

This project served 3 purposes.... the first was using a new Dies Direct texture plate, the second was that it helps me store my 4x4 dies and third I found a use for a Truvia box. (I LOVE TO RECYCLE!)

The Truvia box is a sturdy box that has a tapered lid that I just love. I had about 10 of these boxes and knew that I would find a use for them eventually. I had these boxes sitting near my scrapbooking table and had an assortment of my 4x4 laying on the table and they were in the way. I grabbed a box and started stuffing the dies in the boxes just to temporarily clean up my table. Then it hit me that these boxes really were useful.

The new dies direct texture plates with the nuts and bolts seemed perfect to decorate the boxes and I also reached for the Varsity alpha dies.


One I embossed/debossed the cardstock I took a sandpaper block to it and really liked the results. To make the letters pop I hit them with Stickles.

I decided to do a variety of these boxes for the storage of my 4x4 dies. Needless to say I will continue to make these boxes because I thought that I would make one for my Christmas Dies, and one box for each of the other holidays that I have dies for and decorate the box to reflect what is in the box.

Dig deep into the trash and see what you can recycle into something useful.

Happy Scrappin' ! ! !

Brenda

Wednesday, January 19, 2011

Done With Design Team Duties

I was blessed to sit on the design team for Dies Direct. They have a new DT now and I have moved on to other adventures. I am working again, scrapbooking for myself again which hasn't happened for a very long time, and I am able to spend some much needed time relaxing.

Before I start showing you my personal stuff again I have a few last items to share that I did for the Dies Direct DT. These will be the focus for the next several posts that I do.

First off I did an apple basket for them. The small letters going around the basket and the apple on the handle are the Dies Direct dies.

The basket itself is something that I made using my Makes The Cut computer program. I took a template that I own, cut one, scanned it, and then uploaded it into my Makes The Cut and was able to re-size the template to the size that I wanted which was made with a 12 x 12 sheet of cardstock.


I added some shredded tissue paper and an apple to the basket.

These could be made as a teacher's gift because an apple for the teacher always gets a few brownie points for the student.... or you could leave the nursery rhyme off of it and add something that says "An Apple A Day Keeps The Doctor Away" and give it to someone as a get well gift.

These little baskets can be made in a variety of themes using any die that you might have to decorate it.

Happy Scrappin' ! ! !

Brenda

Wednesday, November 24, 2010

Christmas Is In The Air - Part 2

I promised you the ornament that I also made to try to get into the Christmas spirit. I don't know if this will be my "gift" ornament or not but I generally make 4 or 5 different ornaments and then chose one of those to make for drop by friends or to give family as I see them over the holiday.

This ornament is naturally 3D because of the tea bag folding technique I used and also because you have to make 2 of the medallions and put them back to back so that if the ornament gets turned it is finished on both sides. That is one of my pet peeves.

These are made with squares and single sided patterned papers. You can use more than one patterned paper if you want to but I used 2 (one for each side.) a large brad was also added to the middle of each medallion before I set them together so that there was not a hole or overlap section visible.

Front View:


Back View:


Side View:


The tea bag folding technique to make these can be found on the Internet, just google tea bag folding.

Make a few of these to have on hand for when an unexpected friend or family member drops by as almost everyone puts up a Christmas tree and everyone appreciates a handmade ornament.

Happy Scrappin' ! ! !

Brenda

Monday, November 22, 2010

Christmas Is In The Air

Thanksgiving is just around the corner and I am already planning for Christmas. I have made a few cards and ornaments to try to get myself in the Christmas spirit. By the way it hasn't worked. I am still feeling a little humbug. So a day of shopping is planned for Monday, Tuesday, and Friday. If that doesn't work then the decorating will begin. I must shake the ho-hum feelings and find Christmas!

First a Christmas Card! This card is done with a tea bag folding technique and single sided printed paper cut into squares. Three sizes of squares are needed to make the graduated tree. I also used an embossing template for the back ground, a rectangle for the tree trunk, and a star die to make the topper. Simple thin ribbon is used to accent the bottom of the card.

The great thing about this is that even though you get a 3D effect with the tree because of the paper folding, it lays flat and will go into an envelope for mailing. When taken out of the envelope it fluffs itself back out to be 3D again.


That card is so easy to do and instructions can be found on the Internet.

I will post the ornament in a couple of days.

Happy Scrappin' ! ! ! !

Brenda

Monday, October 11, 2010

Halloween Candy Jar/Luminaries

It appears that I have really neglected my blog... and the truth is I have but not without good reason. There have been many changes in my life and all of them good ones but it keeps me from spending time doing the things that I love doing.

I have many projects to share with you.... most of them are Dies Direct Design Team things but those will have to wait a little while longer. Today I am sharing a project that I did for my CCD/PSR students.

Halloween is just around the corner so I am sharing the Jack-O-Lantern Candy Jars that I made for the kids. These jars are re-purposed glass pint jars that I buy Mayonnaise in. I don't throw them away because I am also a gardener and I reuse those jars to can my vegetables in but for this project I sacrificed a few of my jars to craft with (and I needed the round smooth jars not purchased canning jars.) If you don't have any of these pint jars any round glass jar will work as long as you have a lid to fit the jar.

Supplies that are needed to make this project are:

1) Clean round glass jars with lids (if you don't have lids for the pint or quart jars see #2)
2) Lids purchased from the canning section of your local department store
3) Dark brown or black spray paint for the lids
4) Orange tissue paper
5) Black cardstock or black vinyl
6) Modge Podge Glue from your local crafting or department store
7) Sponge applicator or paint brush
8) Cricut with the "Pumpkin Carving Cartridge" (or if you choose you may hand cut the faces)
9) Raffia or other Ribbon to finish off the piece.
10) OPTIONAL: and I didn't have them so I omitted this - Wine corks for a stem
11) Battery Operated Flameless Tea Light Candles

My finished jars have a brand new candle in the bottom and then are filled with candy for the kids. When the candy is gone which should take about a heartbeat to happen they have a Halloween decoration for their room or that they can give mom as a gift.


The possibilities for these are endless because they can be made into Frankenstein, a Mummy, Dracula, a Witch or countless other Halloween characters.

These don't have to be limited to giving to a child either, adults love them as well. I am going to make a few more and line my sidewalk with them for Halloween night to welcome my Trick Or Treaters.... I just hope they leave them so that I can use them for the years ahead and that they don't steal them. A chance I am willing to take.

Happy Scrappin' and Crafting!

Brenda