I made 3 videos in one day for the Design Team that I am on. So I am posting all 3 of them here at once.
And honestly that is all I have to say about that!
Friday, January 16, 2009


Saturday, January 10, 2009
Happy Birthday - No Not My Birthday!
Yesterday I promised more projects and a promise is a promise!
Right on the heals of the Damask Die release came the January release of Birthday Dies. These are fabulous, so much so that I bought the entire line of them which rarely happens.
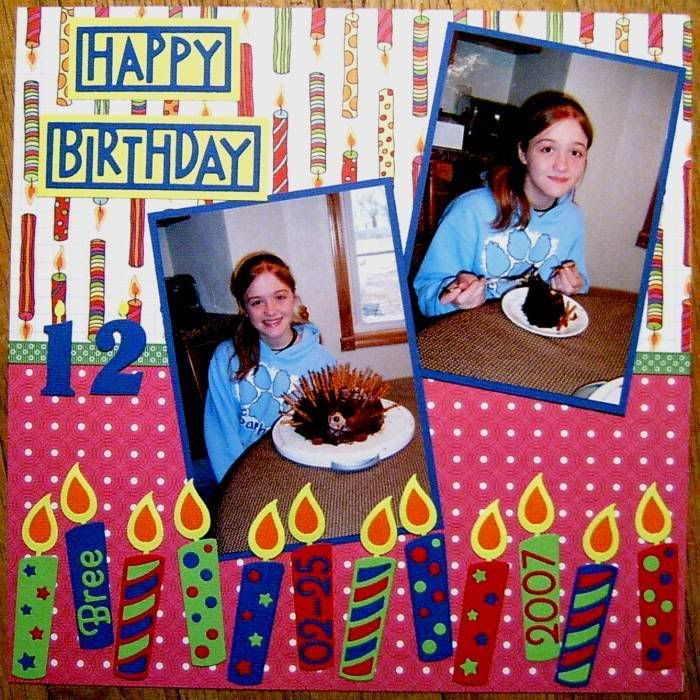
First my daughter, Bree's 12th Birthday LO.

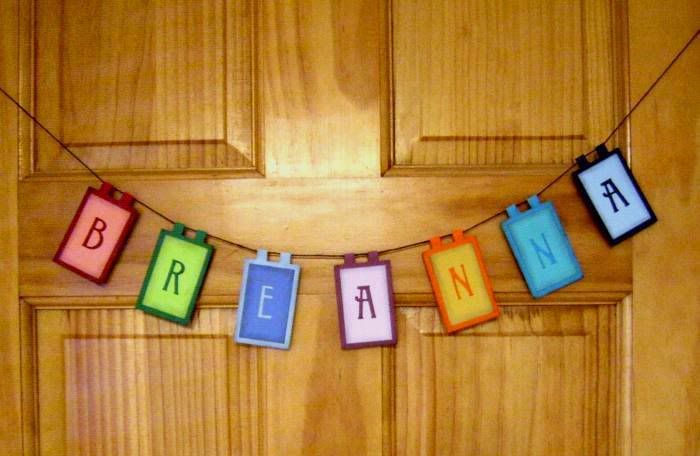
Next a banner using a Pennant Die:

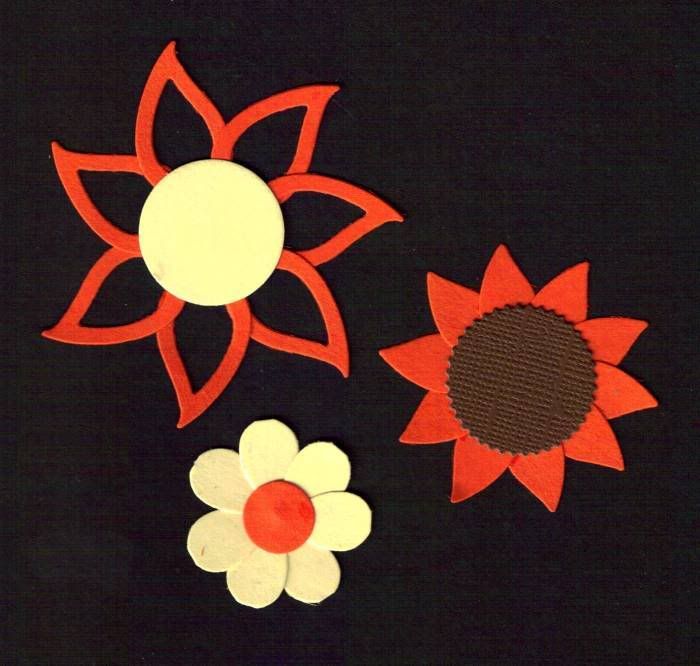
An innovations using the Candle Die that I used in the Birthday LO.... don't throw those little pieces away - a flower is waiting to bloom!

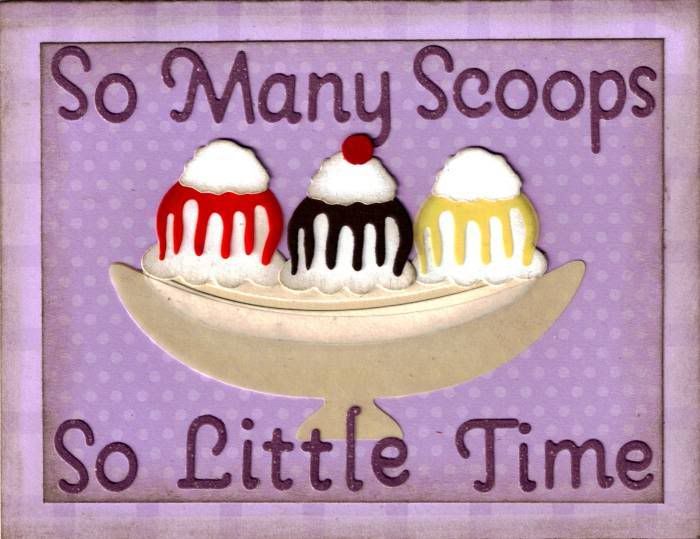
And finally a simple card:

So a promise kept today and I will just let those projects speak for themselves. If you have questions leave a comment and include your email and I will get back to you.
Happy Scrappin' !!!
Brenda
Right on the heals of the Damask Die release came the January release of Birthday Dies. These are fabulous, so much so that I bought the entire line of them which rarely happens.
First my daughter, Bree's 12th Birthday LO.
Next a banner using a Pennant Die:
An innovations using the Candle Die that I used in the Birthday LO.... don't throw those little pieces away - a flower is waiting to bloom!
And finally a simple card:
So a promise kept today and I will just let those projects speak for themselves. If you have questions leave a comment and include your email and I will get back to you.
Happy Scrappin' !!!
Brenda
Friday, January 9, 2009
Loss For Words
Sometimes when I look at the New Release Dies and I think "Who thought of this?" or "What where they thinking?"
That was kind of my thought on the December die release. They were just odd dies, at least that is my opinion, and since this is my blog I get to voice that opinion freely.
I did my work with them but I am still shaking my head about them. These dies took so long for the retailers to get and by the time they got them another new release set of dies were out for January. (I won't even give you my thoughts on that issue.)
In any case ... here are a few projects using the new Damask dies.
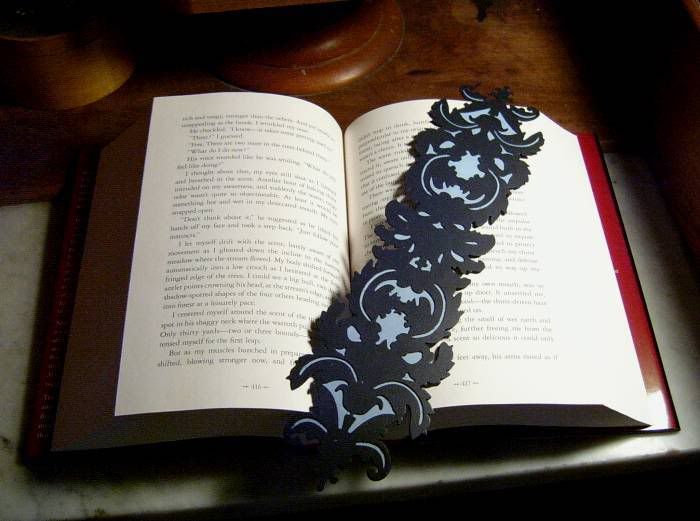
A bookmark using a Faux Chipboard technique. This technique came from Susan! I sandwiched 3 layers of cardstock and between two of those layers I put a layer of velum to give a stained glass look.

I also made an etched plate. Those Damask dies really had me going - I don't know what to do with them or what to make of them. When I looked at this one particular die I just kept seeing butterfly wings so a butterfly it became!

And as if that wasn't enough that I made a butterfly etching, I had to see that butterfly all connected, layered and in color!

I don't know when or if I will do anything else with these Damask Dies but I do know the these are very Gothic looking and have a dark side to them..... and I also know that I am not ready for the dark side!
Happy Scrappin' !!!
That was kind of my thought on the December die release. They were just odd dies, at least that is my opinion, and since this is my blog I get to voice that opinion freely.
I did my work with them but I am still shaking my head about them. These dies took so long for the retailers to get and by the time they got them another new release set of dies were out for January. (I won't even give you my thoughts on that issue.)
In any case ... here are a few projects using the new Damask dies.
A bookmark using a Faux Chipboard technique. This technique came from Susan! I sandwiched 3 layers of cardstock and between two of those layers I put a layer of velum to give a stained glass look.
I also made an etched plate. Those Damask dies really had me going - I don't know what to do with them or what to make of them. When I looked at this one particular die I just kept seeing butterfly wings so a butterfly it became!
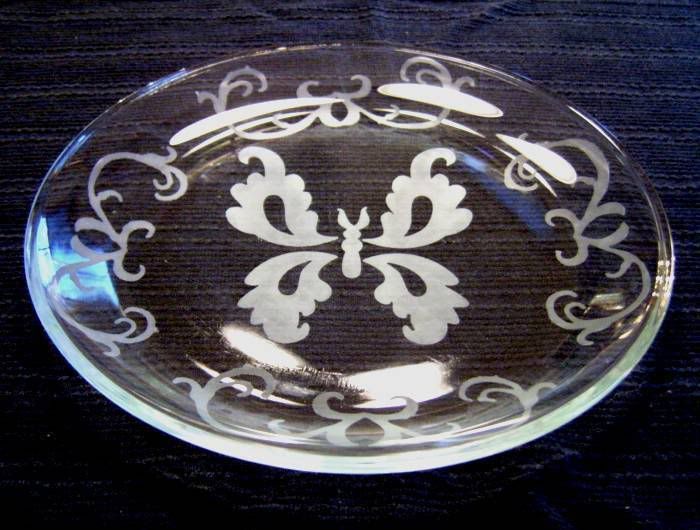
And as if that wasn't enough that I made a butterfly etching, I had to see that butterfly all connected, layered and in color!

I don't know when or if I will do anything else with these Damask Dies but I do know the these are very Gothic looking and have a dark side to them..... and I also know that I am not ready for the dark side!
Happy Scrappin' !!!
Monday, January 5, 2009
It's Video Time!!!!
I have never put a video on my blog so I am digging my heels in and I'm going to do a series of them for you (It's time.) I am a little nervous in front of the camera but I am told that it gets easier. So keep in mind that I am no Martha Stewart or Rachel Ray. I will pause trying to think of a word I need and will try not to call my Pazzle Alligator Clip a Roach Clip again (I did that while doing my first video for Scrap-Mart.)
Over the next few weeks, I plan on showing you several TIPS, TRICKS, and HOW-TO videos. These are just little techniques that I have used for years and never gave them a second thought. In the back of my mind, I guess, I think that all paper crafters, scrapbookers and card makers are privy to this information but I was recently reminded that we are all on different levels of the art. Some of you are beginners while others have been doing this for years.
When I show my work I get emails asking, "How did you do that?" or "What is the secret to getting that to look that way?" Most of the time it is a simple technique that gets the end results. You have to remember if it is difficult I don't do it!
This particular video is on how to flip a die cut to get a mirror image without having ragged/rough edges. You can use this technique to make two of the same object go in the opposite directions such as when I did the "I'm Nuts About You Card" or when I made the "M & M Santa" have boots and mittens.
Watch it and leave me a comment or two on whether or not this was helpful to you OR if there is something you see on omy blog and want more information on, leave me a comment and I will see if I can help you out with that in a future video.
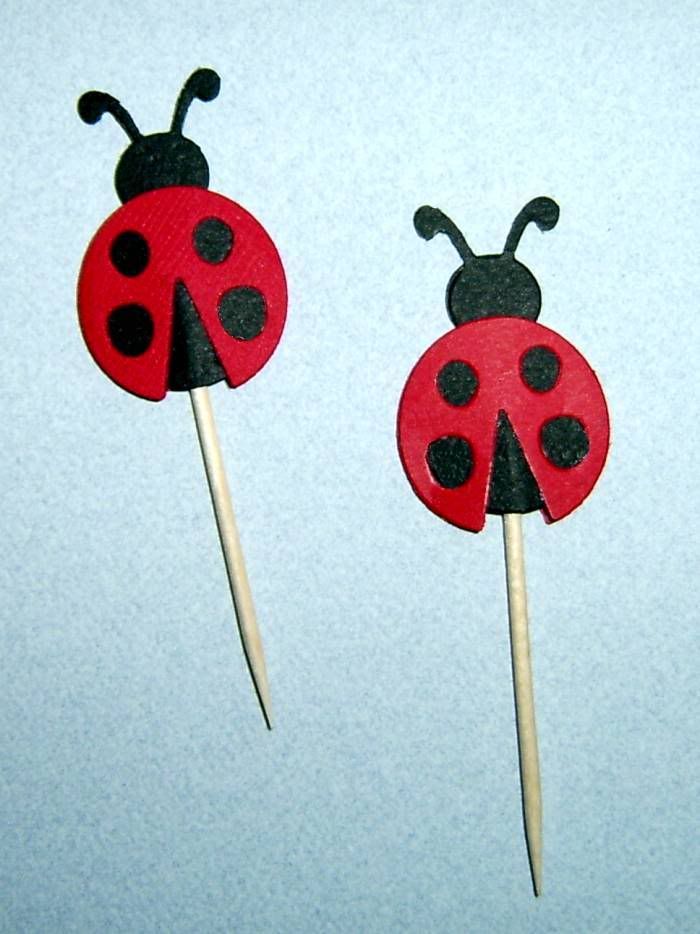
To do this technique you will need a die of your choice, a stylus, a hard surface to work on, adhesive of your choice. On the card in the video I used the QuicKutz SQUIRREL on the Santa I used the QuicKutz BOOT, and Boss Kut OVEN MITT, and for the Cupcake Pick I used the QuicKutz Lady Bug.
A very special TAHNK YOU goes out to my daughter, Bree, for taking time to help me with my video (she is behind the camera!)

I hope that you enjoyed the video and that it was helpful.
Happy Scrappin'!
Over the next few weeks, I plan on showing you several TIPS, TRICKS, and HOW-TO videos. These are just little techniques that I have used for years and never gave them a second thought. In the back of my mind, I guess, I think that all paper crafters, scrapbookers and card makers are privy to this information but I was recently reminded that we are all on different levels of the art. Some of you are beginners while others have been doing this for years.
When I show my work I get emails asking, "How did you do that?" or "What is the secret to getting that to look that way?" Most of the time it is a simple technique that gets the end results. You have to remember if it is difficult I don't do it!
This particular video is on how to flip a die cut to get a mirror image without having ragged/rough edges. You can use this technique to make two of the same object go in the opposite directions such as when I did the "I'm Nuts About You Card" or when I made the "M & M Santa" have boots and mittens.
Watch it and leave me a comment or two on whether or not this was helpful to you OR if there is something you see on omy blog and want more information on, leave me a comment and I will see if I can help you out with that in a future video.
To do this technique you will need a die of your choice, a stylus, a hard surface to work on, adhesive of your choice. On the card in the video I used the QuicKutz SQUIRREL on the Santa I used the QuicKutz BOOT, and Boss Kut OVEN MITT, and for the Cupcake Pick I used the QuicKutz Lady Bug.
A very special TAHNK YOU goes out to my daughter, Bree, for taking time to help me with my video (she is behind the camera!)
I hope that you enjoyed the video and that it was helpful.
Happy Scrappin'!
Tuesday, December 30, 2008
Just A Card Today
I've had a busy day with errands and chores. I finally got to sit down at my crafting table for a few minutes to make a friend a get well card.

I am not great at card making but I am learning and getting better at it. Now if my friend will just get better!

I am not great at card making but I am learning and getting better at it. Now if my friend will just get better!
Monday, December 29, 2008
After A Day Of Pampering...
Yes you read that right I pampered myself today!
I took my daughter out shopping. She wanted to get hair extensions with her Christmas money and so she did (and I have to admit she is so cute with them!) I wanted to cry when she kept telling me she wanted to cut her beautiful hair off. When I finally gave in I allowed her to get 15 inches cut off of it and it was still in the middle of her back but since then she has been getting it shorter and shorter and now she wants it long when she wants it long and short when she wants it short.
Anyway we then went to Achievers. One of my favorite retail scrap booking stores. Today was the release date for the QuicKutz Exclusive Valentines Dies and I had to have them. So I was lucky and used some of my Christmas money and a load of coupons. I love getting new toys.
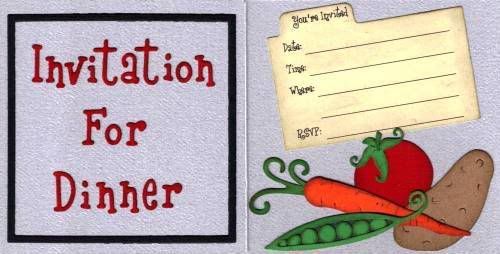
So now tonight I am posting a card/invitation that I made. I am going to have friends over for dinner and thought an invitation would be nice. It was an easy card using my Boss Kuts and QuicKutz Dies and took minutes to make.
The front of the invite looks like this:
.
And when you open it up I used both sides of the card to do the invite and it looks like this:

Now I must get busy with new ideas for January! My brain has been on vacation because of the holiday. (I just wanted to spend time with my family and friends over this past week and with New Year's Day just around the corner there are more parties and festivities to attend. I love this time of year but I am also glad when it all comes to a close and we start the new year. Just a couple more days.
I hope that all of you have a happy, healthy, & prosperous NEW YEAR!
I took my daughter out shopping. She wanted to get hair extensions with her Christmas money and so she did (and I have to admit she is so cute with them!) I wanted to cry when she kept telling me she wanted to cut her beautiful hair off. When I finally gave in I allowed her to get 15 inches cut off of it and it was still in the middle of her back but since then she has been getting it shorter and shorter and now she wants it long when she wants it long and short when she wants it short.
Anyway we then went to Achievers. One of my favorite retail scrap booking stores. Today was the release date for the QuicKutz Exclusive Valentines Dies and I had to have them. So I was lucky and used some of my Christmas money and a load of coupons. I love getting new toys.
So now tonight I am posting a card/invitation that I made. I am going to have friends over for dinner and thought an invitation would be nice. It was an easy card using my Boss Kuts and QuicKutz Dies and took minutes to make.
The front of the invite looks like this:
.
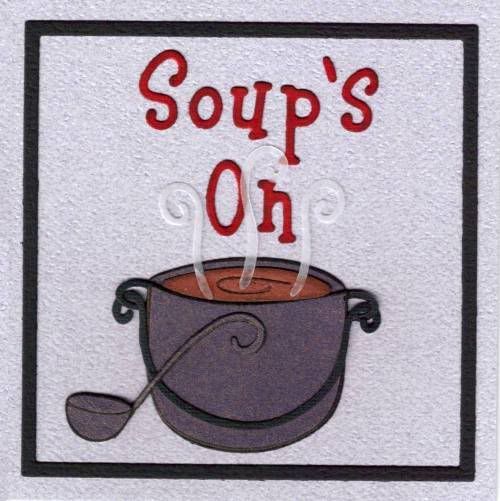
And when you open it up I used both sides of the card to do the invite and it looks like this:
Now I must get busy with new ideas for January! My brain has been on vacation because of the holiday. (I just wanted to spend time with my family and friends over this past week and with New Year's Day just around the corner there are more parties and festivities to attend. I love this time of year but I am also glad when it all comes to a close and we start the new year. Just a couple more days.
I hope that all of you have a happy, healthy, & prosperous NEW YEAR!
Tuesday, December 16, 2008
Last Minute Cards To Hold Money Or Gift Cards
Life gets so busy sometimes that you only have a few minutes to sit down and create a card or two. That is what has happened to me. Christmas is only a week away and I needed a card for my mailman that would hold a gift card and I needed money holders for my God-Children. So today I took 30 minutes and made 3 cards using 3 different methods.
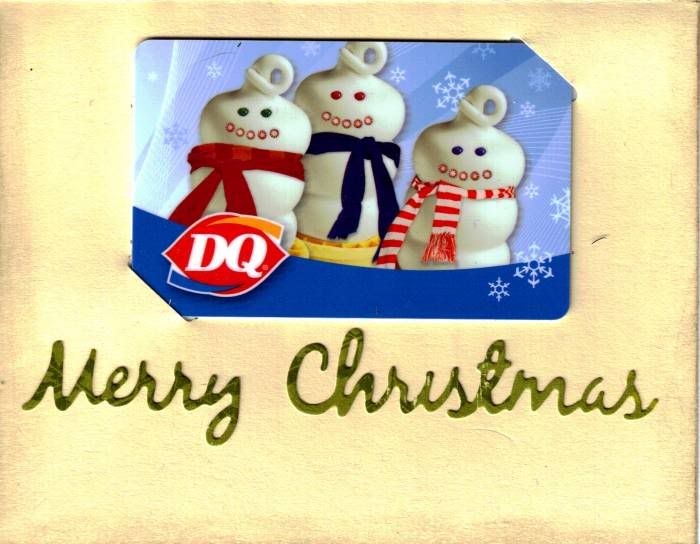
First a card to hold a gift card for the mailman. A somewhat generic card because I don't know him that well and I do not know if he is a Christian Man or not (and to be honest I don't care.) He is a wonderful mail man.
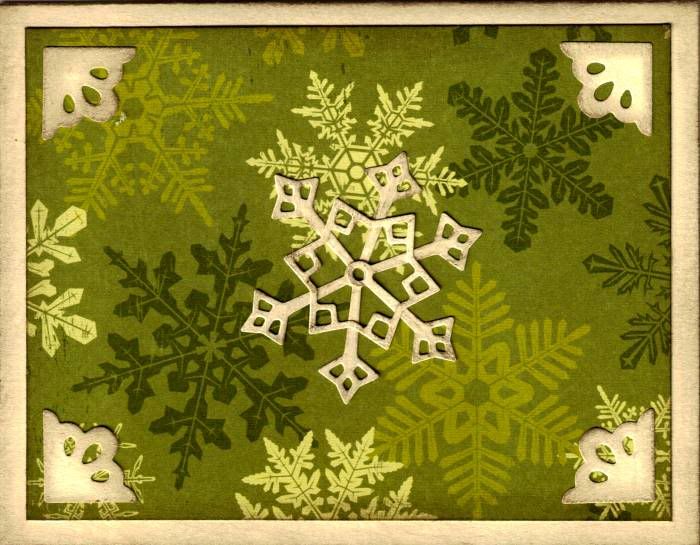
This card is made from a couple of QuicKutz Dies and one Boss Kut die.
Card Front:

Card Inside:

Then for my God-Daughter who is 13 years old who I love dearly.
I used my Cricut with SCAL program. The cut file for this card can be found on the Crafter's Edge Message Board. I did not create this cut file it is one of the very talented designers there. I have to tell you too this card is navy blue with mirror gold.

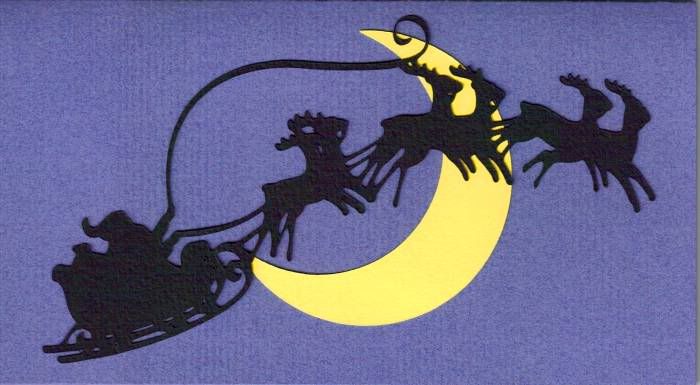
Then I made this one for my God-Son who I also love dearly. He is a bit younger so I did the Santa theme for him. This has been created on my Cricut using the new Noel Christmas Cartridge.

The two cards for my God-Children are tri-fold cards to hold money.
First a card to hold a gift card for the mailman. A somewhat generic card because I don't know him that well and I do not know if he is a Christian Man or not (and to be honest I don't care.) He is a wonderful mail man.
This card is made from a couple of QuicKutz Dies and one Boss Kut die.
Card Front:
Card Inside:
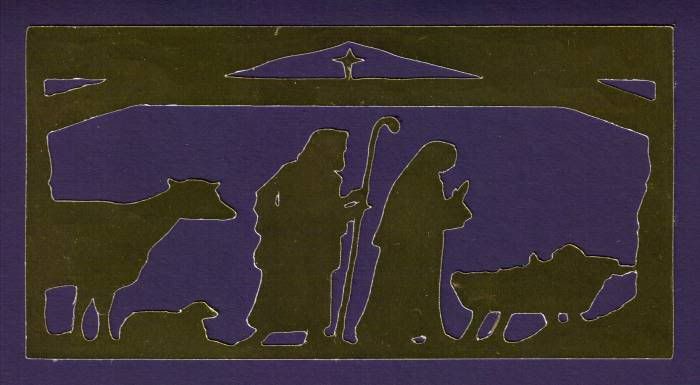
Then for my God-Daughter who is 13 years old who I love dearly.
I used my Cricut with SCAL program. The cut file for this card can be found on the Crafter's Edge Message Board. I did not create this cut file it is one of the very talented designers there. I have to tell you too this card is navy blue with mirror gold.
Then I made this one for my God-Son who I also love dearly. He is a bit younger so I did the Santa theme for him. This has been created on my Cricut using the new Noel Christmas Cartridge.
The two cards for my God-Children are tri-fold cards to hold money.
Monday, December 15, 2008
Christmas Is Winding Down
As I purchased my last few gifts yesterday I remembered the fun things that I used to do for my kids (now ages 27 and 13.)
We would make up a batch of Magic Reindeer Food and just put it in a simple plastic bad and go out on Christmas Eve and sprinkle it on the lawn. The kids would forget about it until after the gifts were open and by the time they went out to check the birds would have ate all of the oats and seeds.
And then Joe and I would always read the Nativity story to them. When they were small a story book form but as they grew we now read it from the Bible. I still look forward to doing that as a family followed by midnight Mass.
After the kids were tucked into bed Joe and I would busy ourselves with putting bows on all of the wrapped gifts and putting them under the tree. We would then get his boots and make Santa's foot prints from the front door (no fireplace) to the tree and then to where they sat the treat for Santa. The next morning I would always grumble about the mess that Santa would leave for me and clean up the "Magic North Pole Snow." Each year Breanna would save a little box of the snow and take it to school for show and tell - she never took one of her toys like the other children - she wanted to share the tradition although she didn't know about the ma and pa Santa behind the snow.
Here is a couple of projects that I did reminiscing about Christmas Past Traditions.
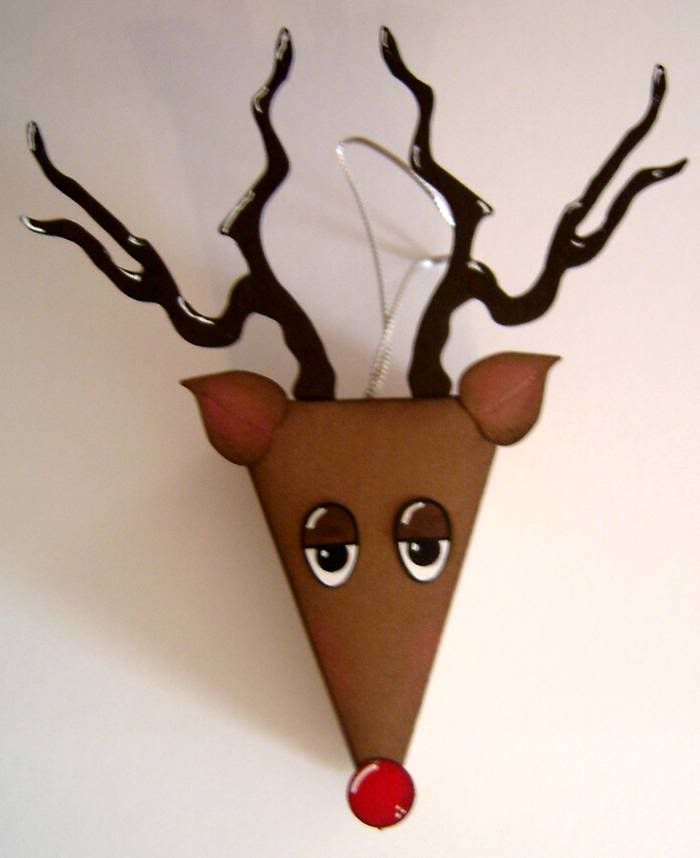
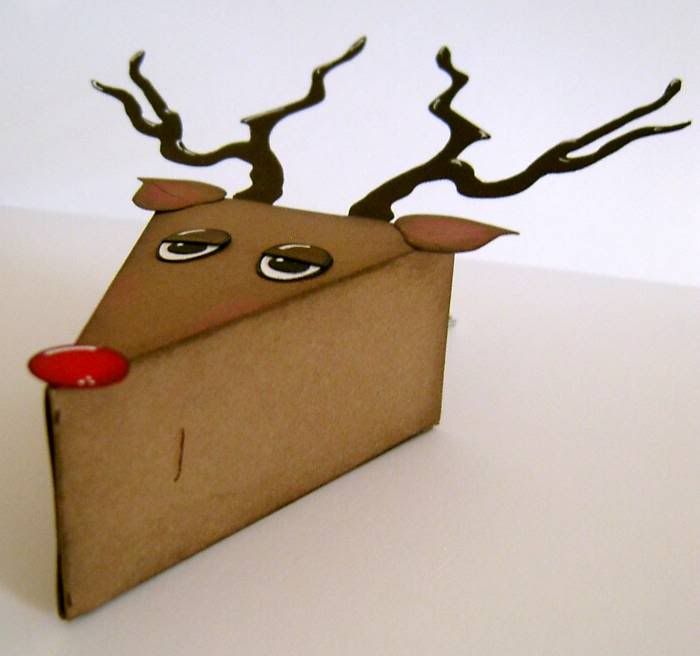
A fun little Reindeer Ornament to put Magic Reindeer Food in and hang on the tree until Christmas Eve. I used my Cricut to make the Cake Box and then used various QuicKut Dies, Boss Kut Dies, and Punches to transform the box into Rudolph.


I know the kids, even though they are grown and don't believe any longer, will still get a kick out of the Tradition behind this little guy.
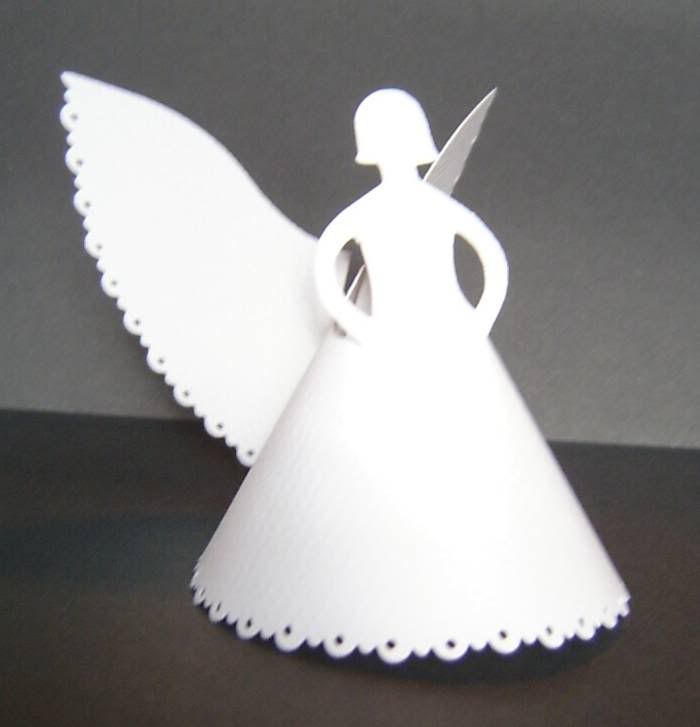
Then I made this angel out of cardstock. I have to be honest, THIS IS NOT MY IDEA, you can find the directions for this little girl on MarthaStewart.com. They made these out of a 6" paper plates and used hand punches to decorate them. I didn't have 6" paper plates so I took the pattern and cut her out of cardstock, used decorative scissors to scallop the bottom and a small hand punch to punch the holes. I just love her.
If you have the SCAL program and a Cricut you can download a cut file for this little beauty at: http://forums.surecutsalot.com/index.php?sid=9b8af66d5e32c4bf9be9df86f13b2d69 There was a wonderful person there that was wonderful enough to share their cut file.

Now over the next week I will make a few last minute Cards to put money gifts in for my God-Children, the mailman, and our Priest. I will share those in a day or two.
It is all coming together.
We would make up a batch of Magic Reindeer Food and just put it in a simple plastic bad and go out on Christmas Eve and sprinkle it on the lawn. The kids would forget about it until after the gifts were open and by the time they went out to check the birds would have ate all of the oats and seeds.
And then Joe and I would always read the Nativity story to them. When they were small a story book form but as they grew we now read it from the Bible. I still look forward to doing that as a family followed by midnight Mass.
After the kids were tucked into bed Joe and I would busy ourselves with putting bows on all of the wrapped gifts and putting them under the tree. We would then get his boots and make Santa's foot prints from the front door (no fireplace) to the tree and then to where they sat the treat for Santa. The next morning I would always grumble about the mess that Santa would leave for me and clean up the "Magic North Pole Snow." Each year Breanna would save a little box of the snow and take it to school for show and tell - she never took one of her toys like the other children - she wanted to share the tradition although she didn't know about the ma and pa Santa behind the snow.
Here is a couple of projects that I did reminiscing about Christmas Past Traditions.
A fun little Reindeer Ornament to put Magic Reindeer Food in and hang on the tree until Christmas Eve. I used my Cricut to make the Cake Box and then used various QuicKut Dies, Boss Kut Dies, and Punches to transform the box into Rudolph.
I know the kids, even though they are grown and don't believe any longer, will still get a kick out of the Tradition behind this little guy.
Then I made this angel out of cardstock. I have to be honest, THIS IS NOT MY IDEA, you can find the directions for this little girl on MarthaStewart.com. They made these out of a 6" paper plates and used hand punches to decorate them. I didn't have 6" paper plates so I took the pattern and cut her out of cardstock, used decorative scissors to scallop the bottom and a small hand punch to punch the holes. I just love her.
If you have the SCAL program and a Cricut you can download a cut file for this little beauty at: http://forums.surecutsalot.com/index.php?sid=9b8af66d5e32c4bf9be9df86f13b2d69 There was a wonderful person there that was wonderful enough to share their cut file.
Now over the next week I will make a few last minute Cards to put money gifts in for my God-Children, the mailman, and our Priest. I will share those in a day or two.
It is all coming together.
Sunday, December 7, 2008
Christams Ideas As I Do Them
Seems like the Christmas Ideas just keep coming and I can't make them fast enough.
Today I am sharing 3 projects.
The first are simple tags made with Boss Kut Dies.

The second project is a Take-Out Box filled with candy and decorated with Boss Kut Dies
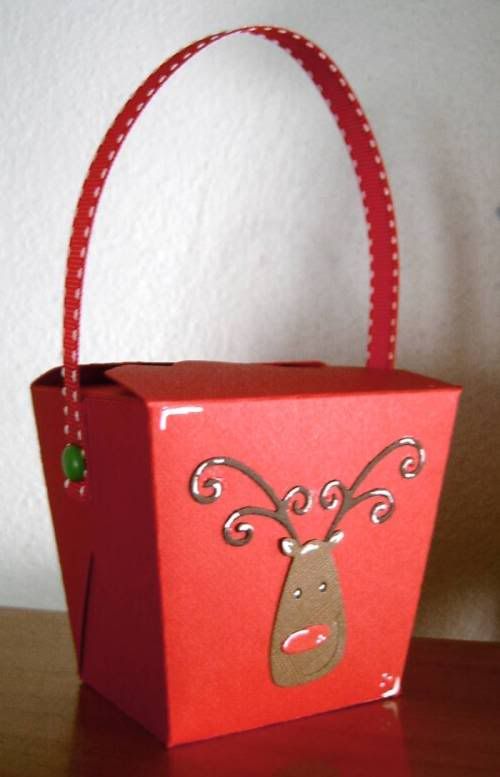
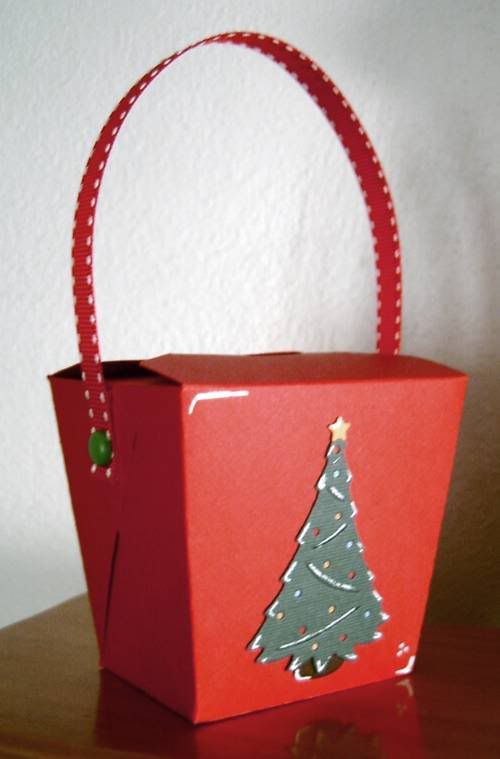
Now this last one I have posted directions for - it is very simple. And I have filled them with candy kisses so that the kids will have an added little gift on the tree!
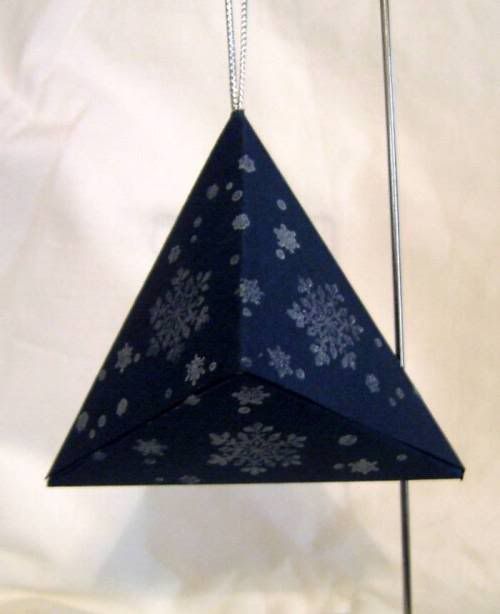
Directions:
Materials:
Paper cutterScor-Pal
Scor-Tape
Snowflake Stamps/Versa-Craft white ink pad/embossing powder
Heat gun
4" of cord/stringNavy Blue Cardstock
1) Cut your Cardstock to 3 1/2 x 8"
2) Using Scor-Pal and short side of cardstock at the top, score at 1/2" and 3"
3) Turn Paper 90 degrees and score at 1/2", 3", and 5 1/2".
4) Mark 1/2" from each scored (I used my scor-pal for this as well.)
5) Cut triangle off at each top corner (see diagrams) using the 1/2" marks and scored corner as your guide.
6) On the left cut a triangle using the 1/2" marks and scores (see diagrams.)
7) On right side cut a diagonal cut to the first score and straight down the score mark (see diagrams)
8) Score the piece diagonally across first square, diagonally the opposite way across the second square, and diagonally the opposite way across the last square (see diagrams.)
9) Use stamps/ink/embossing powder to add decorations and raised stamping to the piece. Avoid embossing on the glue tabs. (See diagram.)
10) Fold on score lines
11) Use scor-tape on each of the glue tabs and peel of backing.
12) Form a loop with cord/string and knot the end. Place the knot side in next to glue tab #1. Adhere tab 1 to the inside forming the side of the triangle.
13) If you wish fill with candy at this point and adhere the other 3 glue tabs to the inside of the box.
And here are the diagrams:

Friday, December 5, 2008
More Christmas Ideas
Santa Claus is coming to town! So I made a Santa M&M Shelf Sitter. 


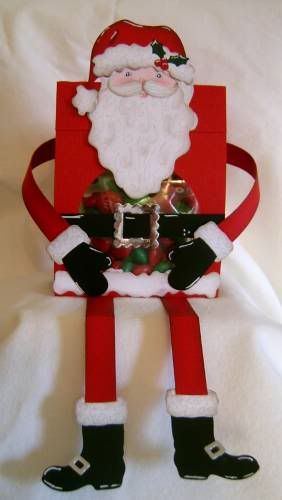
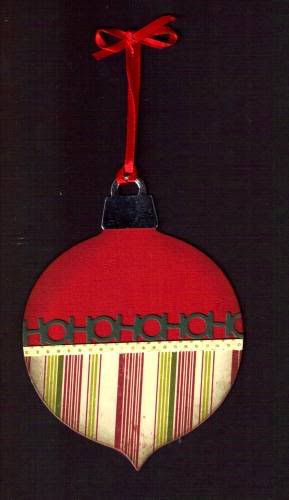
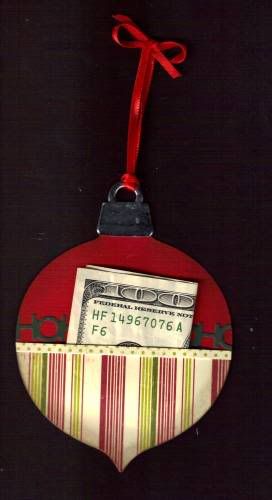
Then in order to give money gifts this year I made a money holder Ornament: Both sides are decorated the same but one side has been made to be a pocket to hold the money.
Front Side:

Back Side:

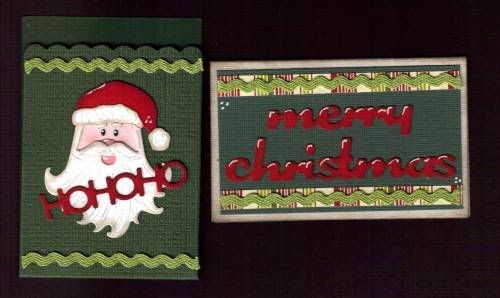
And then Gift Card Holders for those who I want to give a gift but but I don't know what to buy them but don't want to give them cash.
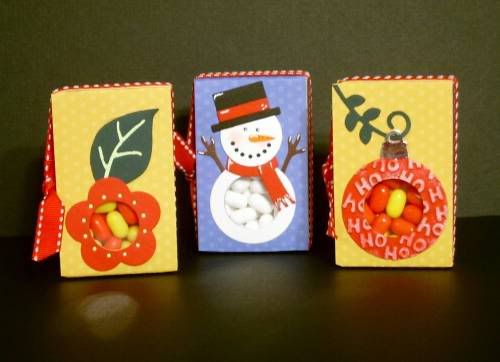
And finally some more variations on the tic tac boxes for stocking stuffers.
More Christmas items next week.
Subscribe to:
Posts (Atom)
